Lineman DIY ~ Conductor Tie Holder ~ Keeping things Organized ~ DIY
Customize... Lineman are always customizing their trucks. We have a place for everything. We keep everything organized and know exactly what we have on our trucks and where it is at.
"Drop down bin, passenger side, top shelf, back right corner, behind the bumps, is where the press sleeves are"
When we get trucks built we try our best to have the all the bins built in a way to accommodate all the tools, equipment, parts and pieces. Yet it never fails as you get to working out of the truck you realize you need to do a bit of customizing yourself. I failed to share with you guys the lights I installed on The outside of my truck, to light it up at night. Man it is sure nice to work next to this truck at night. Maybe I will shoot a video later and show you guys how I did it... and yes, I do think it turned out pretty nice. 😉 Despite not documenting and sharing all my little projects, I do have a little Lineman DIY for you today.

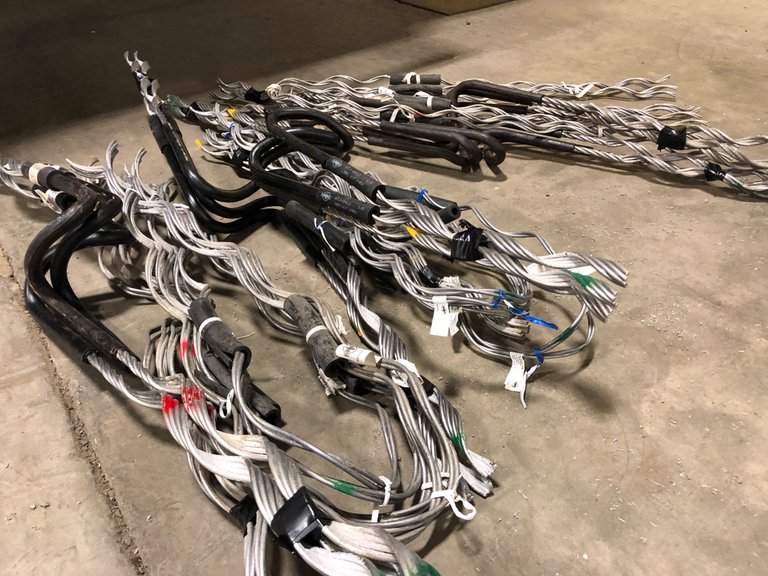
I can’t tell you how many times I have been caught without a dang insulator tie! These aren’t just a one size fits all tie. Each wire size has to have the appropriate size tie for it. Preformed Ties is their appropriate name. I would make a mental note when this would happen, then by the end of the day... What was I suppose to do?
Then the other day I had a little time to whip this little project out and now I have a nice place for all my insulator ties.
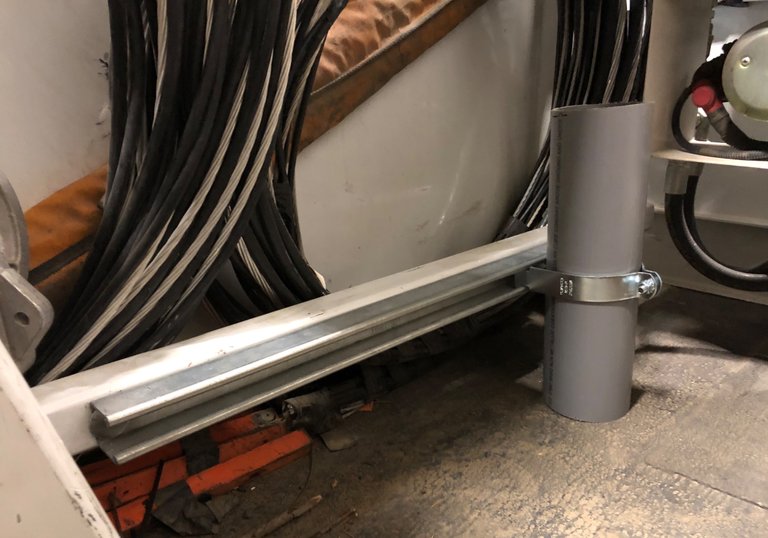
Looking in from the back of the truck I found the perfect spot. Next to the turret on the lower rail, tucked up there and out of the way. For some reason things always seem to get hung up on them.
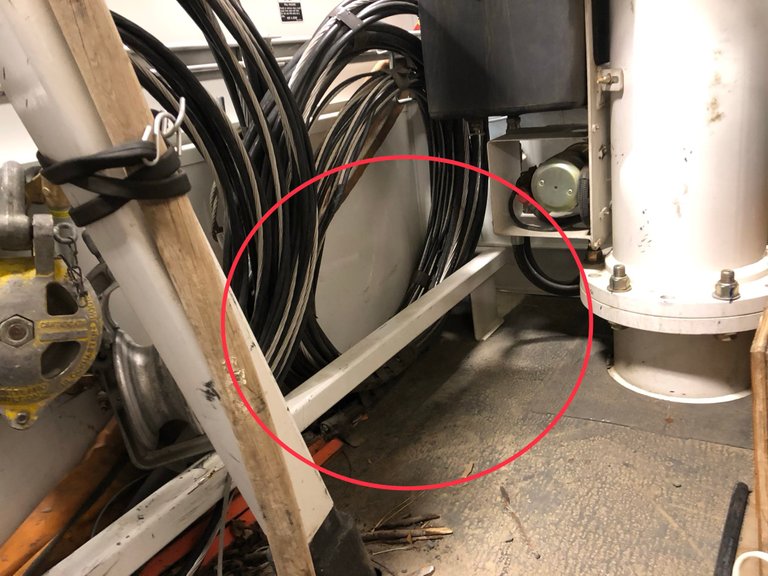
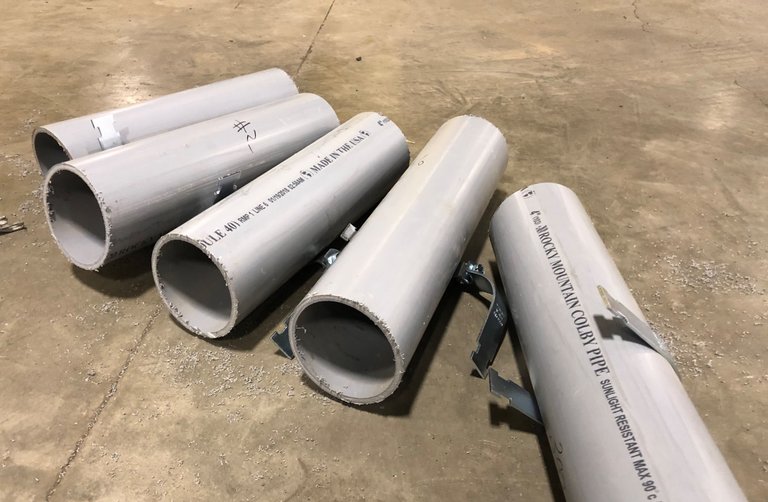
I know there is some stuff laying around the shop that I can make work for this little project. Some guys pack around a 5 gallon bucket with all the ties in a a jumbled up mess or just pile them in a bin... disaster!! but I got an idea... I am going to use 4 inch conduit to hold the different size ties. That will keep each size organized and also allowing me to look in the back of my truck and see if I need to reload them.
Then using a piece of unistrut and some 4 inch straps I can attach the conduit to a sort of “mounting bracket” Then simply screw that into the lower rail. Easy Peasy
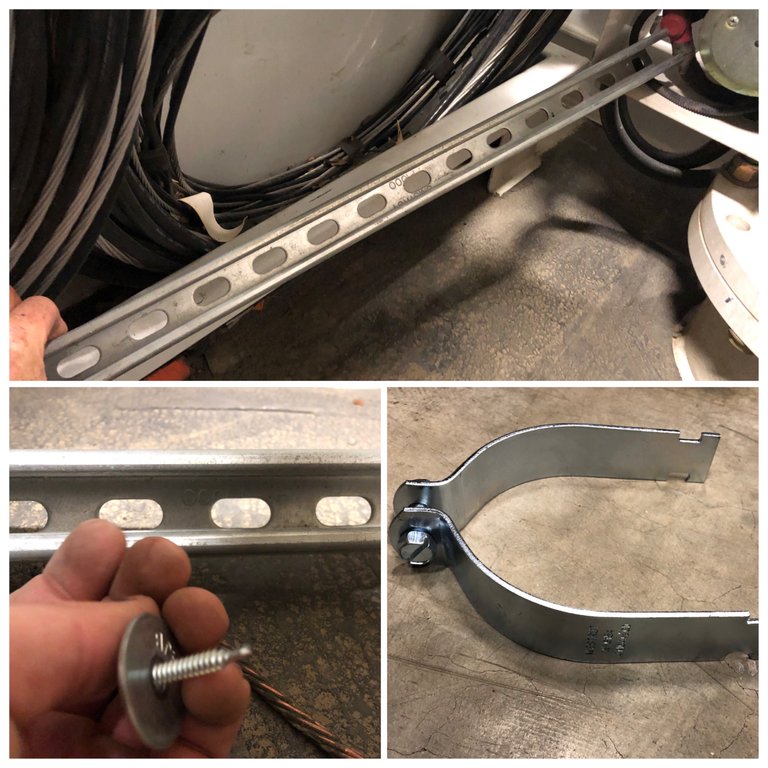
I had to use big washers around the self tapping screws because the holes in the unistrut were so big. Holding the unistrut in place I made a mark where one screw needed to be installed. Using the self tapping screw I drilled it into the lower rail, once the threads started to grab I removed it and placed the uni-strut in place. Then I screwed in the first screw. Just snugging it up enough to allow the piece of unistrut to swing down and out of the way. Then I used the second self tapping screw to make a mark where it needed to go. Swung the uni-strut out of the way, screwed it in, removed it, then swung the uni-strut into place and screwed it all the way in.
After tightening both of the screws up nice and snug without breaking them, I installed the first piece of conduit with the 4 inch unistrut straps.
Now all that is left to do is strap all the conduits to the unistrut and this project is almost done. Seriously, that was a dang near perfect fit. Actually it was a perfect fit. :wink:wink
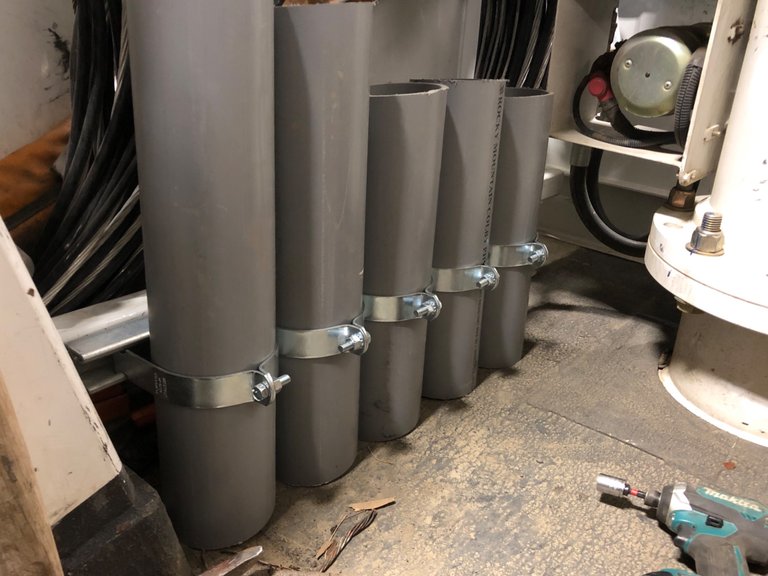
It’s doesn’t get much better than that! Time to fill them with all the different size conductor ties and see how well this is gonna work.
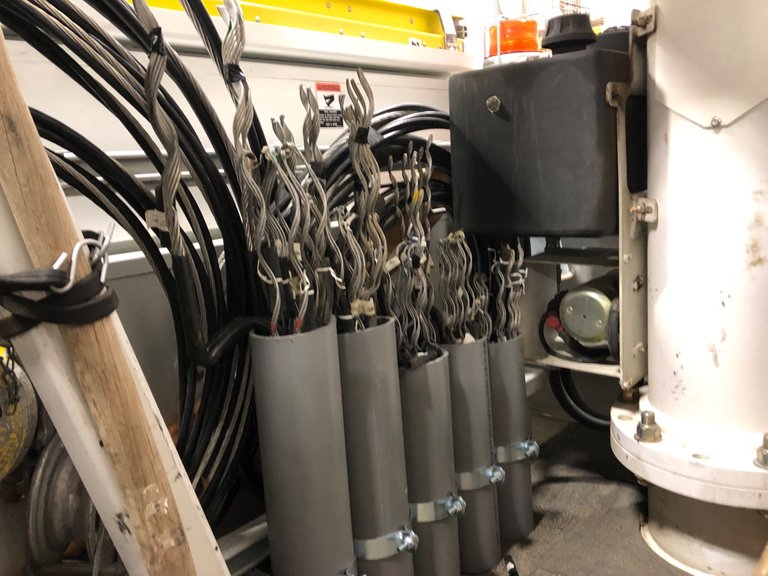
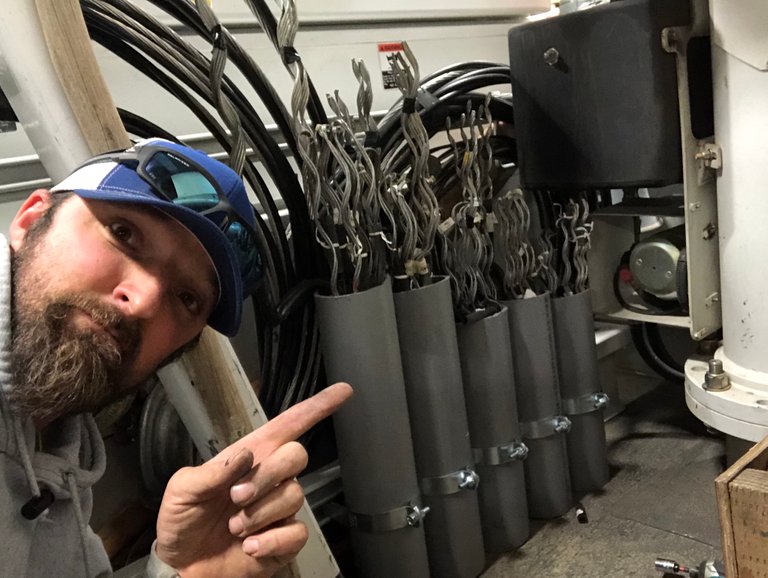
Well they fit in there nicely, look good and organized, easy to access and easy to identify the different sizes. Ya, cutting the conduit with a sawzall wasn’t the best way to get a straight cut but hey, you will have that.
This isn’t something people will necessarily build but maybe it will spark some ideas on a way to make an idea come to life. I have seen pieces of conduit mounted under a cabinet that held battery operated drills... that was a really cool idea.
Well that is it for another DIY project done by yours truly! Now get out there save yourself some money and get creative!!

Steem On
and


Don’t forget to mention @splatz
when you encounter a post that deserves a good Splattin’
by the @splatz trail

Join the @splatz trail
On Steemauto.com
Where we catch those
Splatworthy Posts
Hot off the Press
This post was shared in the Curation Collective Discord community for curators, and upvoted and resteemed by the @c-squared community account after manual review.
@c-squared runs a community witness. Please consider using one of your witness votes on us here
Nice article you got there @jlsplatts!
You should consider participating in a weekly contest organized by @build-it. You stand a chance to win liquid steem, Upvotes, and Tokens. Check it out: https://www.build-it.io/build-contest/@build-it/build-it-contest-20-steem-2250-build-and-100-upvote-from-build-it-in-rewards
Congratulations @jlsplatts! You received a personal award!
You can view your badges on your Steem Board and compare to others on the Steem Ranking
Do not miss the last post from @steemitboard:
Vote for @Steemitboard as a witness to get one more award and increased upvotes!
Congratulations @jlsplatts! You received a personal award!
You can view your badges on your Steem Board and compare to others on the Steem Ranking
Do not miss the last post from @steemitboard:
Vote for @Steemitboard as a witness to get one more award and increased upvotes!