T-Rex No Internet game for ESP32 TTGO T-Display
Hello Hive community! Today i bring you another game for TTGO T-Display board. The T-Rex No Internet GAME for ESP32 boards.

Have you ever saw the message on your browser saying that is No internet? I hate when something is wrong with my internet connection, especially at my work, but while i'm waiting i can always play T-Rex No Internet GAME on my ESP32 board!
TTGO is a ESP32 base development board with built-in display with two push buttons and a reset button on the side. ESP32, as you probably know from my last posts, is able to connect to Wifi and Bluetooth natively. But this is of course, a simple offline game... So let's talk about the game T-Rex No Internet...
This is a simple game, you will not need any additional components. You just need to press the left button and T-Rex will jump and the right button to change the brightness of the screen. The game is harder and faster as long as you play it... You can see your score on the top screen and to start over press the reset button on side of the board to start a new game.
Now let's talk about the code... This time we will use a different way to compile and upload the code to the board. Instead of using Arduino IDE (like i always use) we will use Visual Studio Code and the Extension PlatformIO.
Let's get started! First download the code from my Github repository https://github.com/ptmaker/T-Rex-No-Internet-GAME to your computer.
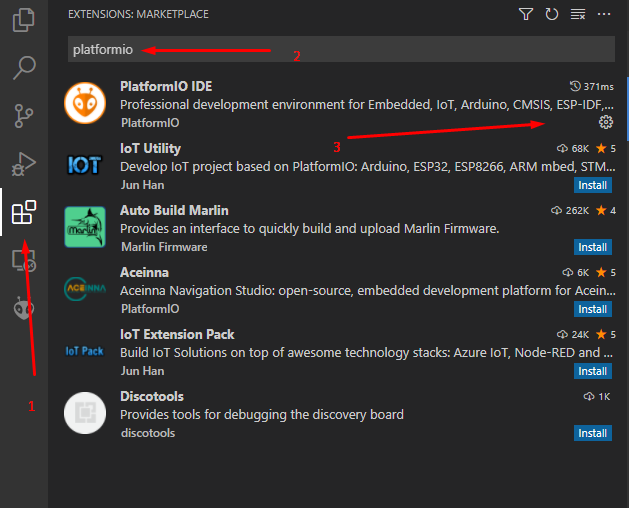
Now we need to install open PlatformIO IDE extension on Visual Studio Code. To do that, open Visual Studio Code and on the left menu click on Extensions and on search bar, search for PlatformIO IDE extension and press Install.
You will need to reload your Visual Studio Code window after installation.
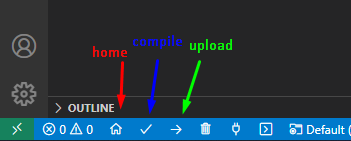
Now on Status Bar click on the Home icon to go to the PlatformIO extension Homepage inside Visual Studio Code.
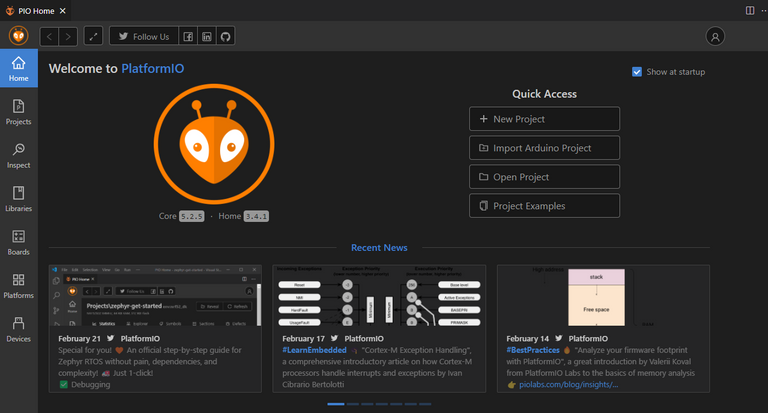
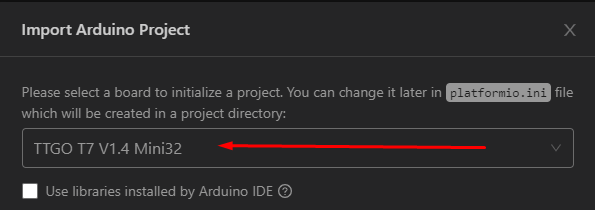
On PlatformIO Homepage click on Import Arduino Project, select the board TTGO T7 V1.4 Mini32 from the list and then select the downloaded folder from Github with the project and press Import.
You will not need to do any changes on the code... We just need to build/compile the code and upload it to your board. To compile the code, click on the Build icon next to Home icon in the status bar, to compile the code and when it finishes click on the Upload icon to upload the files to your TTGO board and it's done!
You can now check your TTGO T-Display board and start playing the game and beat some records!

Like always, feel free to use and modify the code as you wish. Do whatever you want... I hope you learn something with this code, because i learned a lot... Especially with this new way, using VSCode and PlatformIO extension.
Also i already shared a post/video talking about the Bounce Ball game for TTGO T-Display board, so feel free to check it and play.
If you wanna try more cool projects with ESP32 boards, please check my previous posts/videos or follow me for more cool projects in the future...
I hope you like this project and feel free to comment if you have any issue! I will do my best to assist you :)
Thank you so much for your time! See you next time!