Deploy Simple Blog in Firebase Cloud Part 2 of 2
Deploy Simple Blog in Firebase Cloud Part 2 of 2
Hello people of Hive, in this case, I wanted the second post on the guide on how to deploy for free with Firebase, in this second post we explain the CSS a bit and we go to Firebase Cloud console to Deploy the project
With these few changes to the script.js we just take the name from the images i added, its something you can edit yourself.
const urlParams = new URLSearchParams(window.location.search);
const blogId = urlParams.get('id');
const blogImage = document.getElementById('blog-image');
const backButton = document.getElementById('back-button');

const getImageForBlog = (id) => {
  // Use absolute path to the image
  return `img/image${id}.png`;
};


blogImage.src = getImageForBlog(blogId);

backButton.addEventListener('click', () => {
  window.location.href = 'index.html';
});
Here I also add the CSS code where we can change container max-width to keep it the same as the image or in relation, you can also edit any part of this CSS
body {
    margin: 0;
    font-family: Arial, sans-serif;
    background-color: #f0f0f0;
    background-image: url("background.jpg");
  }

  .container {
    max-width: 800px;
    margin: 0 auto;
    padding: 20px;
    background-color: transparent;
    border-radius: 5px;
    box-shadow: 0 0 10px rgba(0, 0, 0, 0.2);

  }

  .container2 {

    max-width: 750px;
    margin: 0 auto;
    padding: 20px;
    background-color: transparent;
    border-radius: 5px;
    box-shadow: 0 0 10px rgba(0, 0, 0, 0.2);
  }


  h1 {
    margin-top: 0;
    text-align: center;
  }
  h2 {
    margin-top: 0;
    text-align: center;
  }
  .blog-links {
    list-style: none;
    padding: 0;
  }

  .blog-links li {
    margin-bottom: 10px;
  }

  .blog-links a {
    display: block;
    padding: 10px;
    background-color: #3498db;
    color: #fff;
    text-decoration: none;
    border-radius: 5px;
    transition: background-color 0.3s;
  }

  .blog-links a:hover {
    background-color: #2980b9;
  }

  #blog-image {
    max-width: 100%;
    margin-top: 20px;
    align-items: center;
  }

  #back-button {
    margin-top: 20px;
    padding: 10px 20px;
    background-color: #e74c3c;
    color: #fff;
    border: none;
    border-radius: 5px;
    cursor: pointer;
  }

  #back-button: hover {
    background-color: #c0392b;
  }
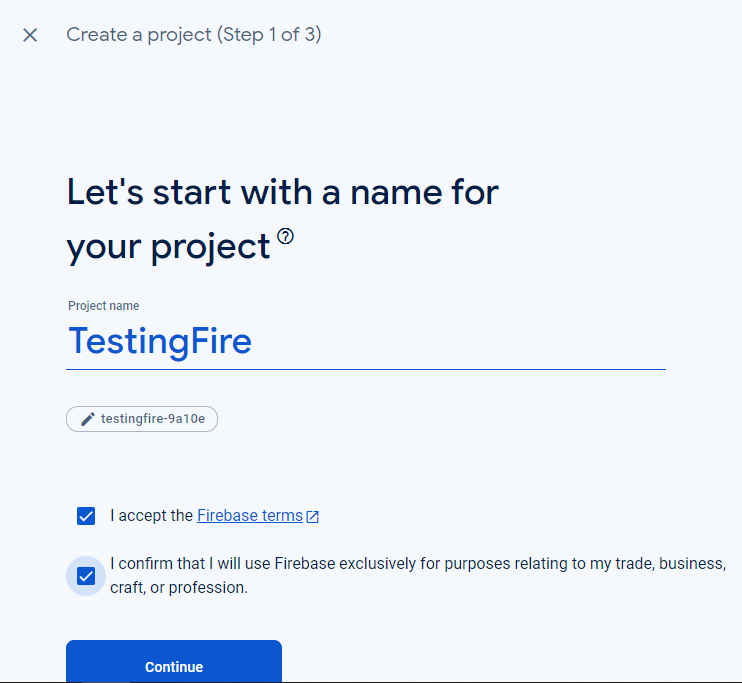
Now we will go to the console Firebase page you can find it like that in Google, log in or create an account and click Create project, just just add any name like the photo:
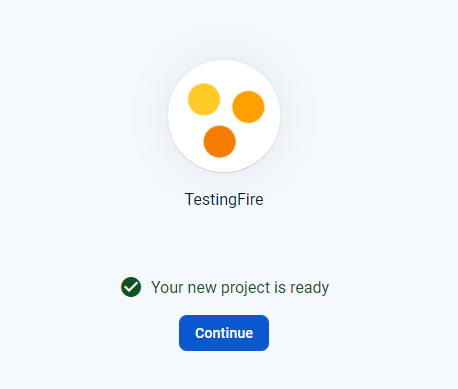
The next two steps you can skip are not important for us testing right now, you can agree or disagree on the terms for analytics. We just need to wait for the project to get created like this:
Here you just add a name and register the app, same for 2nd step just skip it for now you can read if you want but depends on the project.

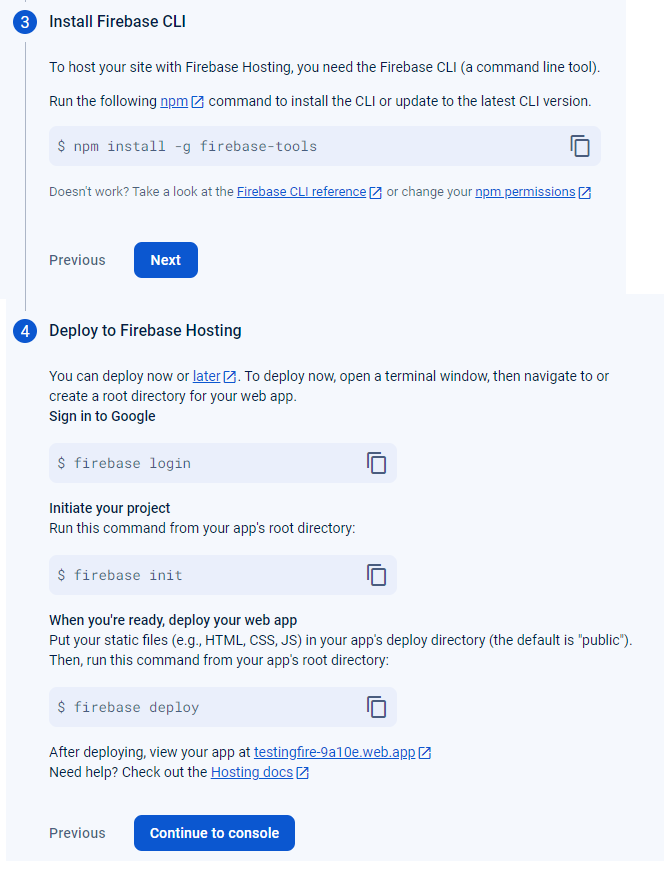
Here we install firebase CLI as any other npm package with a terminal, nothing else in this step.
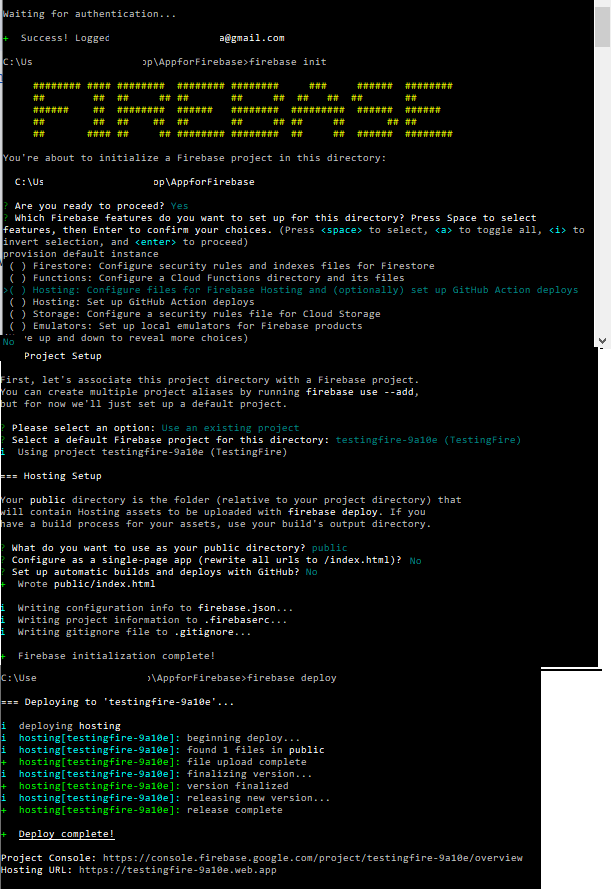
Finally we check this commands, we will use them in the directory of the project once we installed Firebase CLI
Here i am using the commands in the terminal as you can see, the same commands as the guide tells us, here we see the deploy is complete, and we get no errors.
Thank you very much to all for your attention in this second guide we just made a Deploy in Firebase, with a really simple Blog, we saw the Firebase Cloud console is easy to use for this kind of page, that's it for these 2 part guide I hope it was helpful for you!!!
You can check my blog here: https://peakd.com/@taradraz1
Congratulations!
✅ Good job. Your post has been appreciated and has received support from CHESS BROTHERS ♔ 💪
♟ We invite you to use our hashtag #chessbrothers and learn more about us.
♟♟ You can also reach us on our Discord server and promote your posts there.
♟♟♟ Consider joining our curation trail so we work as a team and you get rewards automatically.
♞♟ Check out our @chessbrotherspro account to learn about the curation process carried out daily by our team.
🏅 If you want to earn profits with your HP delegation and support our project, we invite you to join the Master Investor plan. Here you can learn how to do it.
Kindly
The CHESS BROTHERS team
Thanks for your contribution to the STEMsocial community. Feel free to join us on discord to get to know the rest of us!
Please consider delegating to the @stemsocial account (85% of the curation rewards are returned).
Thanks for including @stemsocial as a beneficiary, which gives you stronger support.