PHOTO RE-TOUCHING (Photoshop Tutorial) PART ONE (1)
Good Day Everyone.
Today I am going to show you how you can treat your picture and remove some spots on your face. Just like the normal makeup we do at home. So but for the men. We can treat some pictures, using our digital software like the PHOTOSHOP or any other photo editing software.
Just be patient with me and be attentive to what we are going to do today.
So I am going to pick a picture to use for our training today, and I am going to use a mobile picture and try to make it look so dynamic. Just like what we use the DSLR camera to snap. You are going to fine-tune the picture.
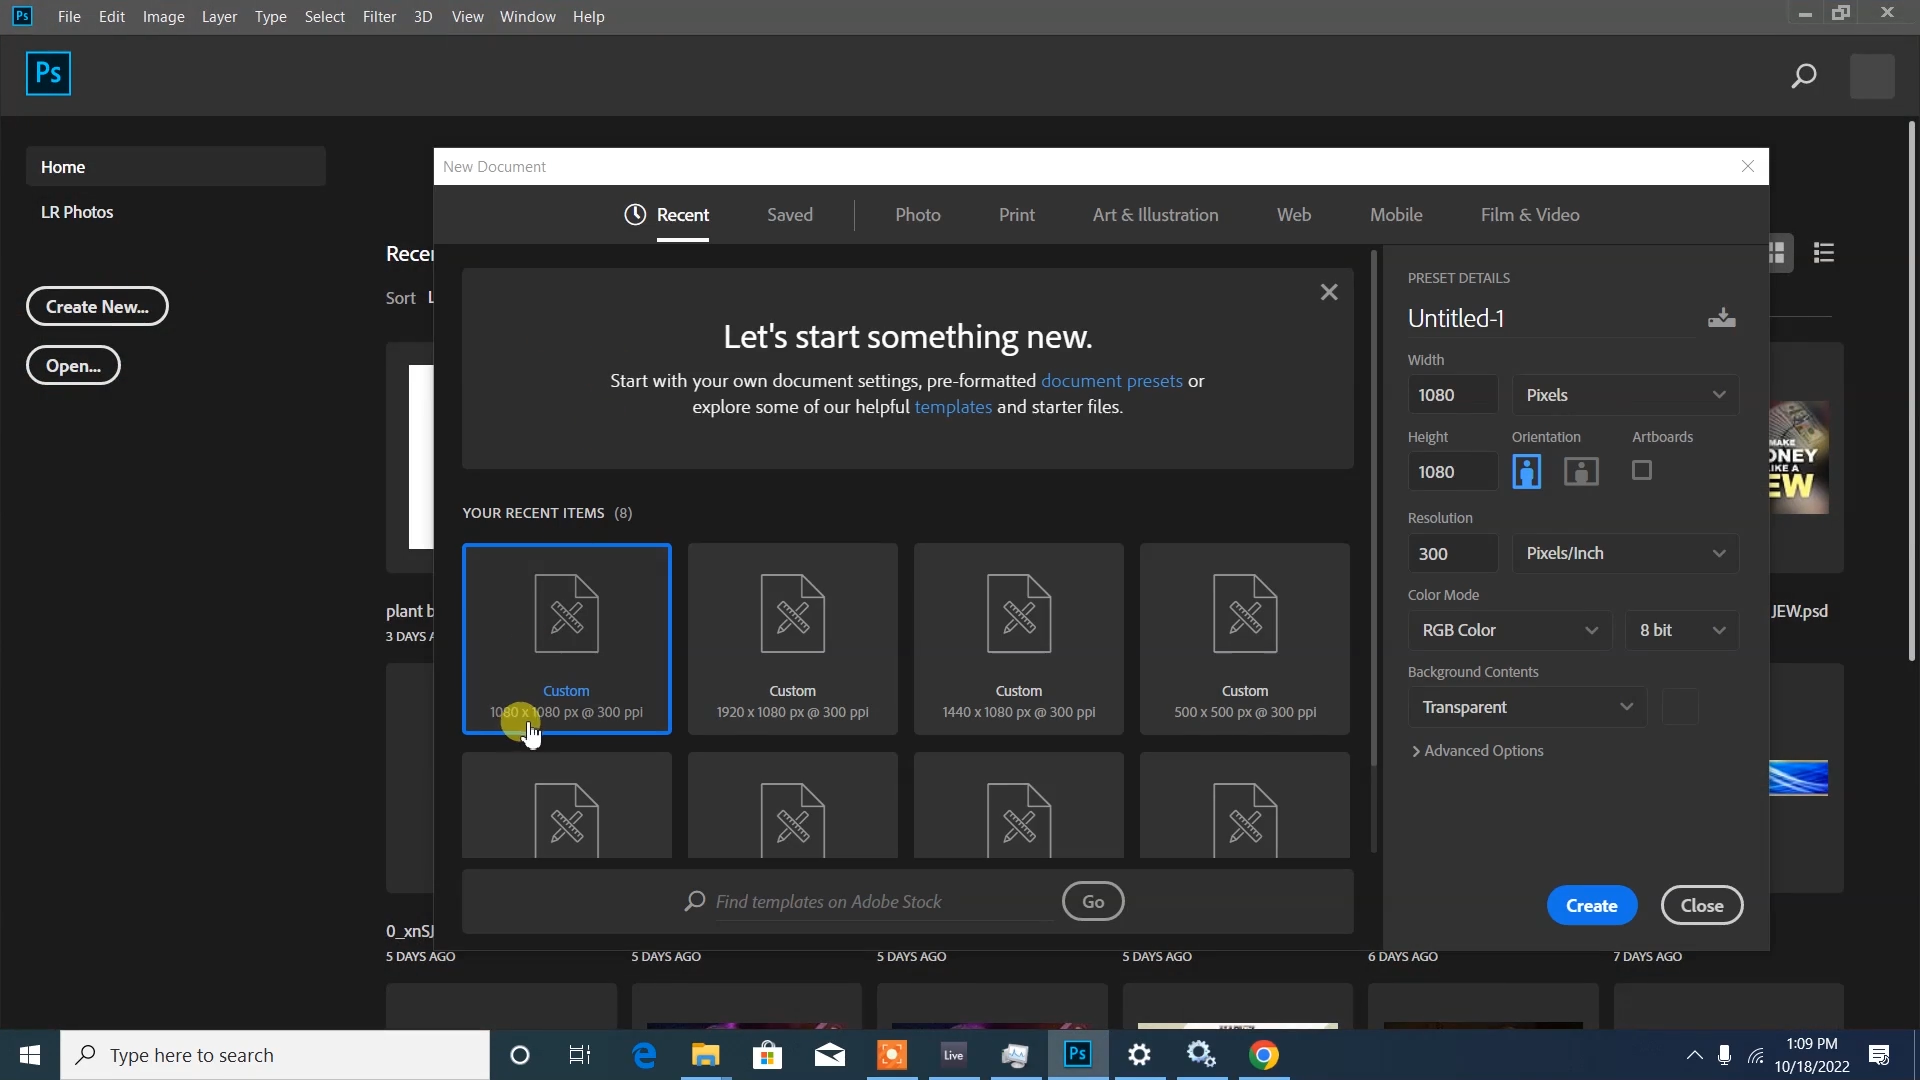
So today I am going straight to my Photoshop I will => CREATE A NEW DOCUMENT
https://img.inleo.io/DQmVUDC7HUzhdb3iGvkkLjZrMkpsLCQi2y23z1k1BoD9R67/2%20.%20I%20will%20create%20a%20new%20document..png
I am using 1080 by 1080 the social media or Instagram posts and maybe WhatsApp status and other stuff. So my resolution will be three hundred (300). I am using pixel per inch pixel then RGB COLOR. RGB COLOR is mainly used for our online Posts and online documents. But when it comes to printing you can use the CMYK COLOUR.
For my background, I will leave it transparent. Remember the size again is 1080 by 1080 pixels which is a box size you created
So I am going to drag a picture in the Photoshop design environment.
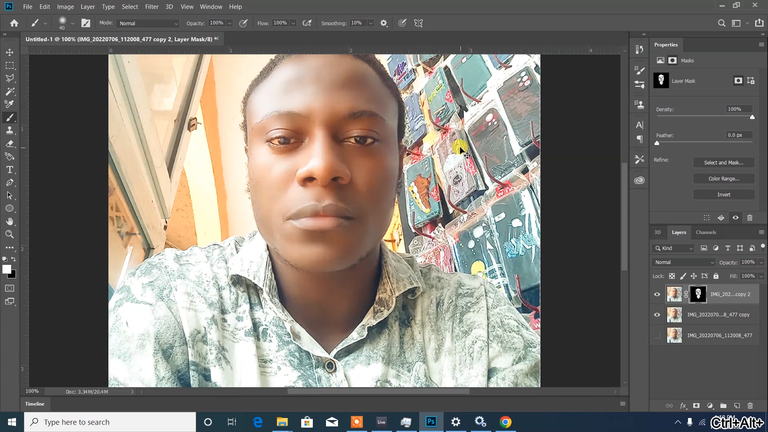
And this is the picture I am going to edit.
I will use my (CTRL +) to zoom close. So that we can see the tiny spots on the face. We can still make up his face to make it look more feminine.
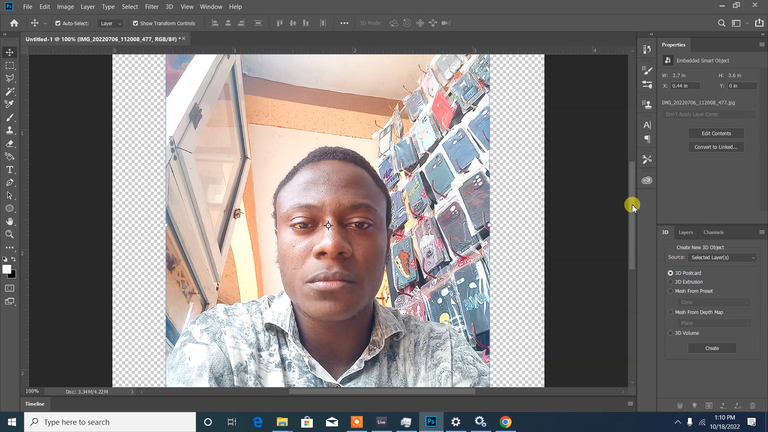
But for today, I am just going to work on the quality of the picture.
First of all, I need to select this area.
Then delete the other area. To get that process done, I am going to click on LAYERS at the bottom-right of the Photoshop design environment.
So I am going to click the LAYERS. I cannot delete any section, even though I apply the INVERSE option.
I cannot delete it because it is not a RASTERIZED LAYER. So I need to RIGHT CLICK (MOUSE ACTION) and rasterize the layer, then I apply the DELETE command.
The next step is to click on my POLYGON LASSO TOOL to DOUBLE-CLICK on the transparent area. I click my PICK-TOOL and I move it up. So I can press my SHIFT or this node and scale it. Or you can even scale it like that it depends on the type of Photoshop you have.
To treat this face I am going to use my FILTER which is my CAMERA RAW FILTER to pop out the quality.
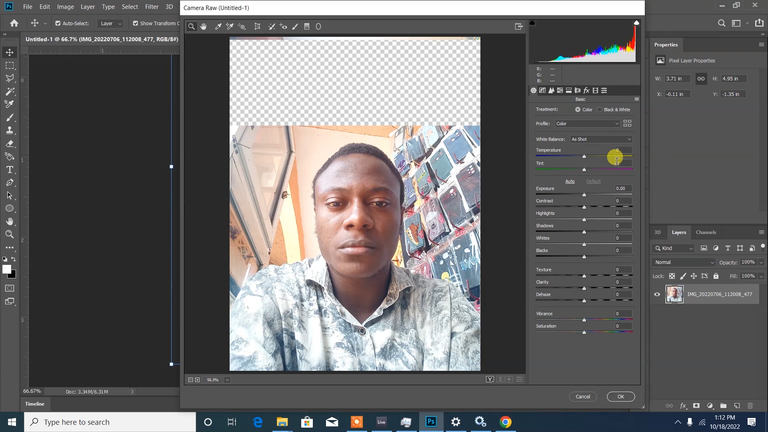
I will increase my TEMPERATURE a little and reduce my TINT. Then increase my CLARITY to bring out the Shadows. Then my VIBRANCE pops out the contrast ratio so for now let me leave it like this.
So before I will continue, I am going to duplicate by pressing (CTRL + J) on my keyboard. (CTRL + J) again so I take off the original and I work with the rest too.
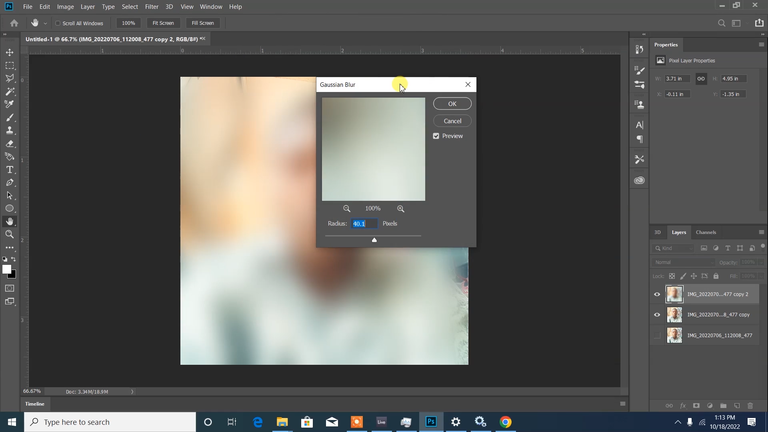
This is my base layer, this is my top layer. What I am going to do now? I am going to click on this top layer to smoothen the face and come to my FILTER
I use my GAUSSIAN BLUR and increase it a little, and click ok.
So the next step. I am going to mask the GAUSSIAN BLUR layer by adding a LAYER MASK. I will click it then press (Ctrl + I) to inverse. You will see that it reserves that blur effect to a specific area.
I am going to use my brush to apply that effect.
I will pick my brush and select a soft round brush. Then I will increase the size a bit. Press (CTRL +) to zoom the face. And touch an area. Now you can see the effects.
You can use your brackets to reduce your brush size or you can come here to reduce the size.
Press your space key and drag it up.
So you can have a smooth face here but we should make it more natural by reducing the opacity of this layer.
So just reduce the opacity. So that at least it will still reserve some natural details so that is uh my way of smoothing the skin so then
I can still apply little touches, by smoothening around the eyelid. So I press the (CTRL +) zoom
I come here and I reduce the brush size.
The opacity of the brush can be reduced. So apply some low opacity of the brush effect here.
You can see.
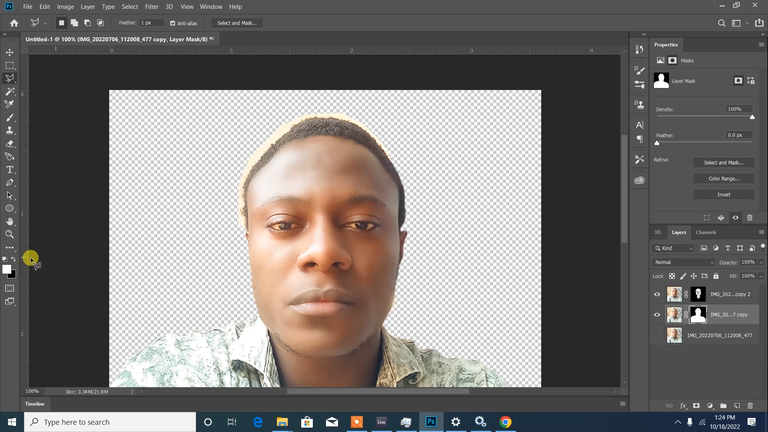
The next step is to trim the outer background of this picture. Remember the Layer Mask layer I use for the smoothening. I am going to trim the layer that carries the background.
I will use my POLYGON LASSO TOOL. And start from this point.
NOTES
Advisably before you start trimming your objects or subjects on the Photoshop design, first click on your POLYGON LASSO TOOL , and increase the feather pixel to one(1). Don't increase it more than one (1) because that is how it will smooth the edge. If you leave it at zero (0), The Edge you trimmed will be Sharp.
You will start from here and make sure you do it neat.
One thing about Graphics Design and Photoshop of pictures is patience if you are not patient you cannot do it.
I am going to press my PLUS (+) to zoom in on this Edge so that I can be visible.
Now you see some areas here. Whereby you need to use a special Dimension to filter the hair from the background.
So, I am going to roll back a bit from this ear I take the space like this just because of the hair and there is a trick I use in my photo-touching processes
When you come here, having a mixture of colours you can take it to the edge.
If you try to effect that. This section with different colours, will not give you a good result.
So after getting your picture. You just click on your MASK LAYER add a LAYER MASK
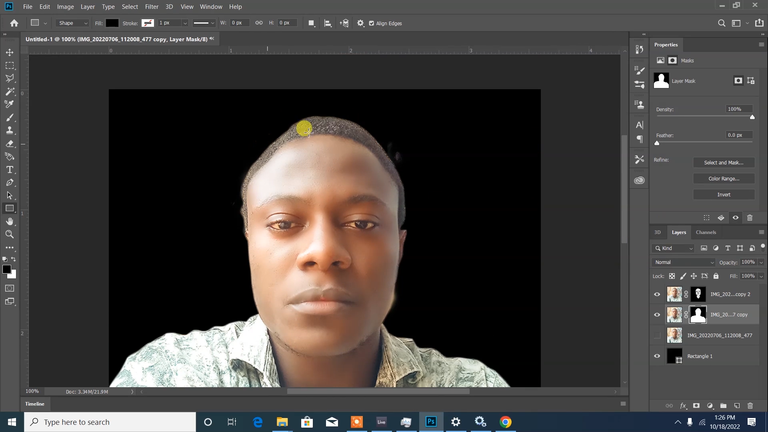
You see those yellow surroundings there. We are going to work on it
Now I RIGHT-CLICK here. Before I do it let me first add the black background to differentiate this picture and those yellow Edge I preserved.
I swap from my foreground to my background black. I draw a black rectangle and I drag it down.
I drag it down. Then click here. RIGHT-CLICK. I am going to select and mask.
I will use this tool which is the QUICK SELECTION TOOL to show you the surroundings. But I will use this REFINED-EDGE brush tool to take off the surroundings from the hair so I use my brackets to expand.
I reduced it a bit. I can zoom.
It will neatly take away the colour from the hair. Filter it from the hair. Take note of this. Because once you are trying to fix some female picture this process is seriously essential.
You neatly filter it and you click on OKAY. Before you click OK, you should smoot the edge a bit. That is global refinement by smoothing the edge.
Then you retake the edge inside minus five percent (-5) then you click ok.
So at least we did some light touches on the hair. Though we still have some spots here.
I will go back to select mask.
Okay, it is still there just with some stain. These are the areas that have multiple colours so that is why that place is still visible. I will remove this black background.
For me I will take my POLYGON LASSO TOOL to just take out those things.
I will click the main picture, not the mask and delete. At least to have some smooth edge. Then a place here also by the chick and click here.
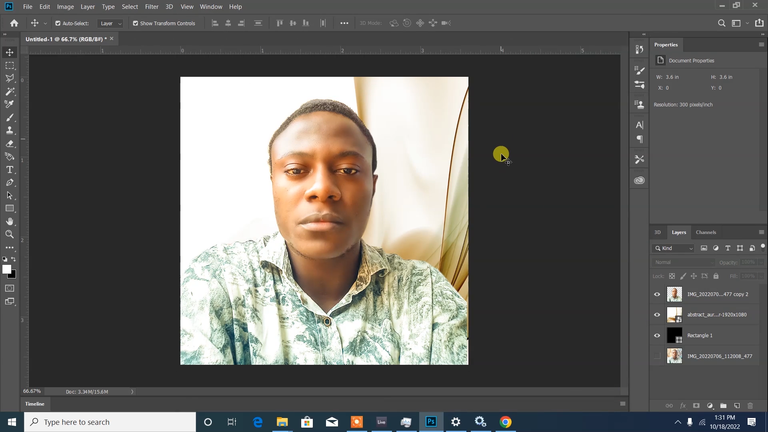
I am going to bring in a background.
I have the two pictures here. This is my original. I will drag it below the background layer. But before I bring it together, I am going to duplicate the mask. Because I will still use it for other purposes.
CTRL + J to Duplicate
Drag it down. Take it off. Just preserve it and then I RIGHT-CLICK and I will convert it to Smart Object. I am will them a single object.
I can bring everything together. Both the mask and the picture as one object.
You can go further, by rasterizing that layer. So it becomes a single layer both the mask and everything.
So I will still apply some FILTER. Go to my CAMERA RAW FILTER increase the CLARITY.
I reduce the shadow a bit. If you are working with some pictures, you can increase the shadow. But for this, I will reduce the shadow. The BLACK Pop out the black. TEXTURE increase the texture. VIBRANCE increase the Vibrancy.
Then SATURATION, you can see the saturation effect on it. So but let me just add a little SATURATION. CLICK ok.
So for today, I am going to stop here. So that my next video will be on the Part Two (2) whereby, I will make use of the other mask I have preserved. In adding some more quality to this picture.
Posted Using InLeo Alpha
Congratulations @supiconvees-md! You have completed the following achievement on the Hive blockchain And have been rewarded with New badge(s)
Your next target is to reach 1000 comments.
You can view your badges on your board and compare yourself to others in the Ranking
If you no longer want to receive notifications, reply to this comment with the word
STOPThank you. I appreciate your gift.
Go for it @supiconvees-md! You've got what it takes to reach your new target on Hive.
@tipu curate
Upvoted 👌 (Mana: 27/57) Liquid rewards.