Water cooled 9900k rig: Building a new PC
Its been a few years since I built a new PC, but with new software on my PC I need more power. Mostly for emulation of video games (RPCS3), and some games that are not so well optimized (Arma 3). My previous rig for gaming and video editing had a Ryzen 7 1700 with a stock cooler. I ran it at stock clocks and it did well for about half of the games and software I ran on it. But that gap has been growing ever since.
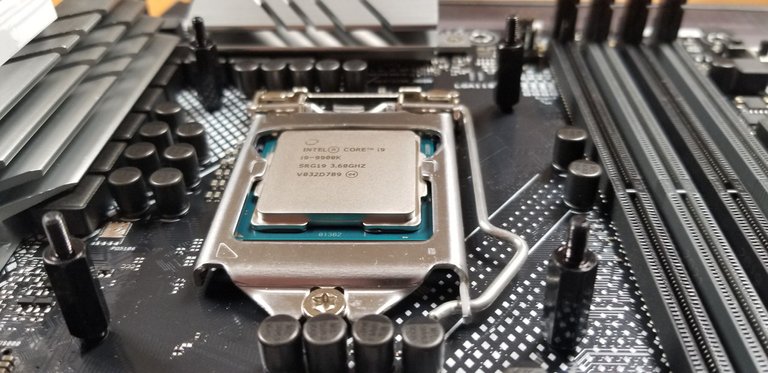
So I decided to build a new more powerful rig, I settled on the Intel i9 9900k. I had the option of buying a 10900k but from the benchmarks I have seen most apps do not use all the threads it offers and a 9900k can reach close to the same speeds if I win the "silicon lottery". Not all CPUs are the same, some can be overclocked quite far while others cannot. So we shall see if my 9900k is from the good bin.
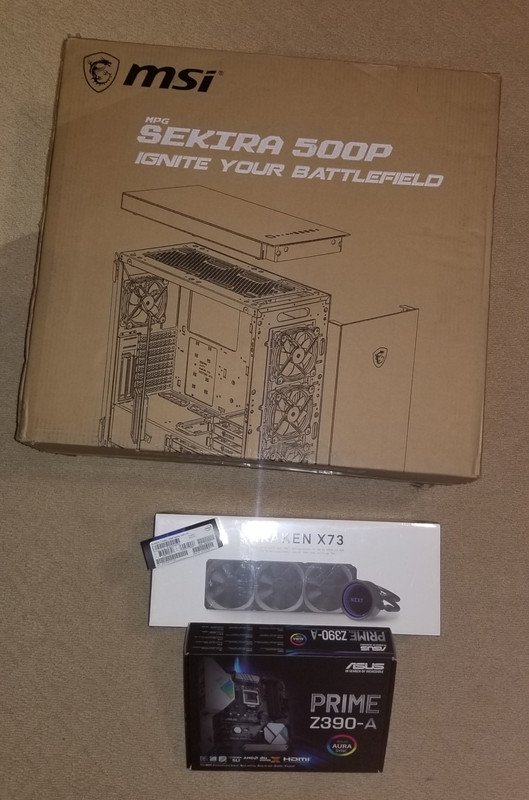
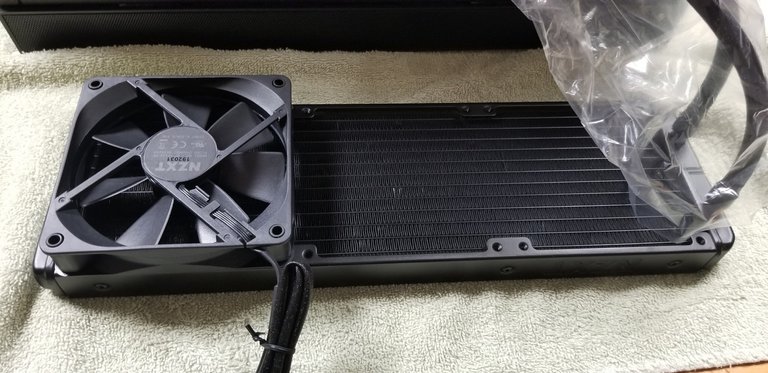
Using an i9 9900k means alot of heat will be produced, so I found a water cooler AIO to keep the processor cool. With my plans of overclocking I needed something powerful, and maybe even a bit of overkill. The NZXT Kraken x73 is a 360mm water cooling all in one system. It is already assembled and ready to be installed on a CPU. MSI makes a case that allows for a top mount 360mm radiator so I went with the Sekira 500P. And the motherboard is a basic Prime 390-A, I wanted something a little better but seems Z390 premium boards cost close to as much as a premium Z490 chipset board. So decided to go with a more basic motherboard. It lacks dual PCI 16x which sucks, meaning running two video cards one of them is being limited.
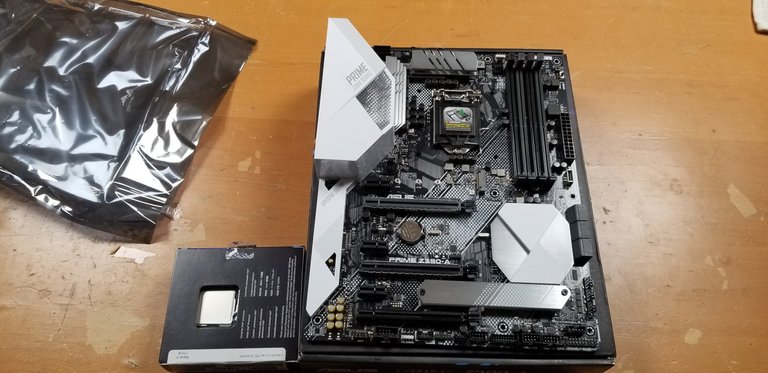
Using its 115x bracket from NZXT on the back of the motherboard I secure it to the case. I was surprised to find no screws came with the case, normally they include screws in the case box or the motherboard case. But luckily I had a bunch on hand to use.
With the motherboard installed I moved onto installing the NZXT Kraken X73, this required me to remove the top panel and front panel to install the radiator and fans. Using needle nose plyers I was able to open them squeezing's the retention pins.
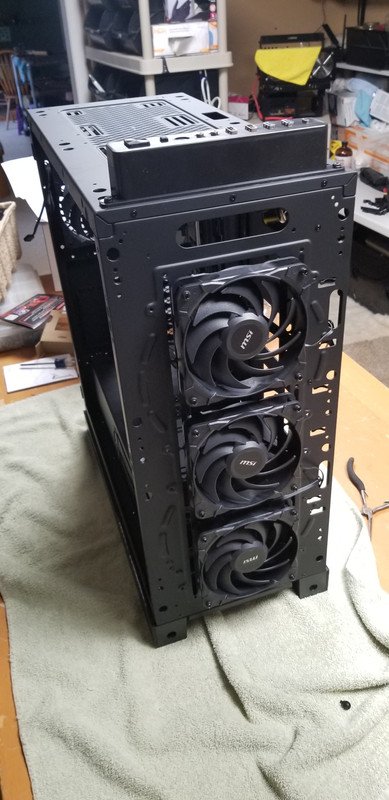
Pretty cool this case comes with three fans on the front, with all the added positive airflow it should help with cooling. I will upgrade the rear fan to give the case better airflow. As the radiator will be blowing air into the case from above and so will those three front fans. So that little MSI fan that came with the case will not do when mining.
MSI did a great job on this case, no sharp edges to cut my fingers and everything seems really solid. Taking it apart to install the water cooling. The glass panels it came with are nice as well, though add alot of weight to the case. I took them off until I had the case in its final location.
After holding up the radiator to the case and figuring out how I wanted to mount it, I moved onto adding the three fans to the radiator. Their configuration will pull air from the outside of the case through the radiator and down into the case.
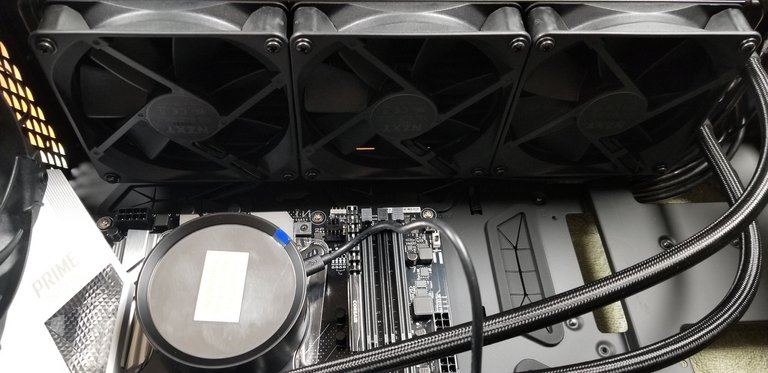
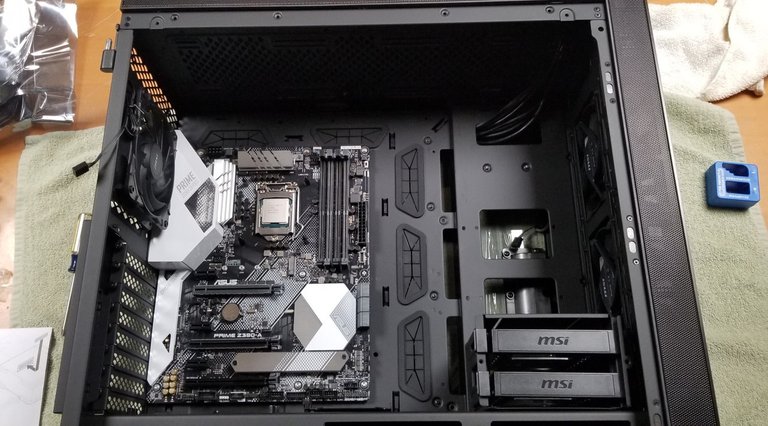
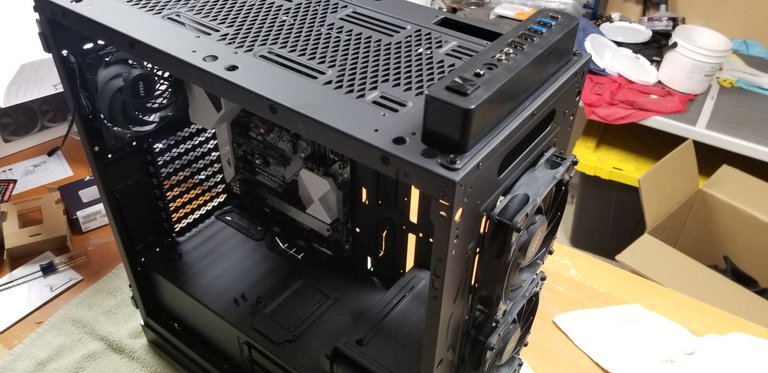
With the radiator mounted I moved onto positioning the CPU cooler, wanted to make sure the tubing was not positioned in a weird way and where I could plug in the needed data and power for the pump. I put one memory module in a slot to see how well it would fit along with the cooler installed. Its close, but with less than an inch to spare it fits.
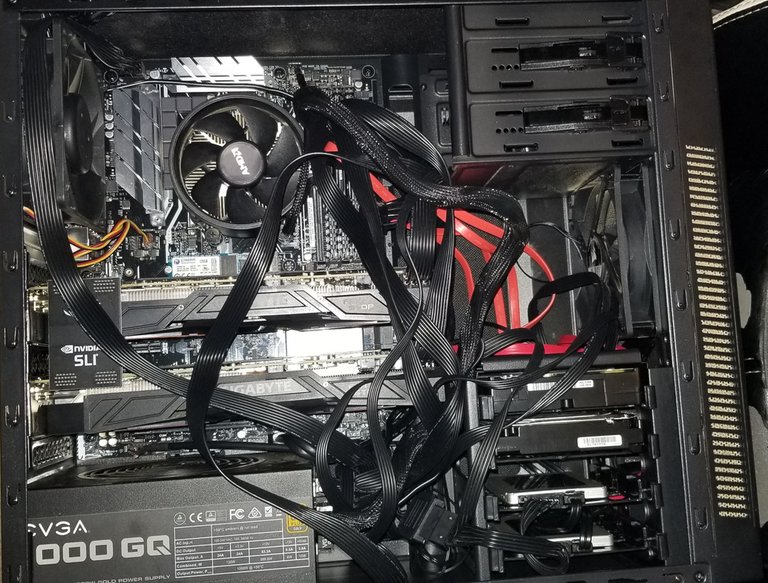
This new PC build is using some old parts from my previous rig, such as the 1KW power supply, 2 Nvidia 1080 video cards, 1 NVME SSD, 2 2.5" SSDs and 2 3.5" HDDs. Finding a computer case that fit all those drives proved to be difficult. Many cases only offered space for one or two drives, not enough for the RAID I have plans for building in the future.
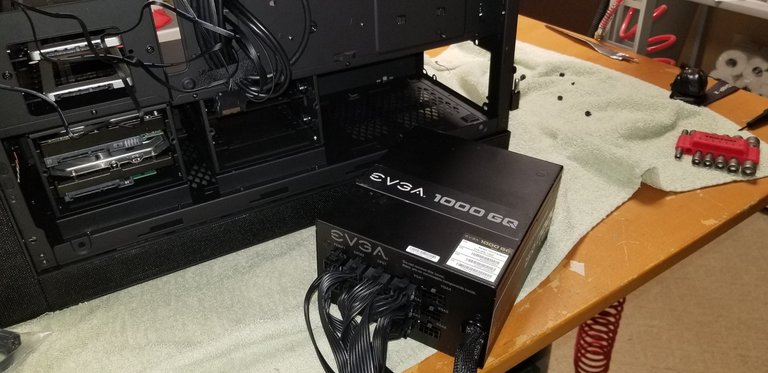
Using a modular power supply I could attach just the needed cables and leave the rest off. This helps with not producing such a "rats nest" inside the case. Though with this case I had to move one of the hard drive cages to get this PSU installed.
The power supply is installed and now I move onto routing the cables through the case. I have never been all that good at this part, but luckily cases are making it easier and easier to do, this case had many places to route cables behind the motherboard giving it a nice look.

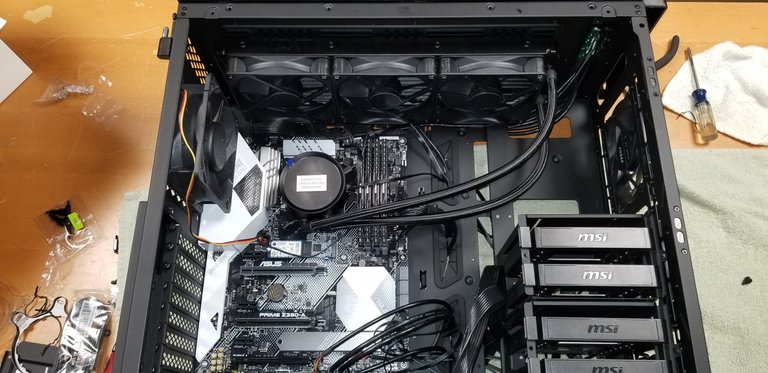
Note the hard drive tray has been moved from the bottom left to the middle right of the case. Those front fans are going to work great to keep the hard drives cool.
By this time in the build its all coming together nicely, I added my video cards and connected power to them. The motherboard got its 24pin main power cable and the aux cable is connected as well. This machine is ready to be tested and powered on for the first time.
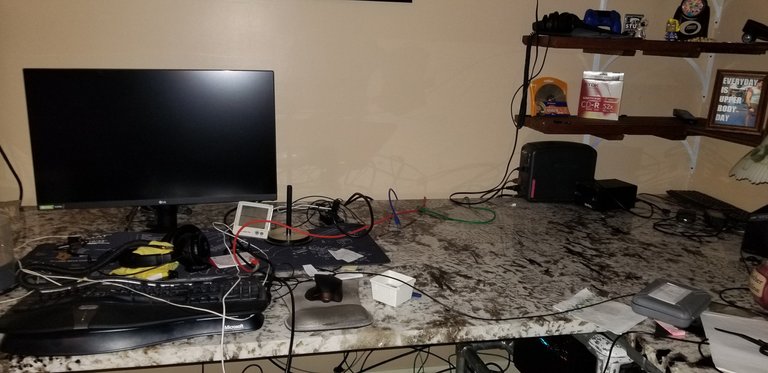
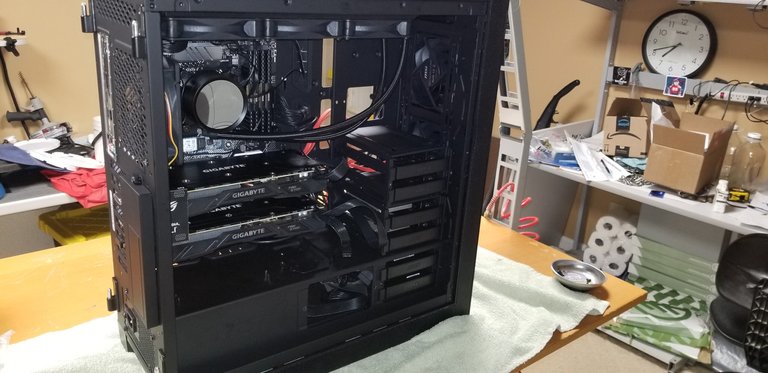
I made space for it on my desk in my office, my previous build did not have any glass on it. Just a plain black case with no window. But this this build looks much nicer I moved it to the top of the desk so I can enjoy looking at it. Also I dont want to kick it by accident under my desk breaking glass everywhere...lol
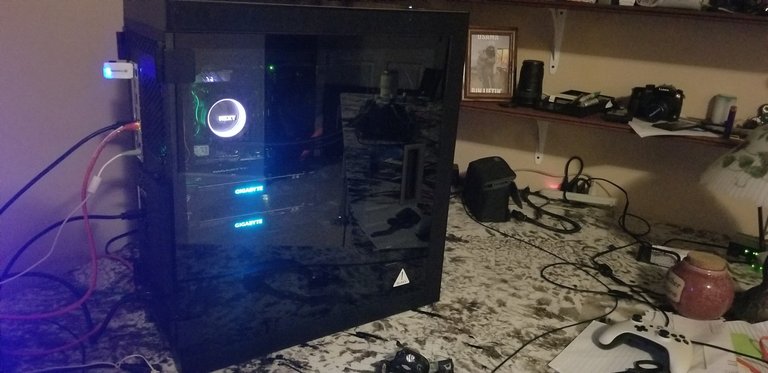
Moving it into my office I placed it on the desk and then added the front and rear glass panels, the thing was already very heavy so moving it without the glass helped a little. I booted it up and made sure the water pump was running and cooling the CPU well. After a few minutes of looking at the BIOS I got to installing Windows 10 64bit on the machine. I could not boot into my old OS as the chipset was completely different going from AMD to Intel.

Source: https://cpu.userbenchmark.com/Compare/Intel-Core-i9-9900K-vs-AMD-Ryzen-7-1700/4028vs3917
This CPU is a big step up from my Ryzen 7 1700, while it comes with a standard clock speed of 3.6Ghz which is slightly less than the Ryzens 3.7ghz, the i9-9900K can bump one processor core to 5GHz, four cores to 4.8GHz, and all eight to 4.6GHz stock. But I think with some good airflow, water cooling and some testing I can get this machine to run to close to 5Ghz on all cores while doing non AVX workloads.
In my next post on this project I will talk more about the CPU I picked, along with doing some benchmarks on it stock. And then overclocking the processor.
https://twitter.com/Bhattg18/status/1351198804725346304
This is really a beautiful piece of engineering 😍🙏
Thanks alot.. been having alot of fun with the build.
It is a very powerful equipment, the energy consumption must be very high or I am wrong?
Yeah it pulls about 350w just for the CPU and another few hundred watts for the video card. So I'm using a 1kw power supply.
Luckily where I live power is not all that expensive.
It's lucky that where you are energy is not so expensive because that would be a big problem.
Hah yeah, I am lucky. I pay around 0.056582 per kWh. How much does it cost where you are?
Approximately 0.17 per kWh
Oh damn yeah thats costly.