Aesthetic DIY Logo-design: Detailed and Comprehensive step by step process to make your own
Its super exciting to finally have my first post in the Hive-Diy community. I was initially skeptical about posting a logo design tutorial as I thought it might deviate from community standards for accepted post. @equipodelta cue stating that design tutorials were accepted was all I need and enough motivation to finally publish my first logo design tutorial in this community. Much thanks to her as I would have been left in the dark.
Alright enough intro which are not in line with today's DIY project designs. Good DIY lovers, today I would be stating step-by-step in an orderly and detailed fashion how to make an aesthetic logo design for Hive DIY community. I promise you by the end of this tutorial you would be able to make something that's similar and quite interesting, maybe even better than mine using nothing but your phone. No need for fancy gadgets or apps.
So let's jump right into the tutorial.
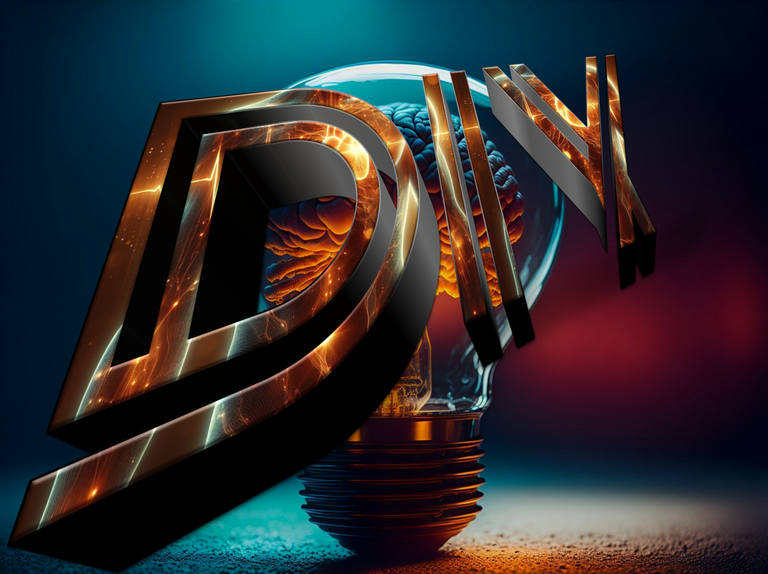
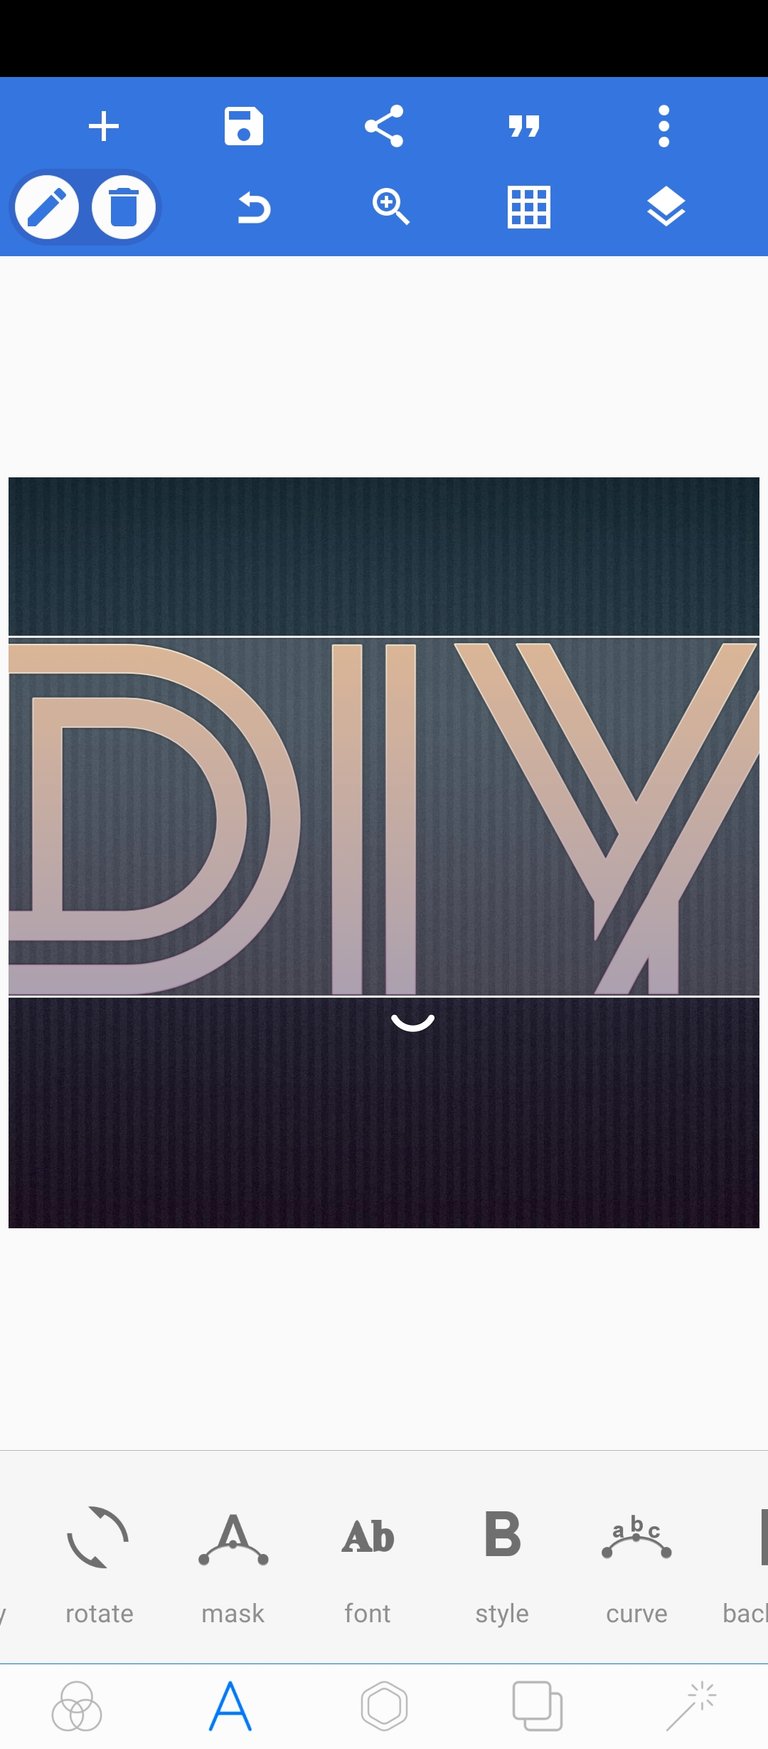
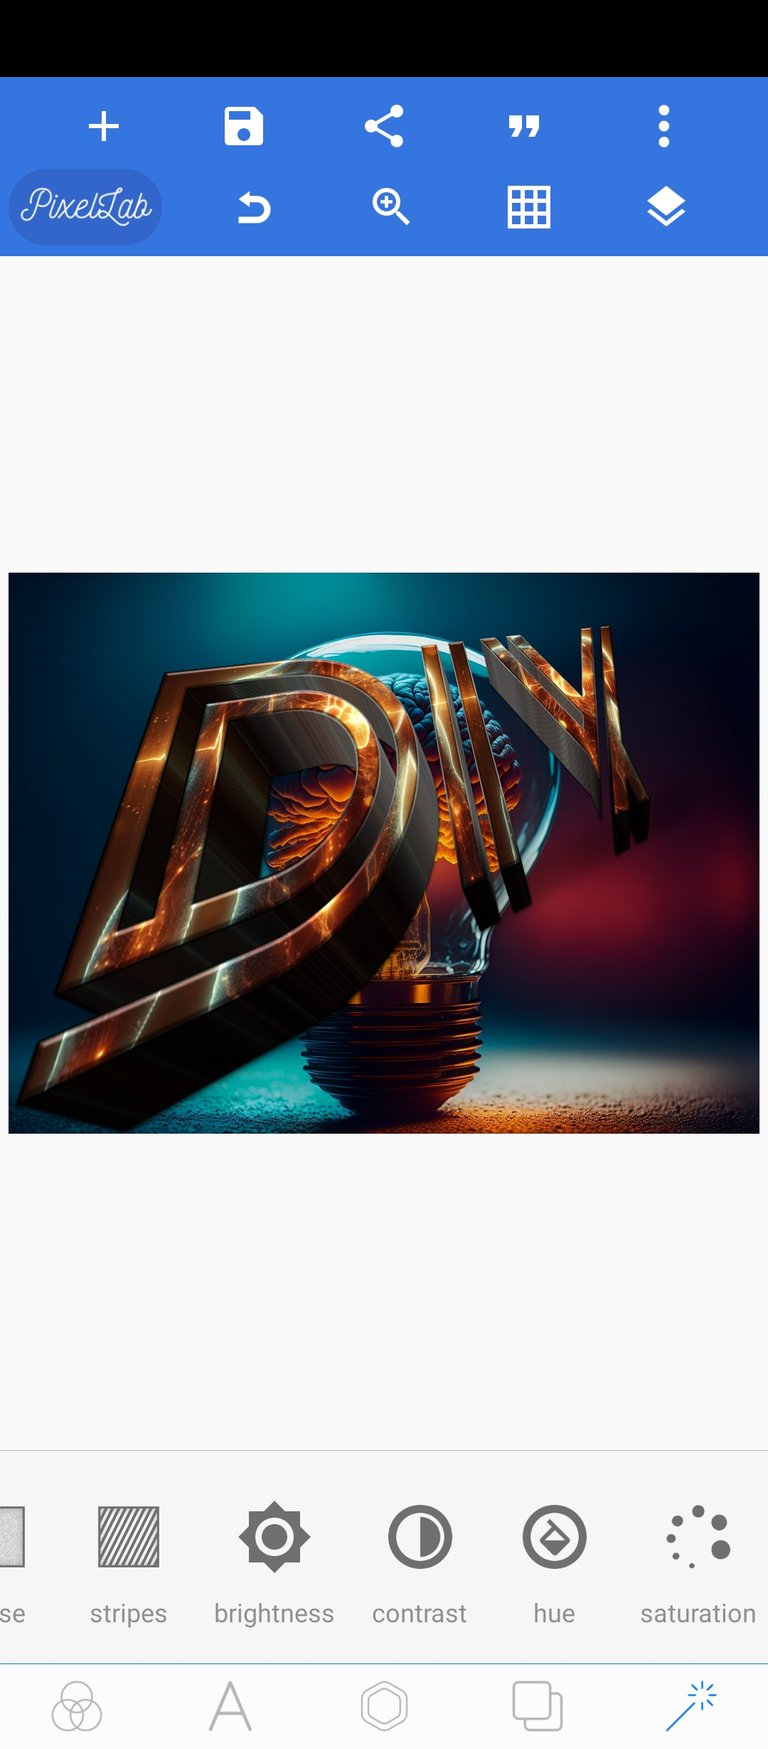
I would be tutoring on how to make the design below👇
STEP-BY-STEP PROCESS FOR THE ABOVE DESIGN
First download Pixellab app on Playstore (it has a large white P on a blue background), install it and go ahead to open it.
Once you open Pixellab you should have the screenshot below
From the above screenshot, go two steps towards the right and select the blackish-blue canvas/background with "THIN" written on it.
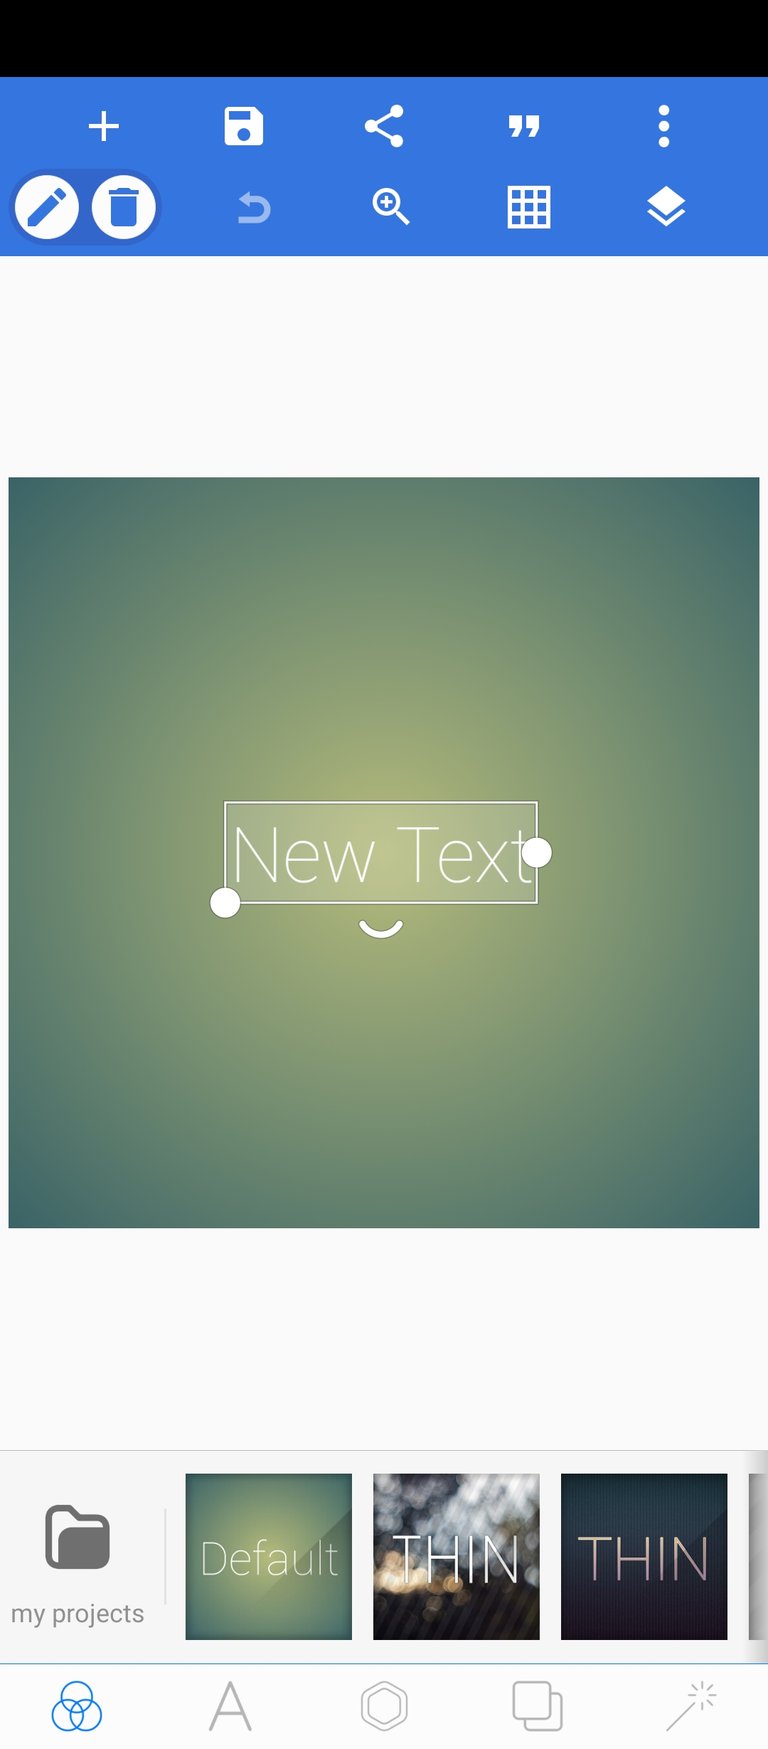
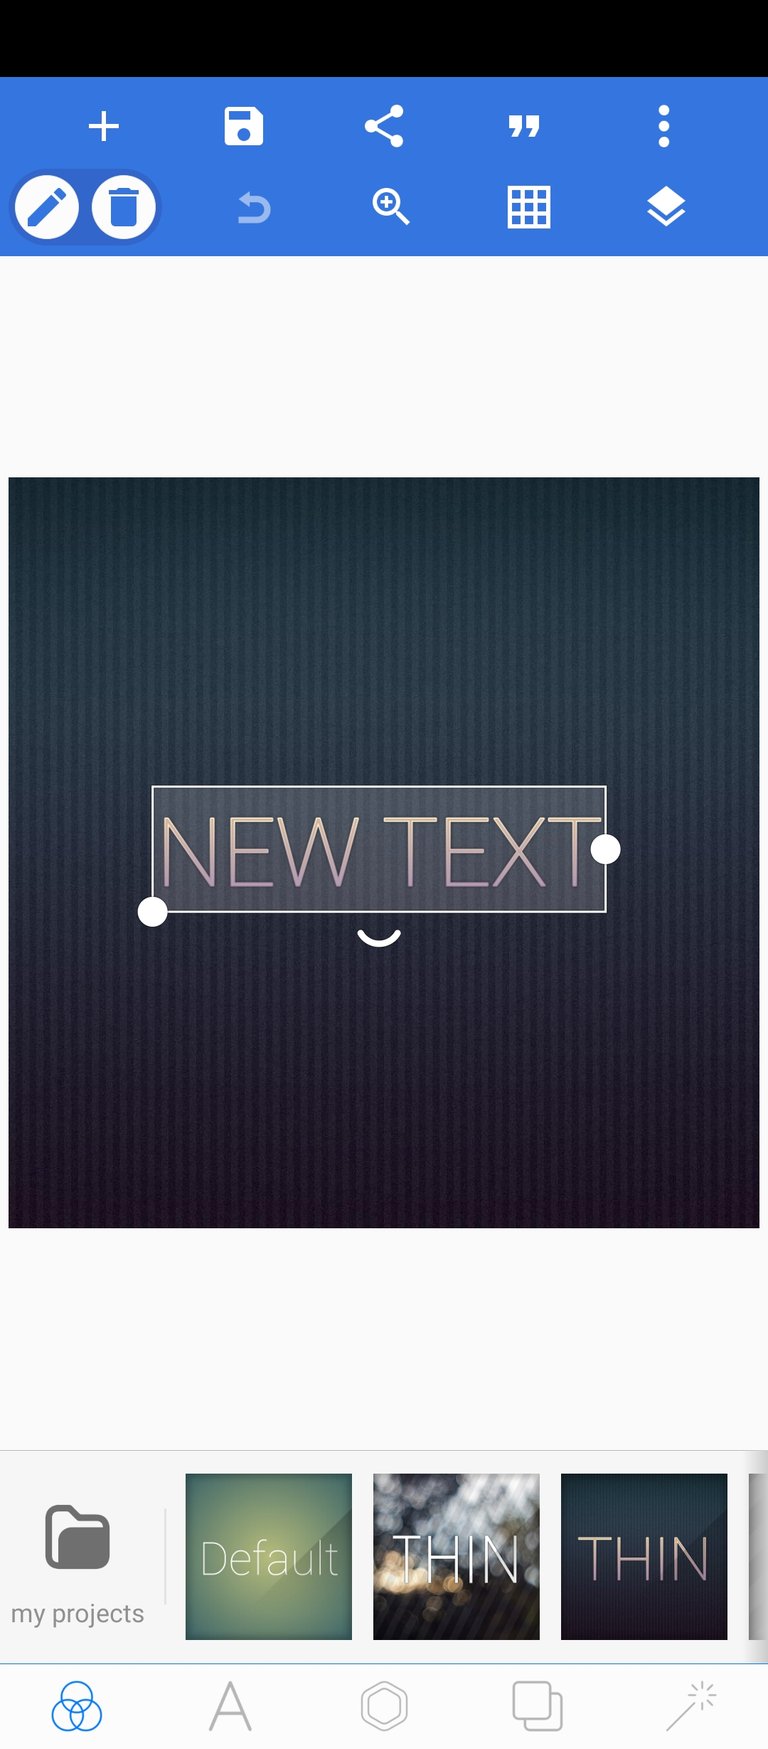
Now you have this 👇
- Tap the "NEW TEXT" once and you have this
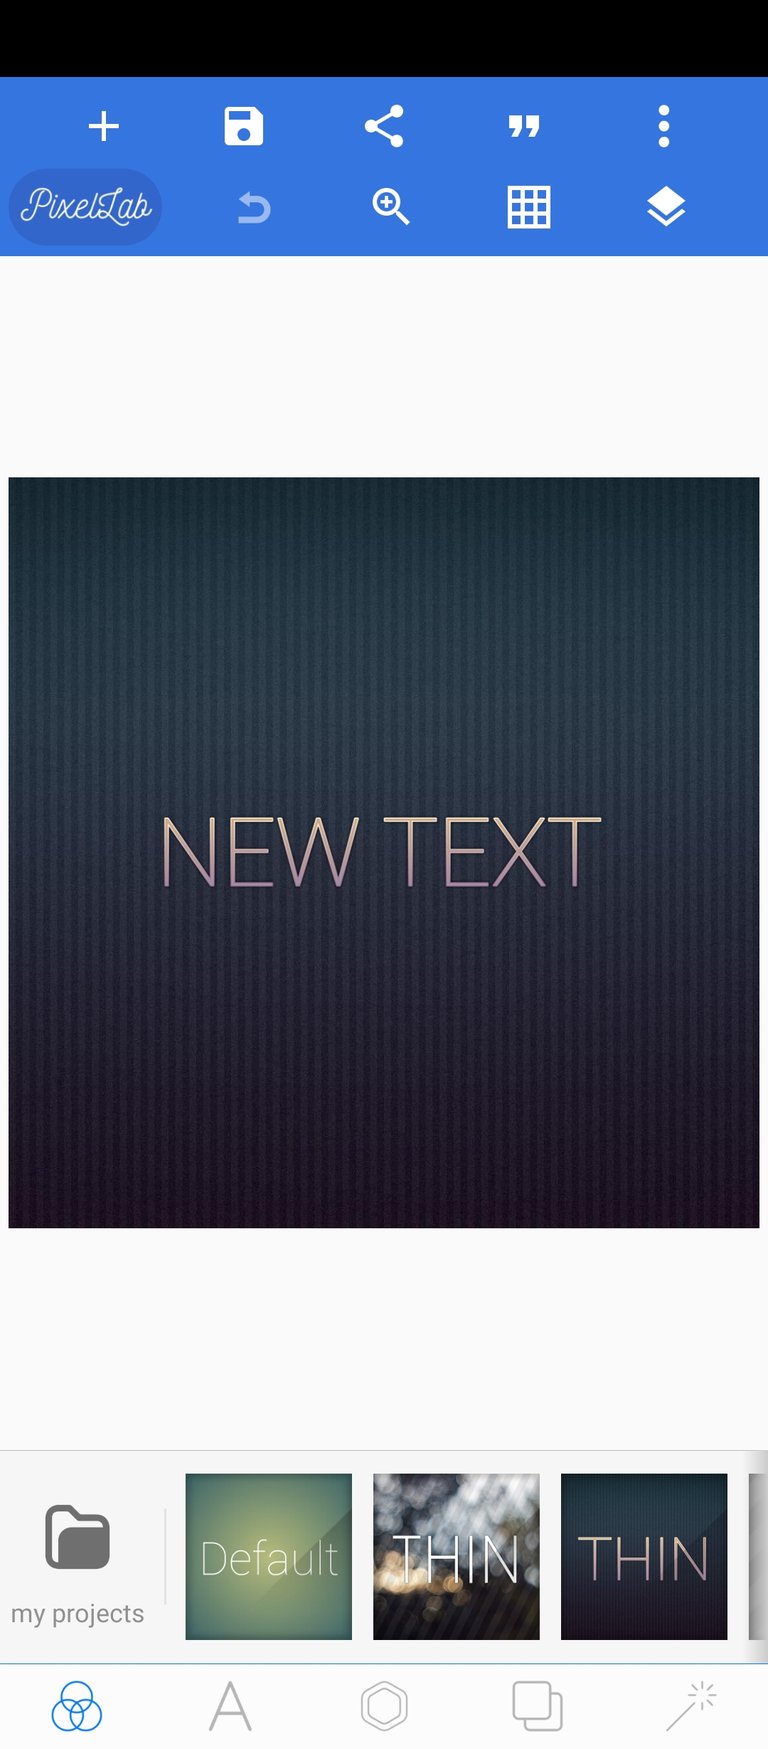
- Double tap the "NEW TEXT" and you would be taken to an interface where you can change the text to "DIY" as seen below
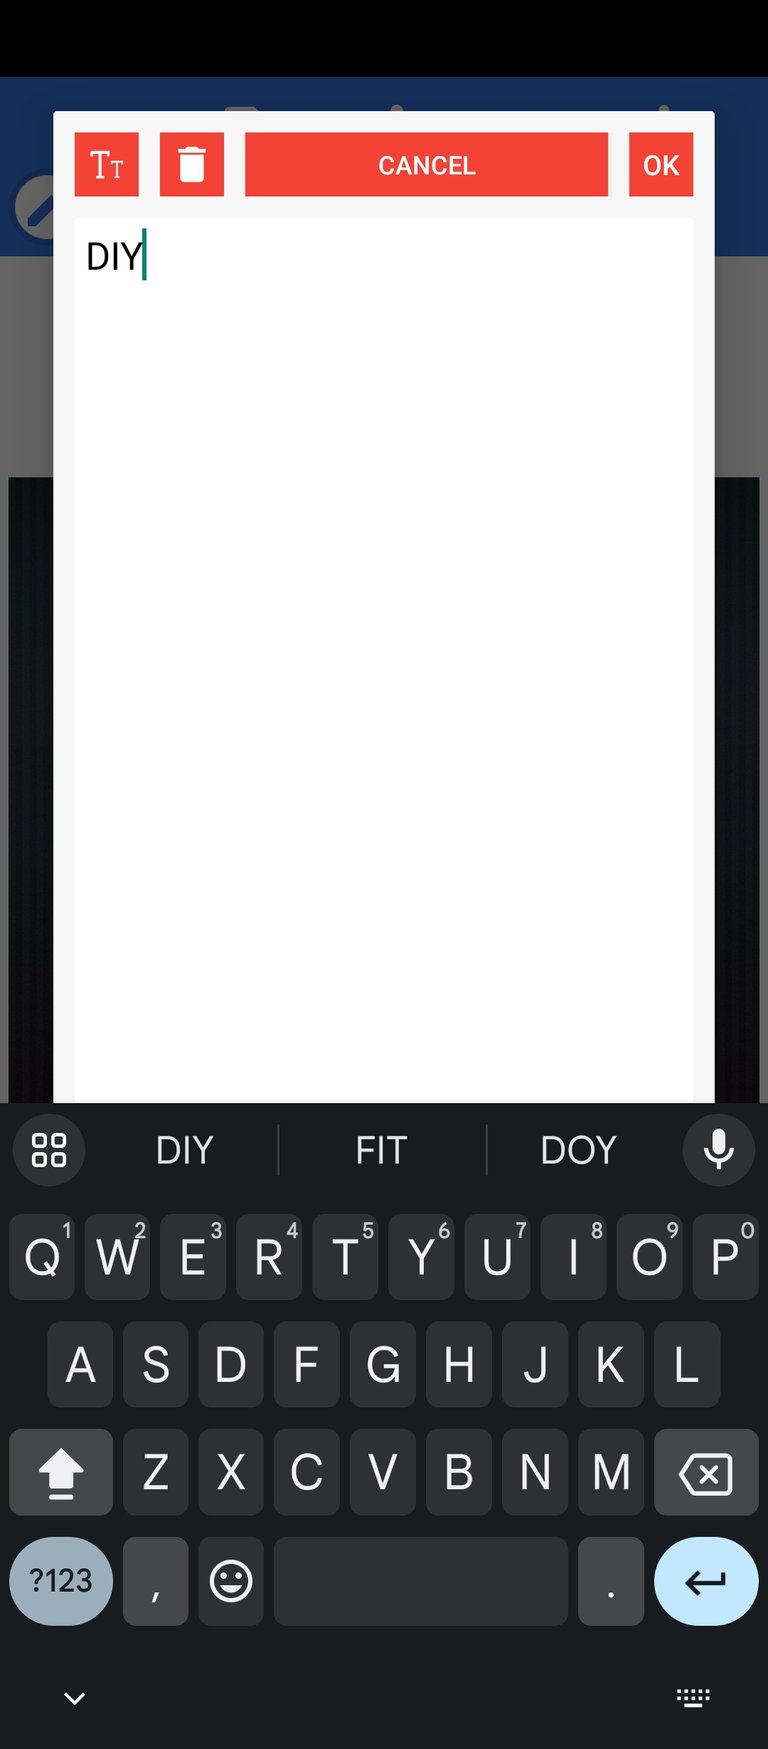
Type in "DIY" as above
Once you have typed in "DIY", select "OK".
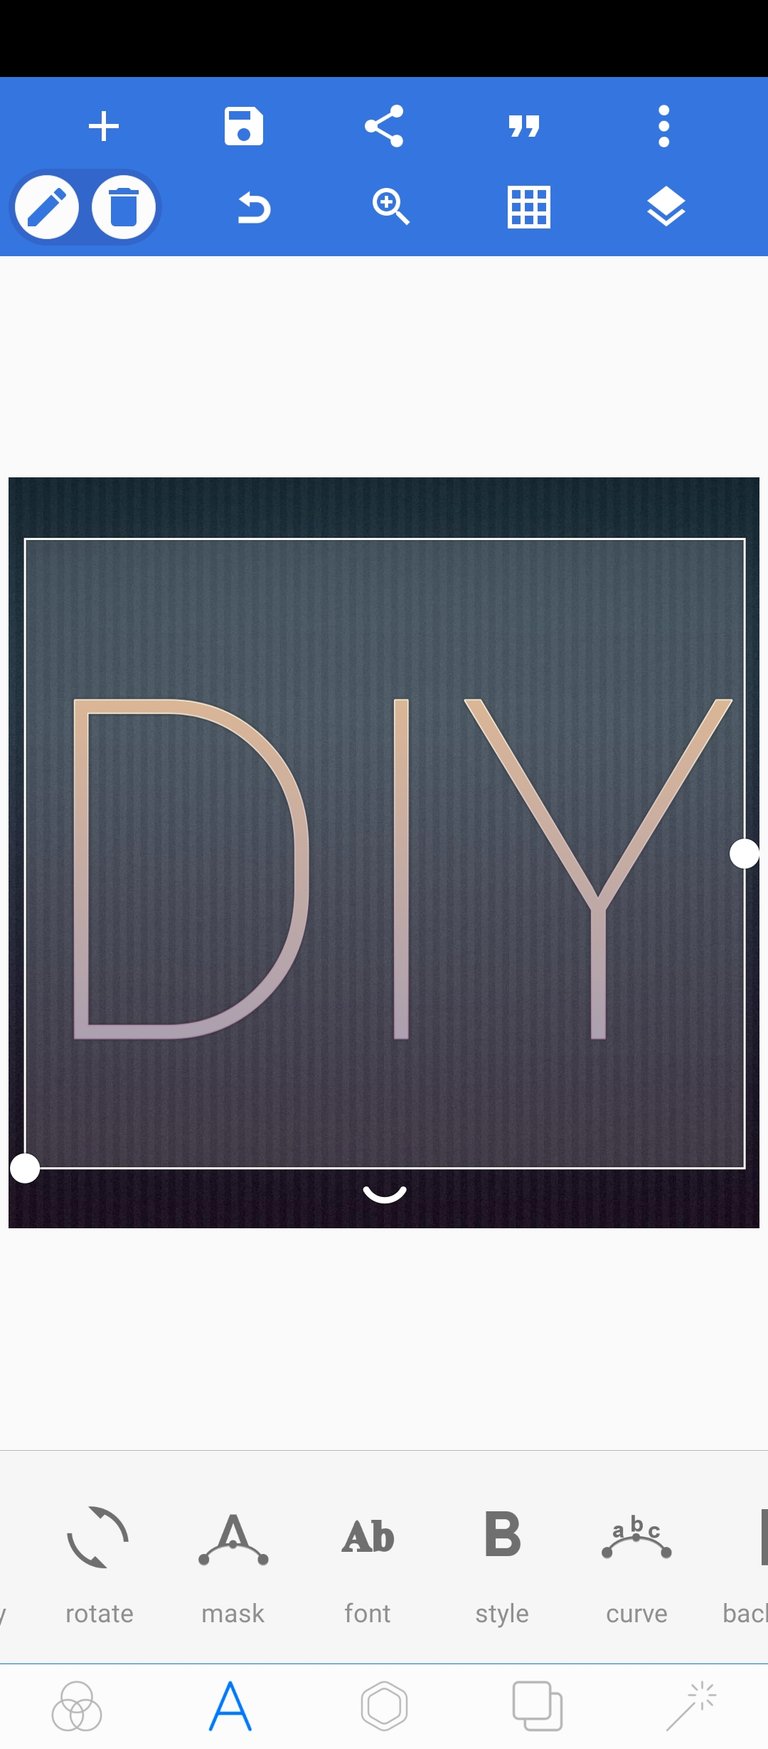
You should have the below 👇 on selecting "OK"

Readjust the above to fit better on the blackish-blue canvas as seen below.
After readjusting, change the text font by tapping on "DIY" text once and then select "font" below the design interface.
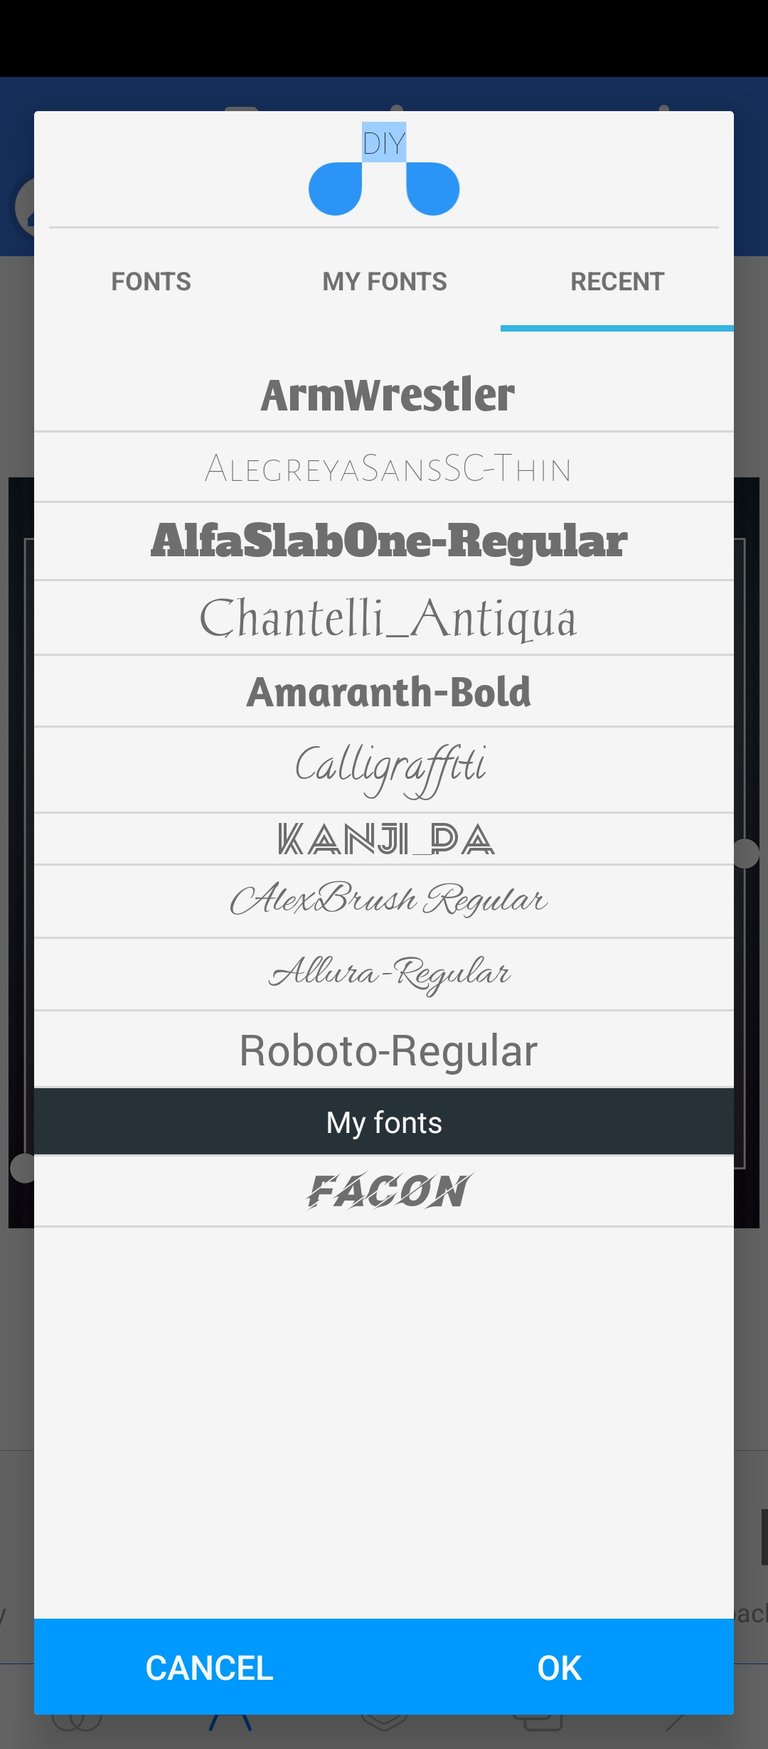
- In the option for fonts, select "KANJ_ PA" font type, then select "OK".
- On doing the earlier stated, your text font should change from normal to the below font type.
- Adjust the size using the below tool.
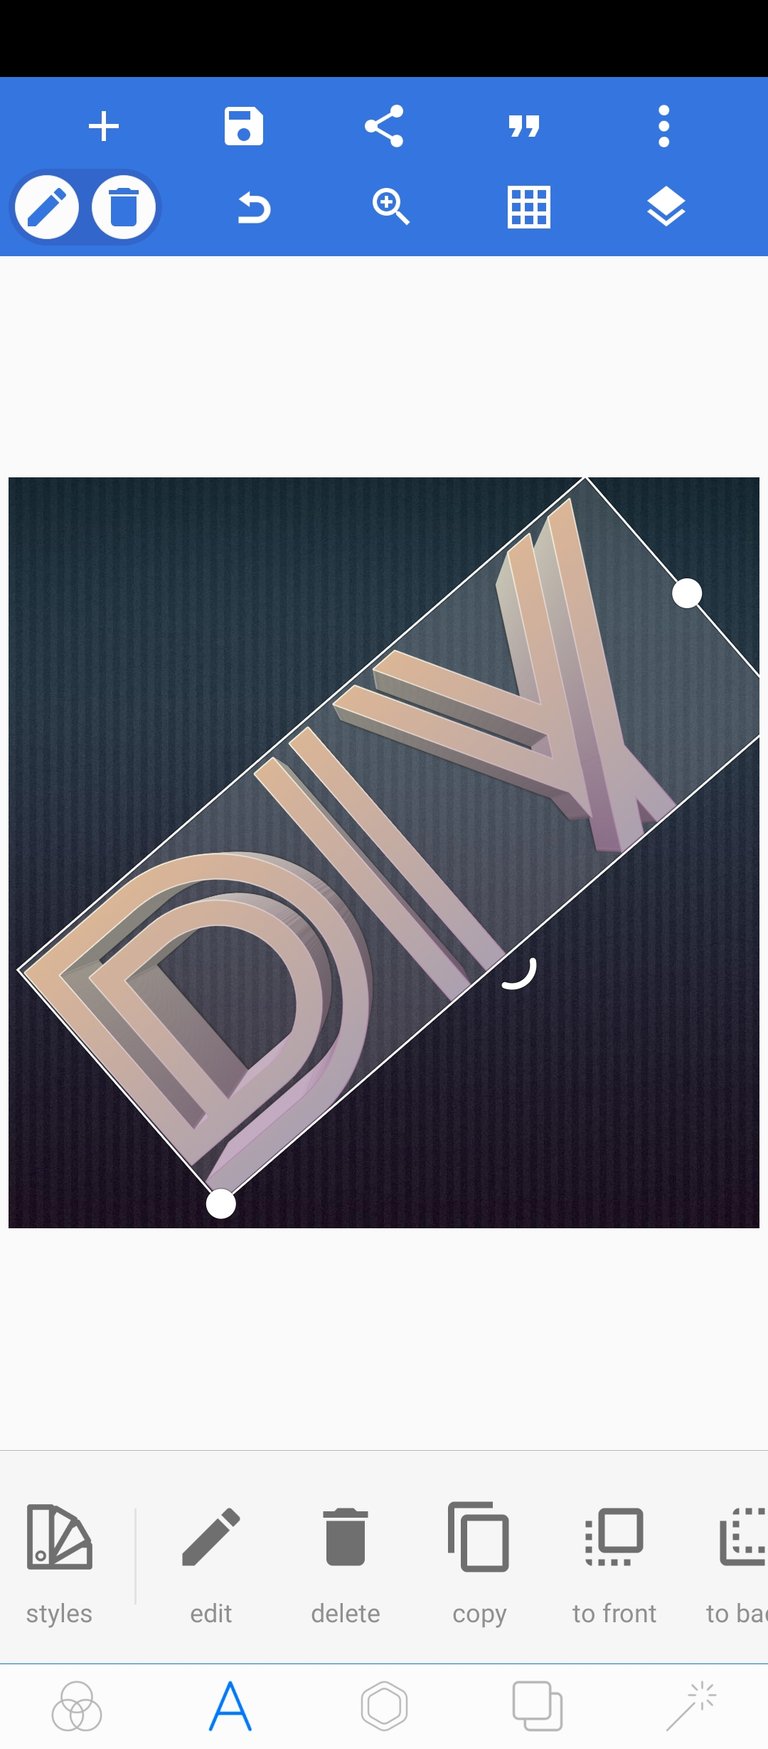
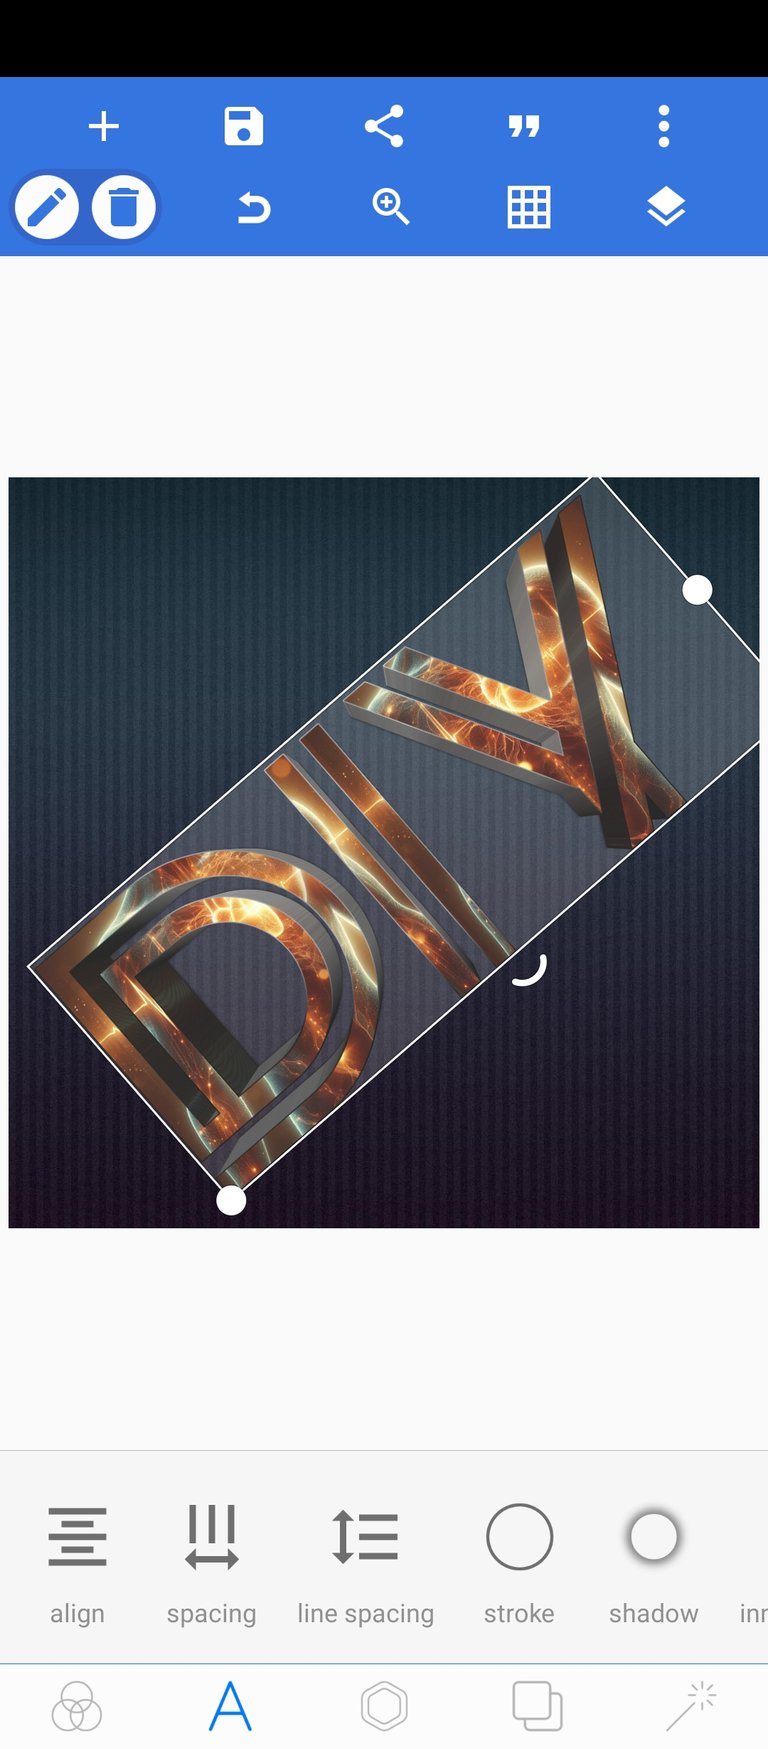
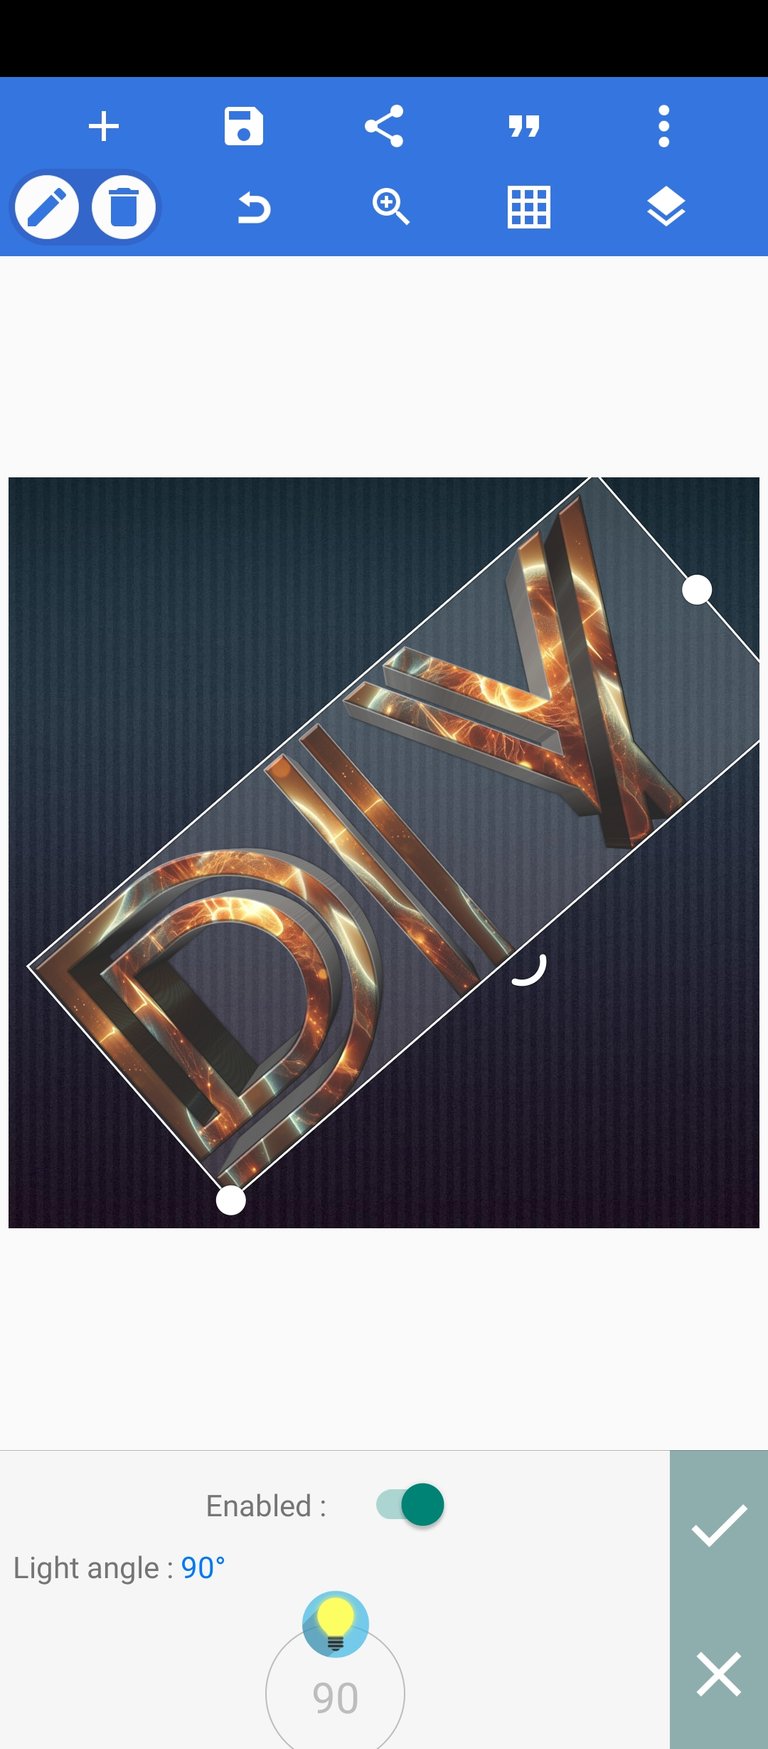
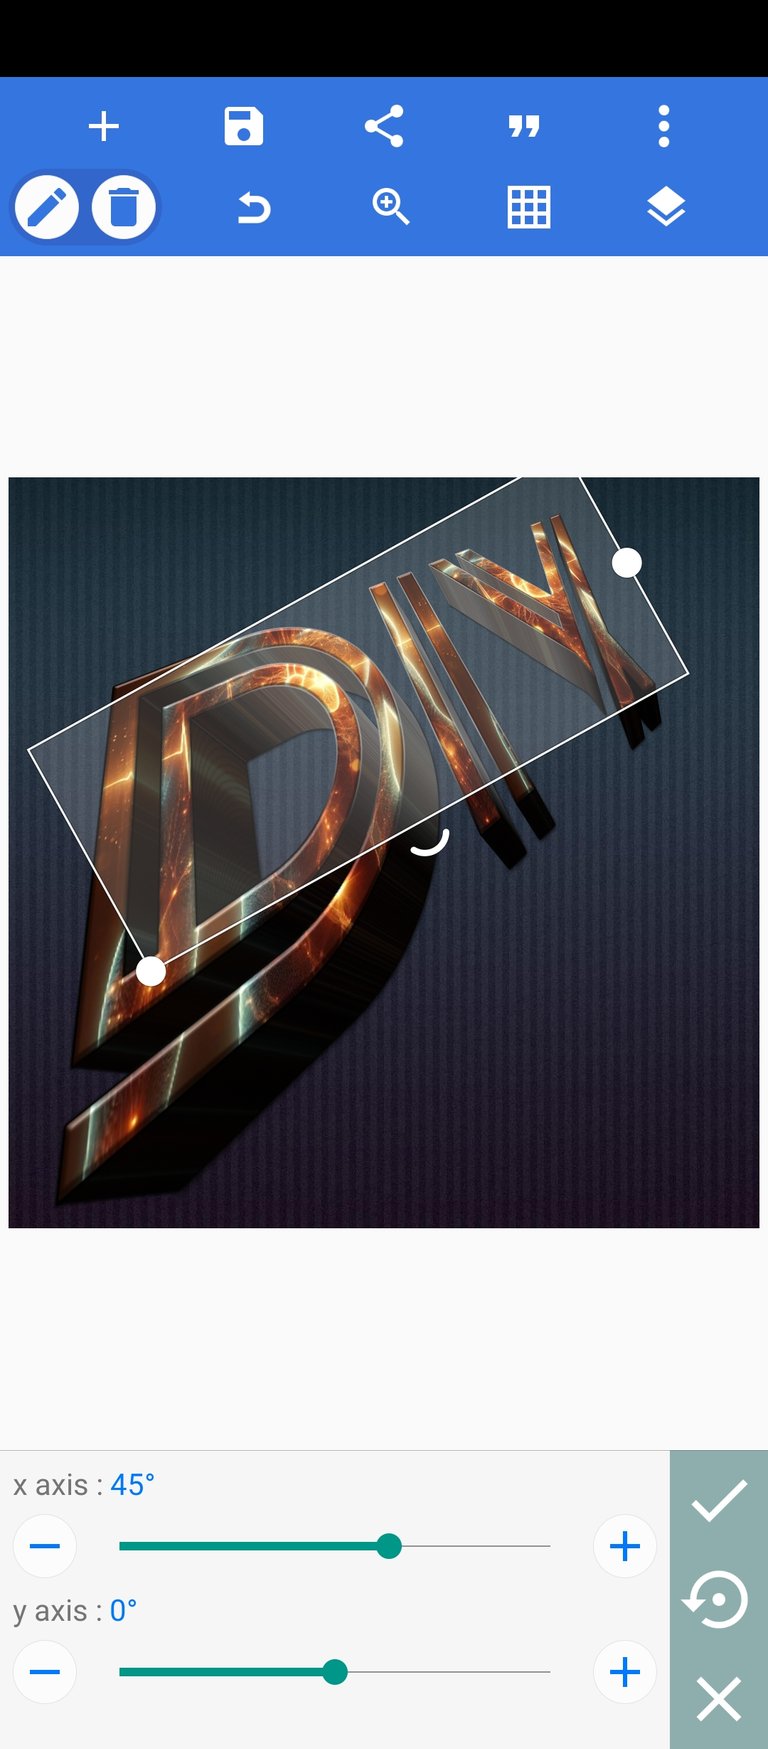
Rotate it using the rotatory point (looks like a small C) on the canvas. This helps you angulate it as seen below 👇.
Then convert to 3D using the 3D option.
- Now it's time to add some cool and aesthetic texture to the fonted text. Select "TEXTURE" at the bottom section of the design interface. It is just between "COLOR" and "OPACITY". Tap it.

- Now for the purpose of this design, once you select "TEXTURE", you should be taken to images in your device. See the screenshot below:
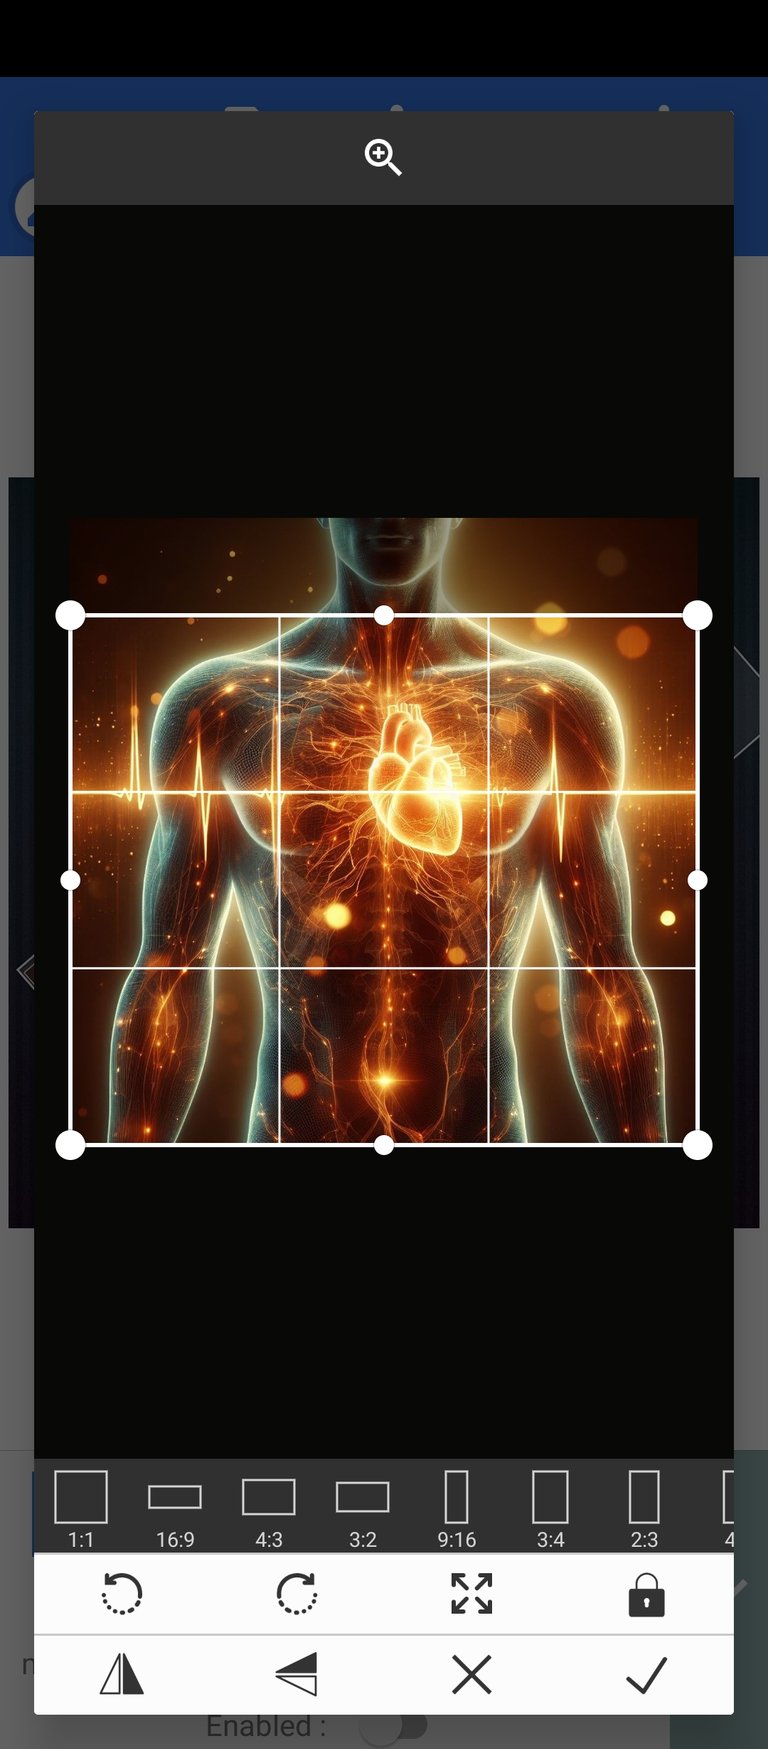
Once taken to your device's images, select an image you would like to use as texture. I selected what you see above.
Once you have selected a texture, select "OK" which is indicated by a mark sign ✔️ and it would immediately be applied to your design.
See the result below:
- Now, so far so good we have succeeded in converting the texture of our text to an aesthetic and cool one and also it is now in 3D dimension.
Let's continue
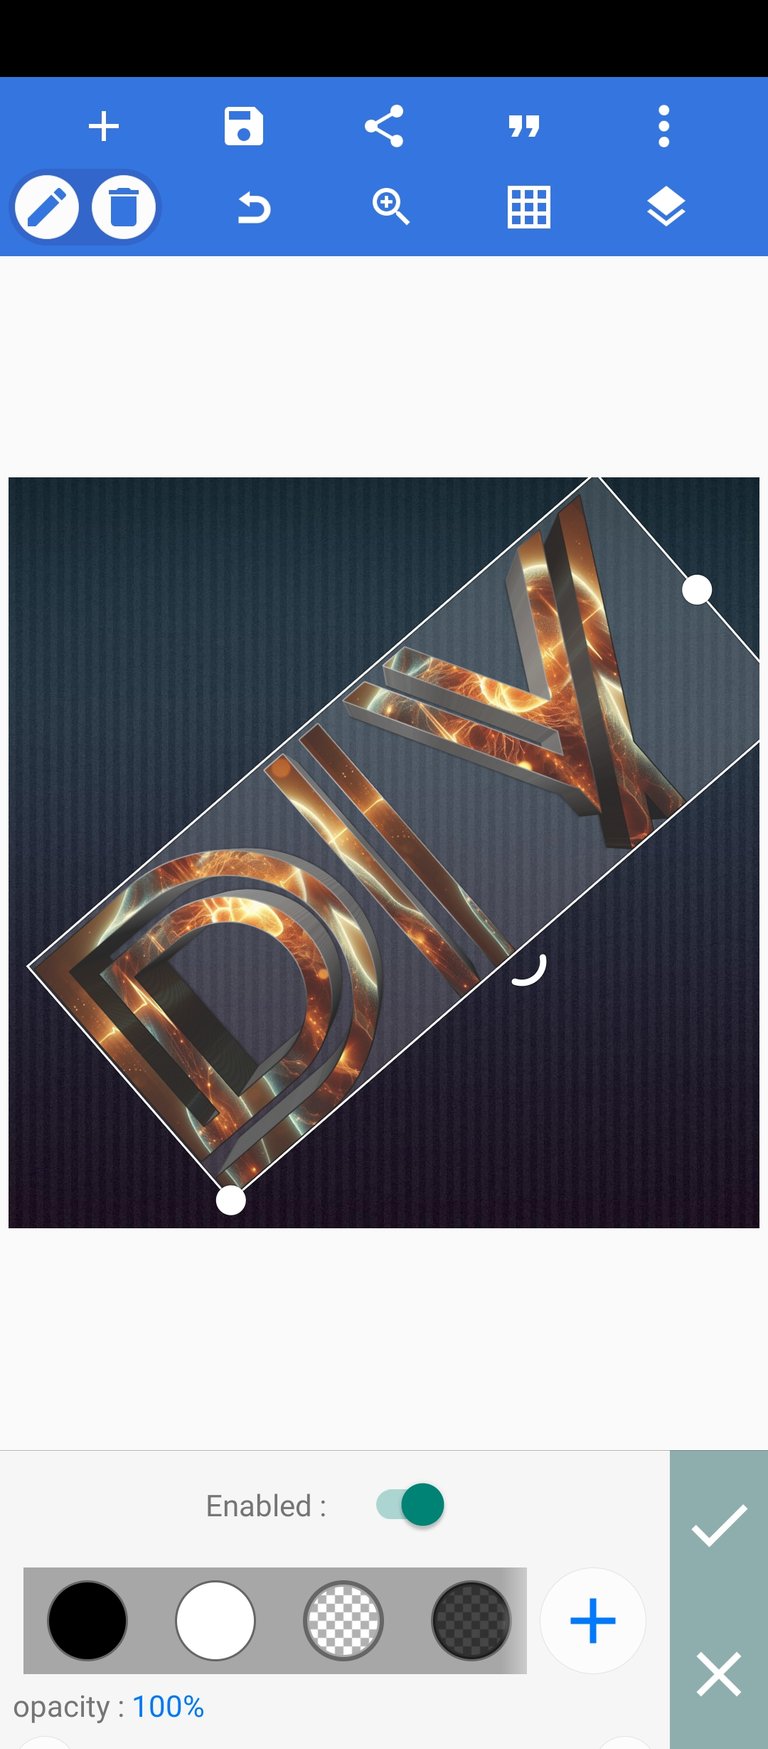
The next thing we need or want to do is add some finishing touches. Start by selecting stroke as seen below, activate it, and follow my screenshots closely.

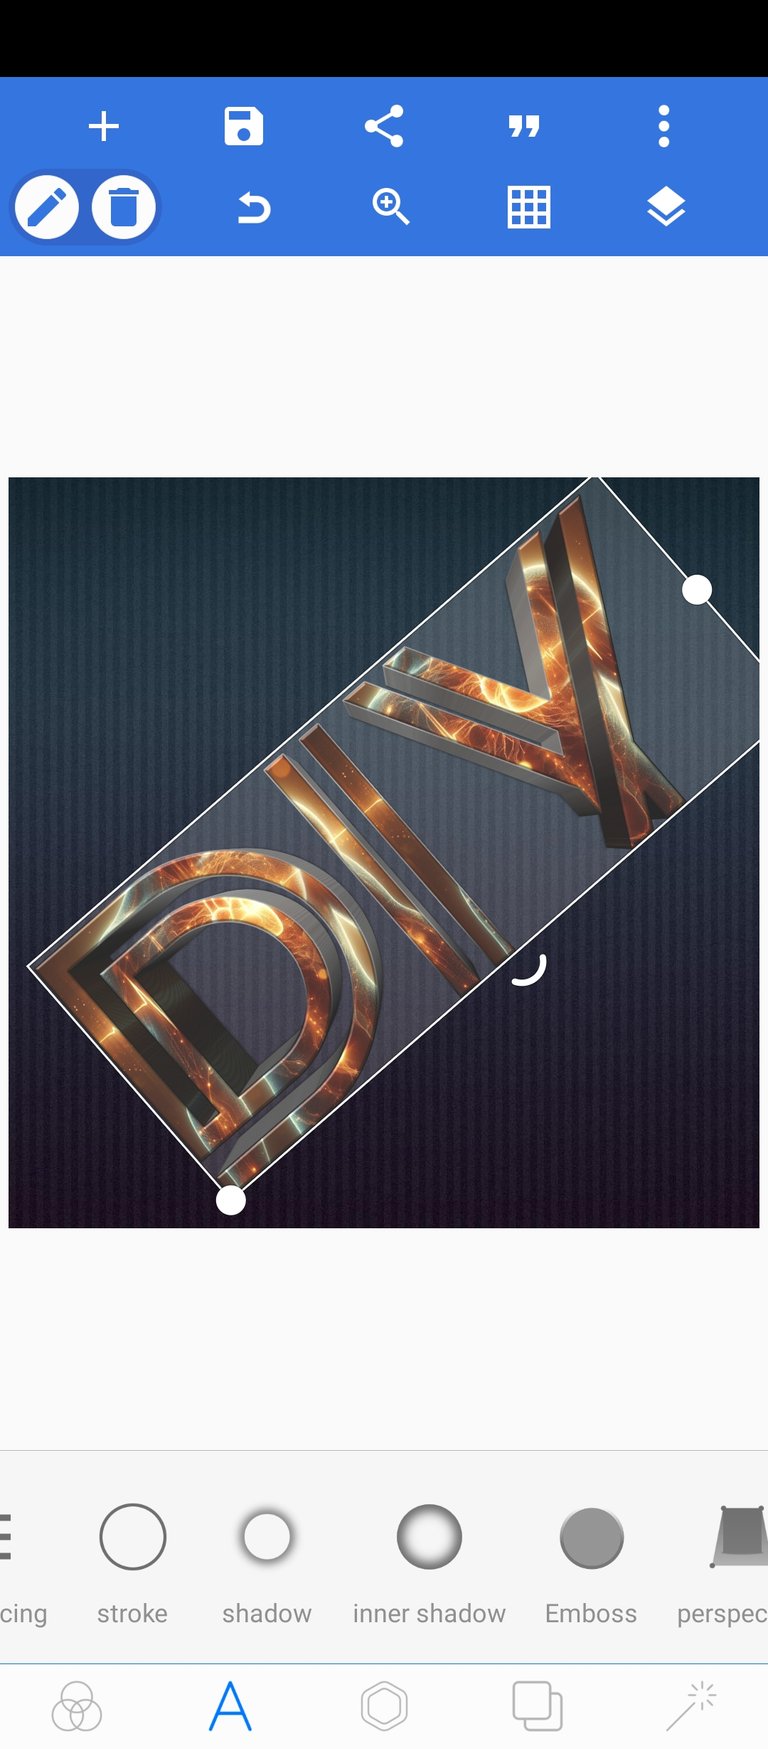
- Then activate the following, in this order: emboss, add your preferred color, shadow, add your preferred color, and inner shadow, also add your preferred color or use a gradient.
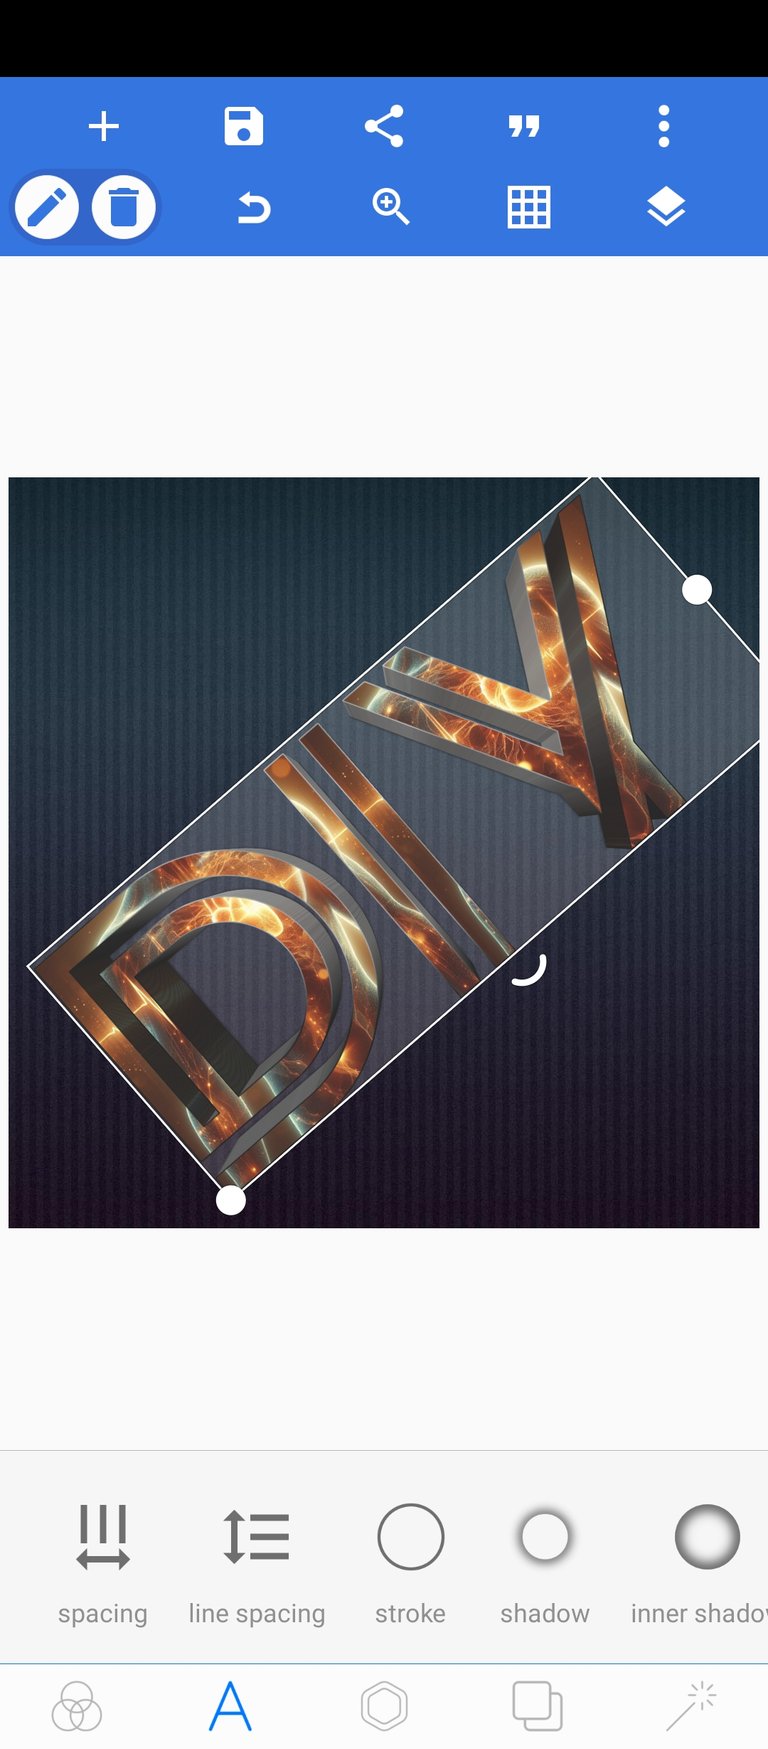

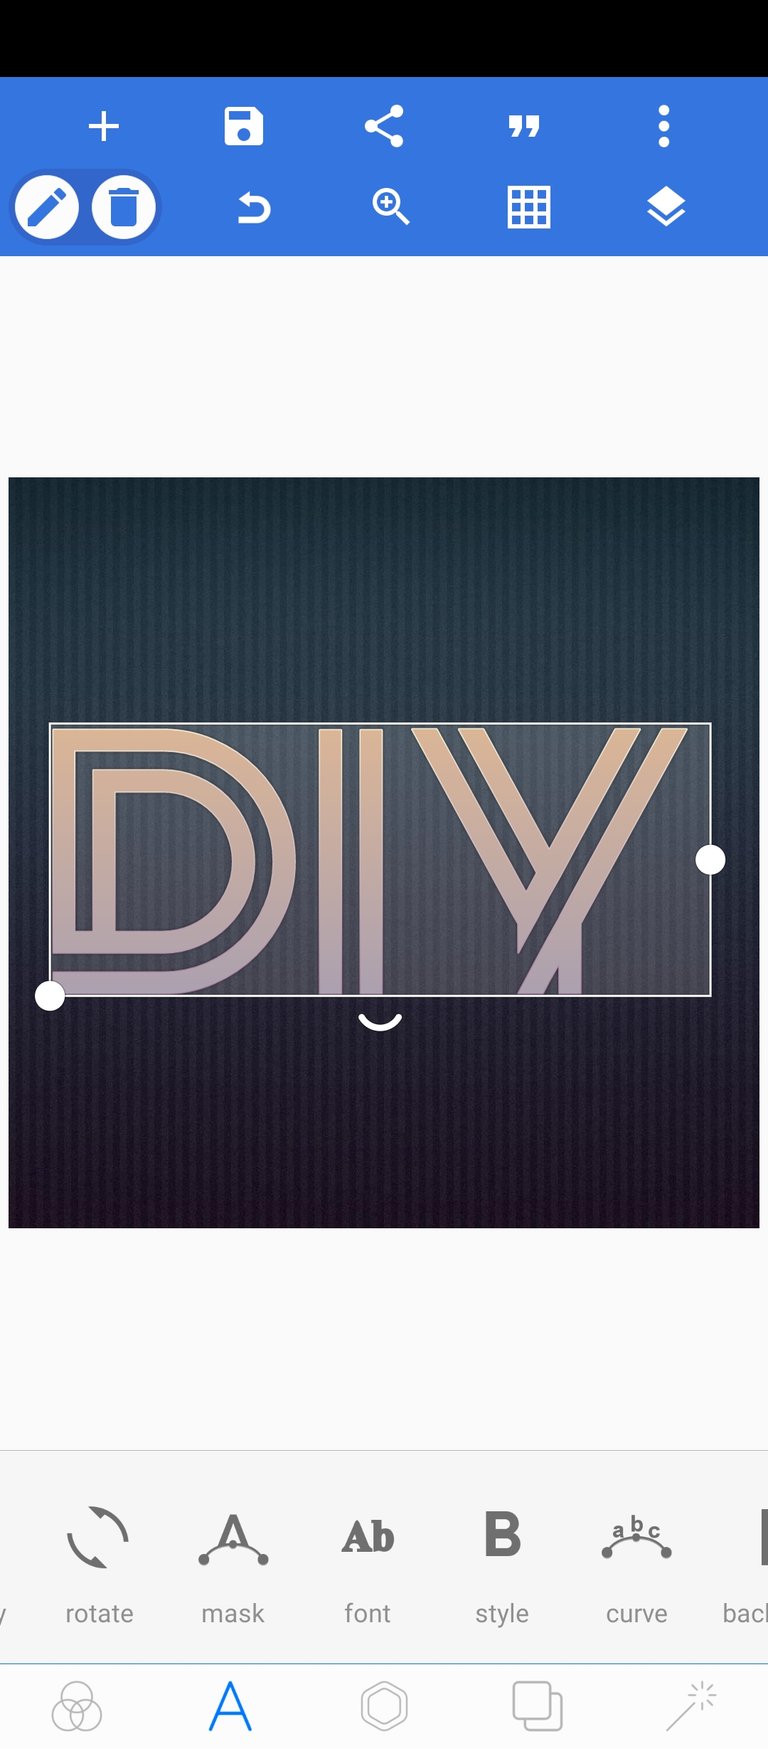
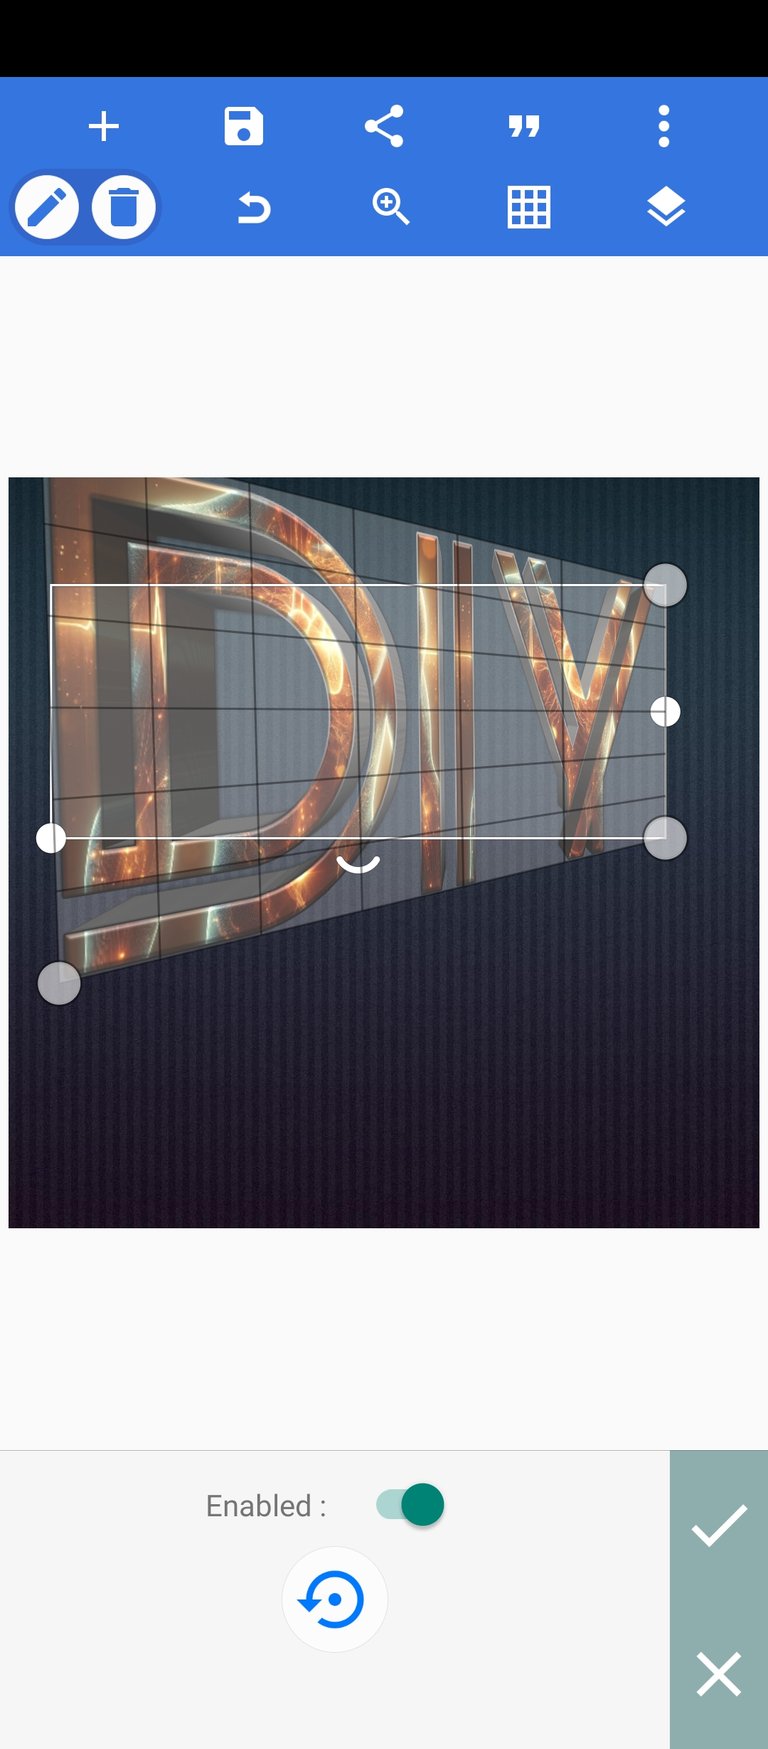
- Once done with the above, go ahead and change the perspective as seen below. Do this by pinching and expanding the sides. Pinch in the side you would like to make smaller and expand the side you would love to make bigger. Here 👇
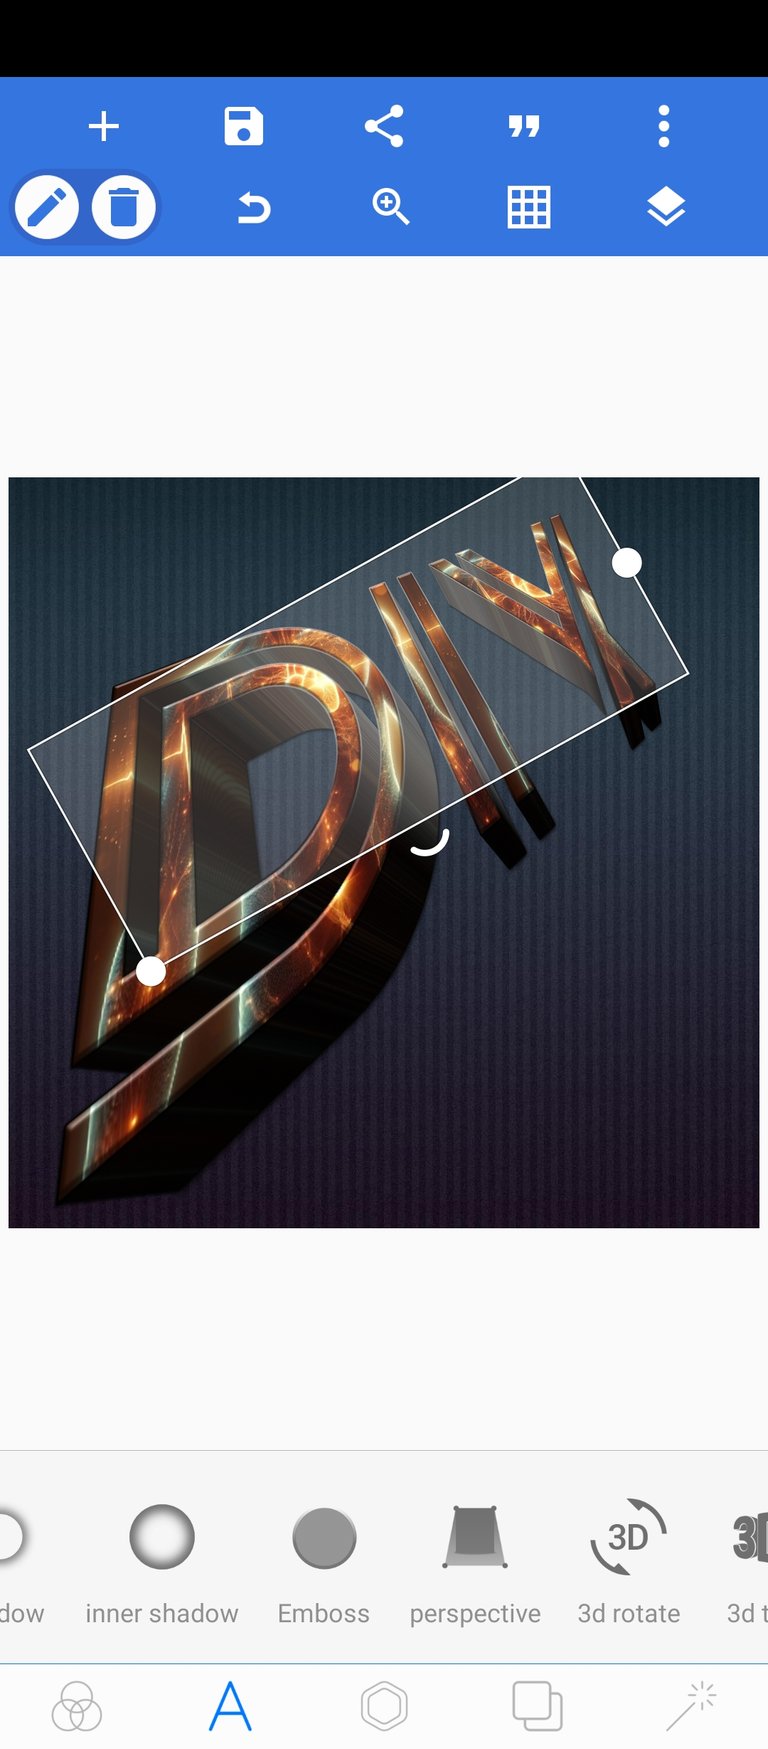
- Then rotate it to angulate it just like before.
- Now we change the background to what we prefer.
- Select the double square below.

- Select images here, then select the image you like to use as a background.
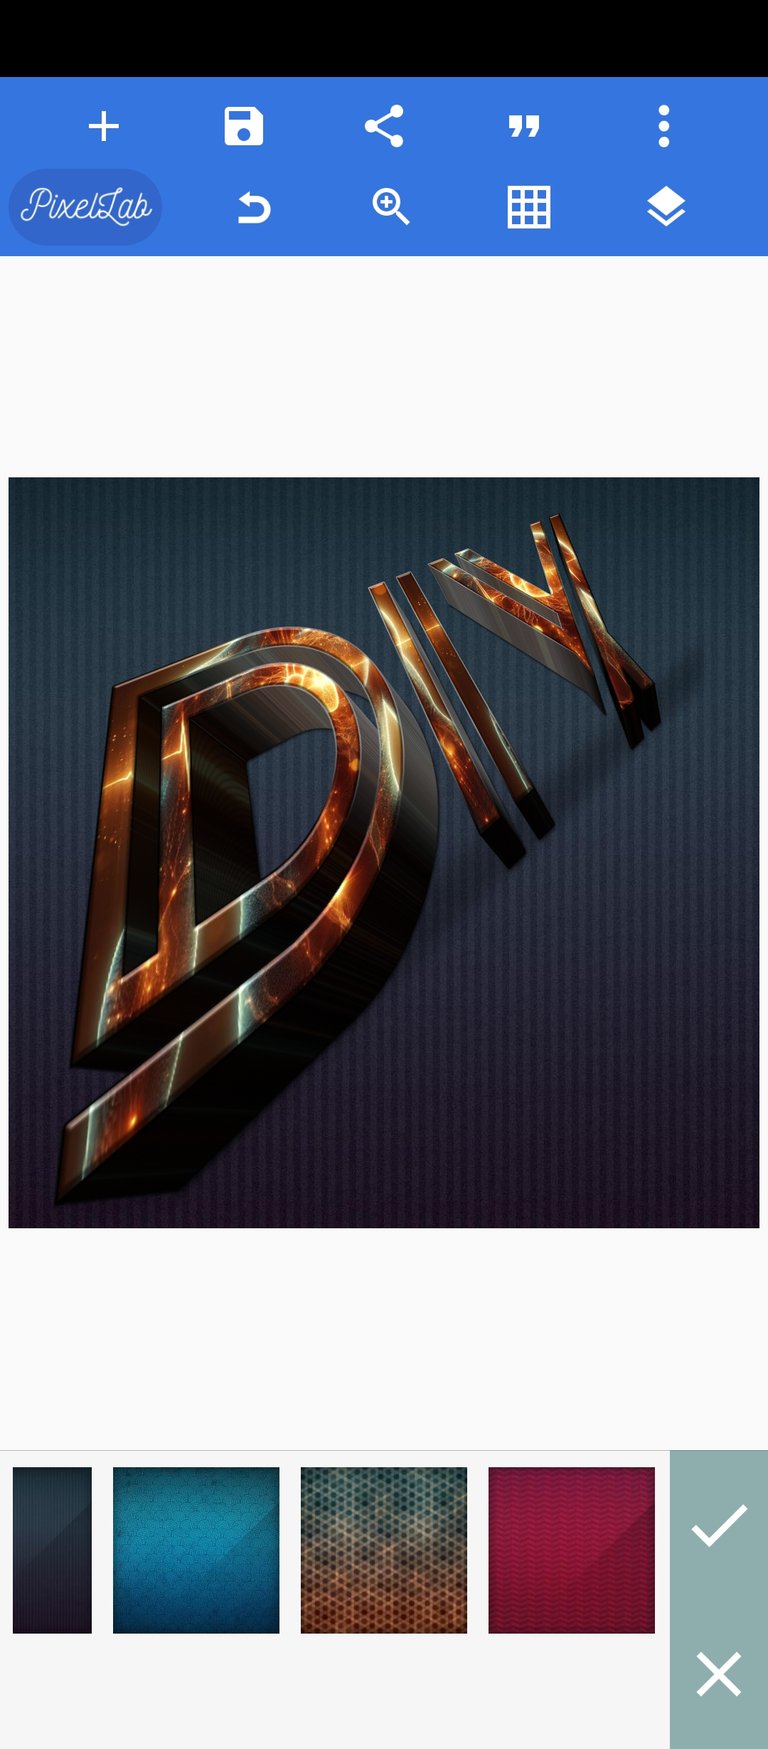
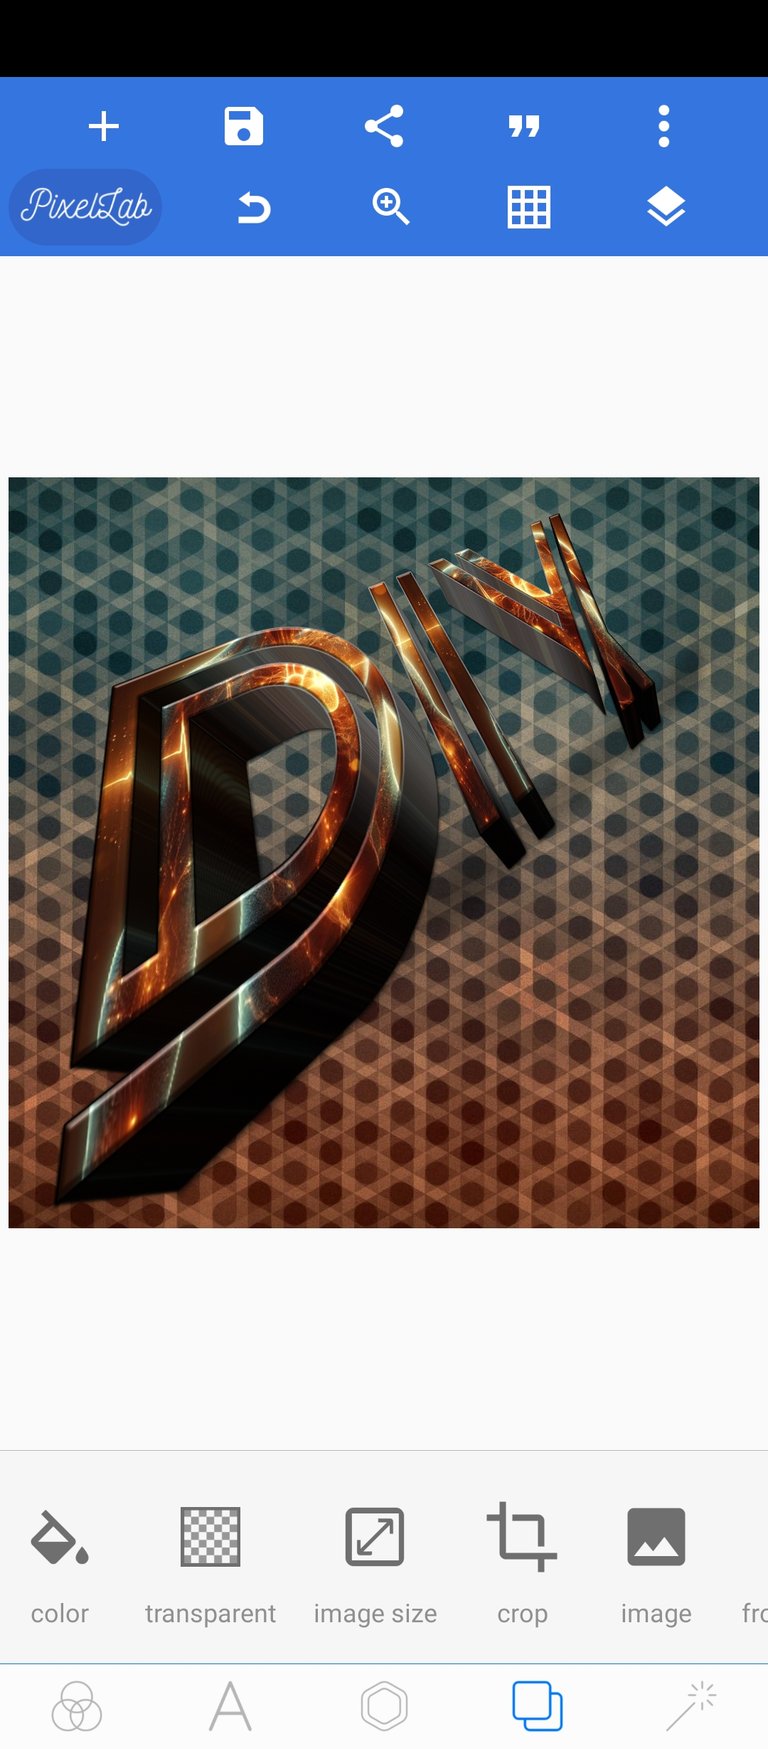
- Alternatively, select an image in your gallery, just like I did 👇
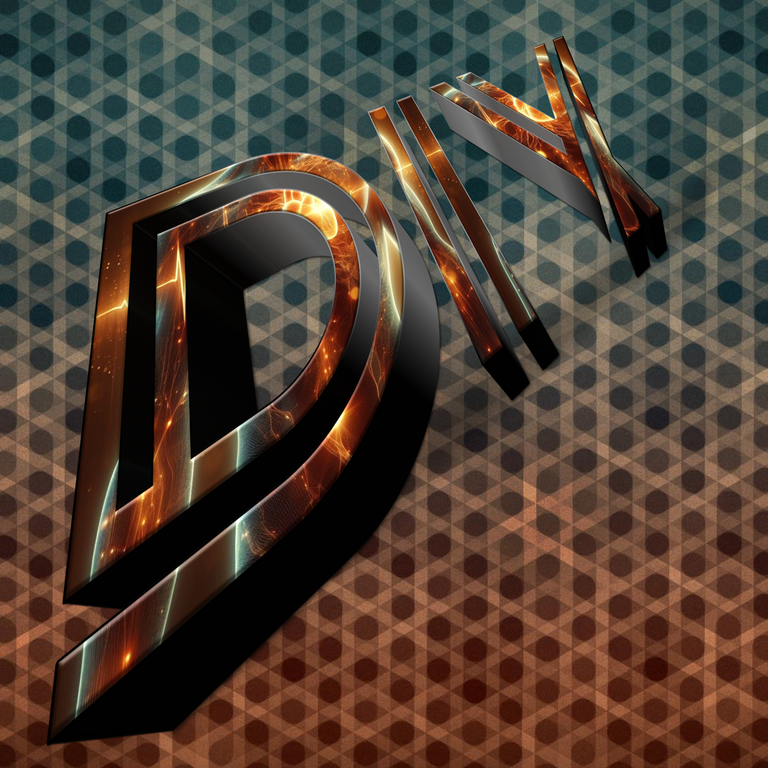
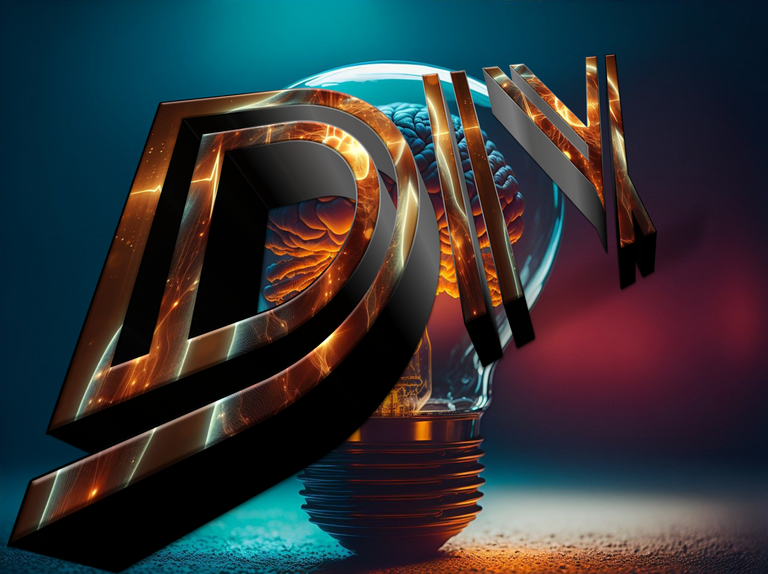
- Adjust it, then you have your final result. You can go ahead and do more adjustments if you like.
Final Results

END OF TUTORIAL
Let me know if you were able to follow through
Credit
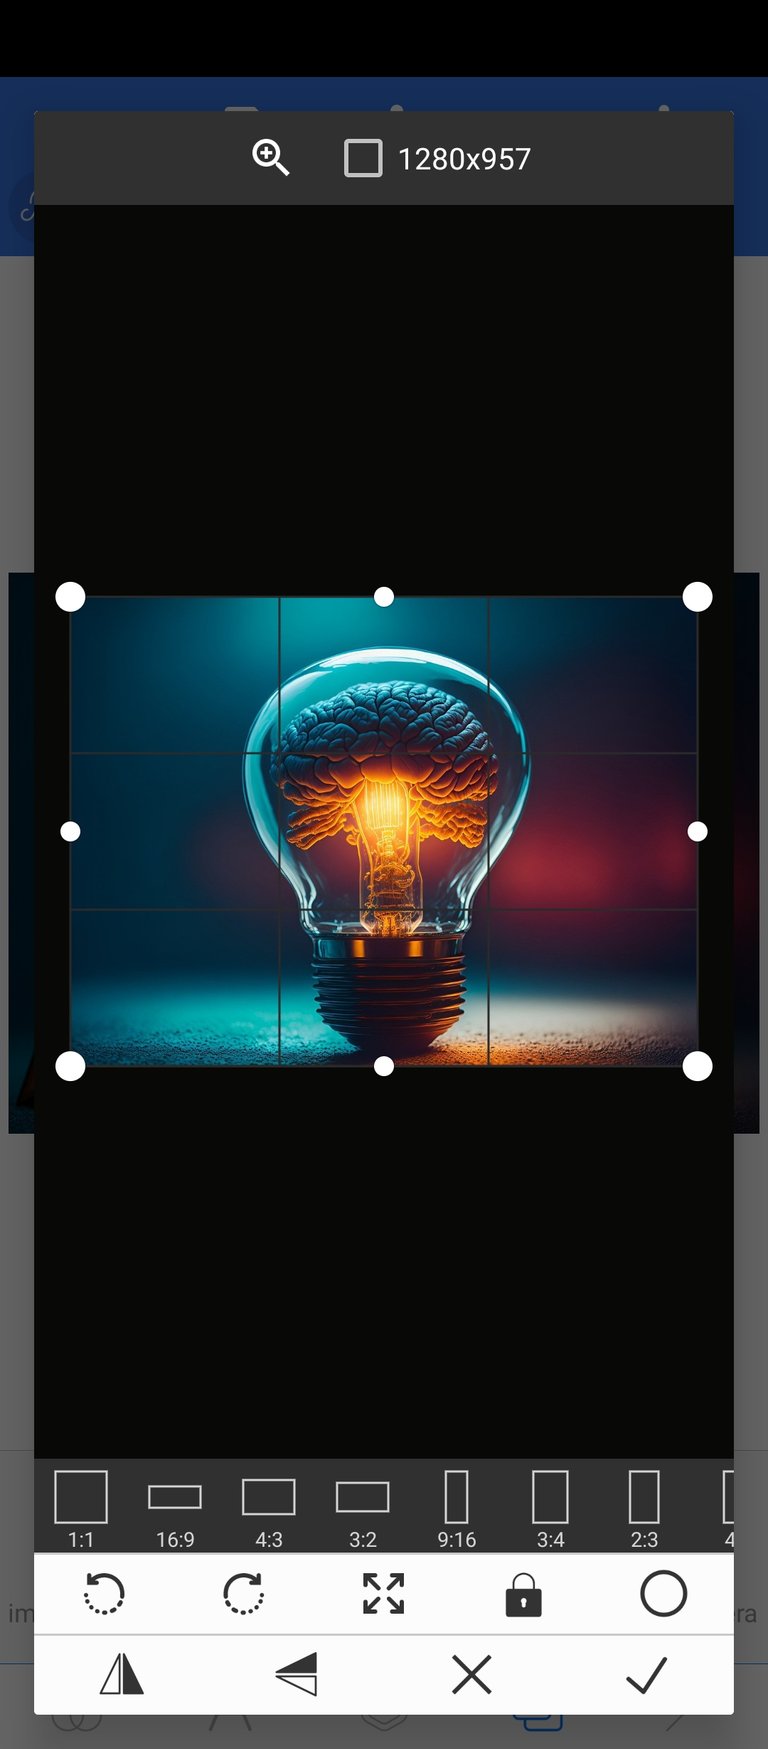
The Image below 👇 used in design was gotten pixabay
