Raspberry Pi Home Automation Part V
In part 4 of this series I shared some pictures of the LED light strips in action and the small relay board that I use when I want to control a device with power that is independent of the Raspberry Pi.
In this post I'd like to share a few screenshots of the webpages we use to control some of the devices and a little bit about how easy it is to install node-red on your Pi and implement these programs!

This is the webpage that I've setup using the dashboard of Node-Red. I just saved this webpage as a favorite on my better half's tablet and phone and she can access it easily! Just touch the buttons to turn the devices on or off. I could easily tie them into sunrise/sunset calculators or weather apps and have them triggered by other events as well.
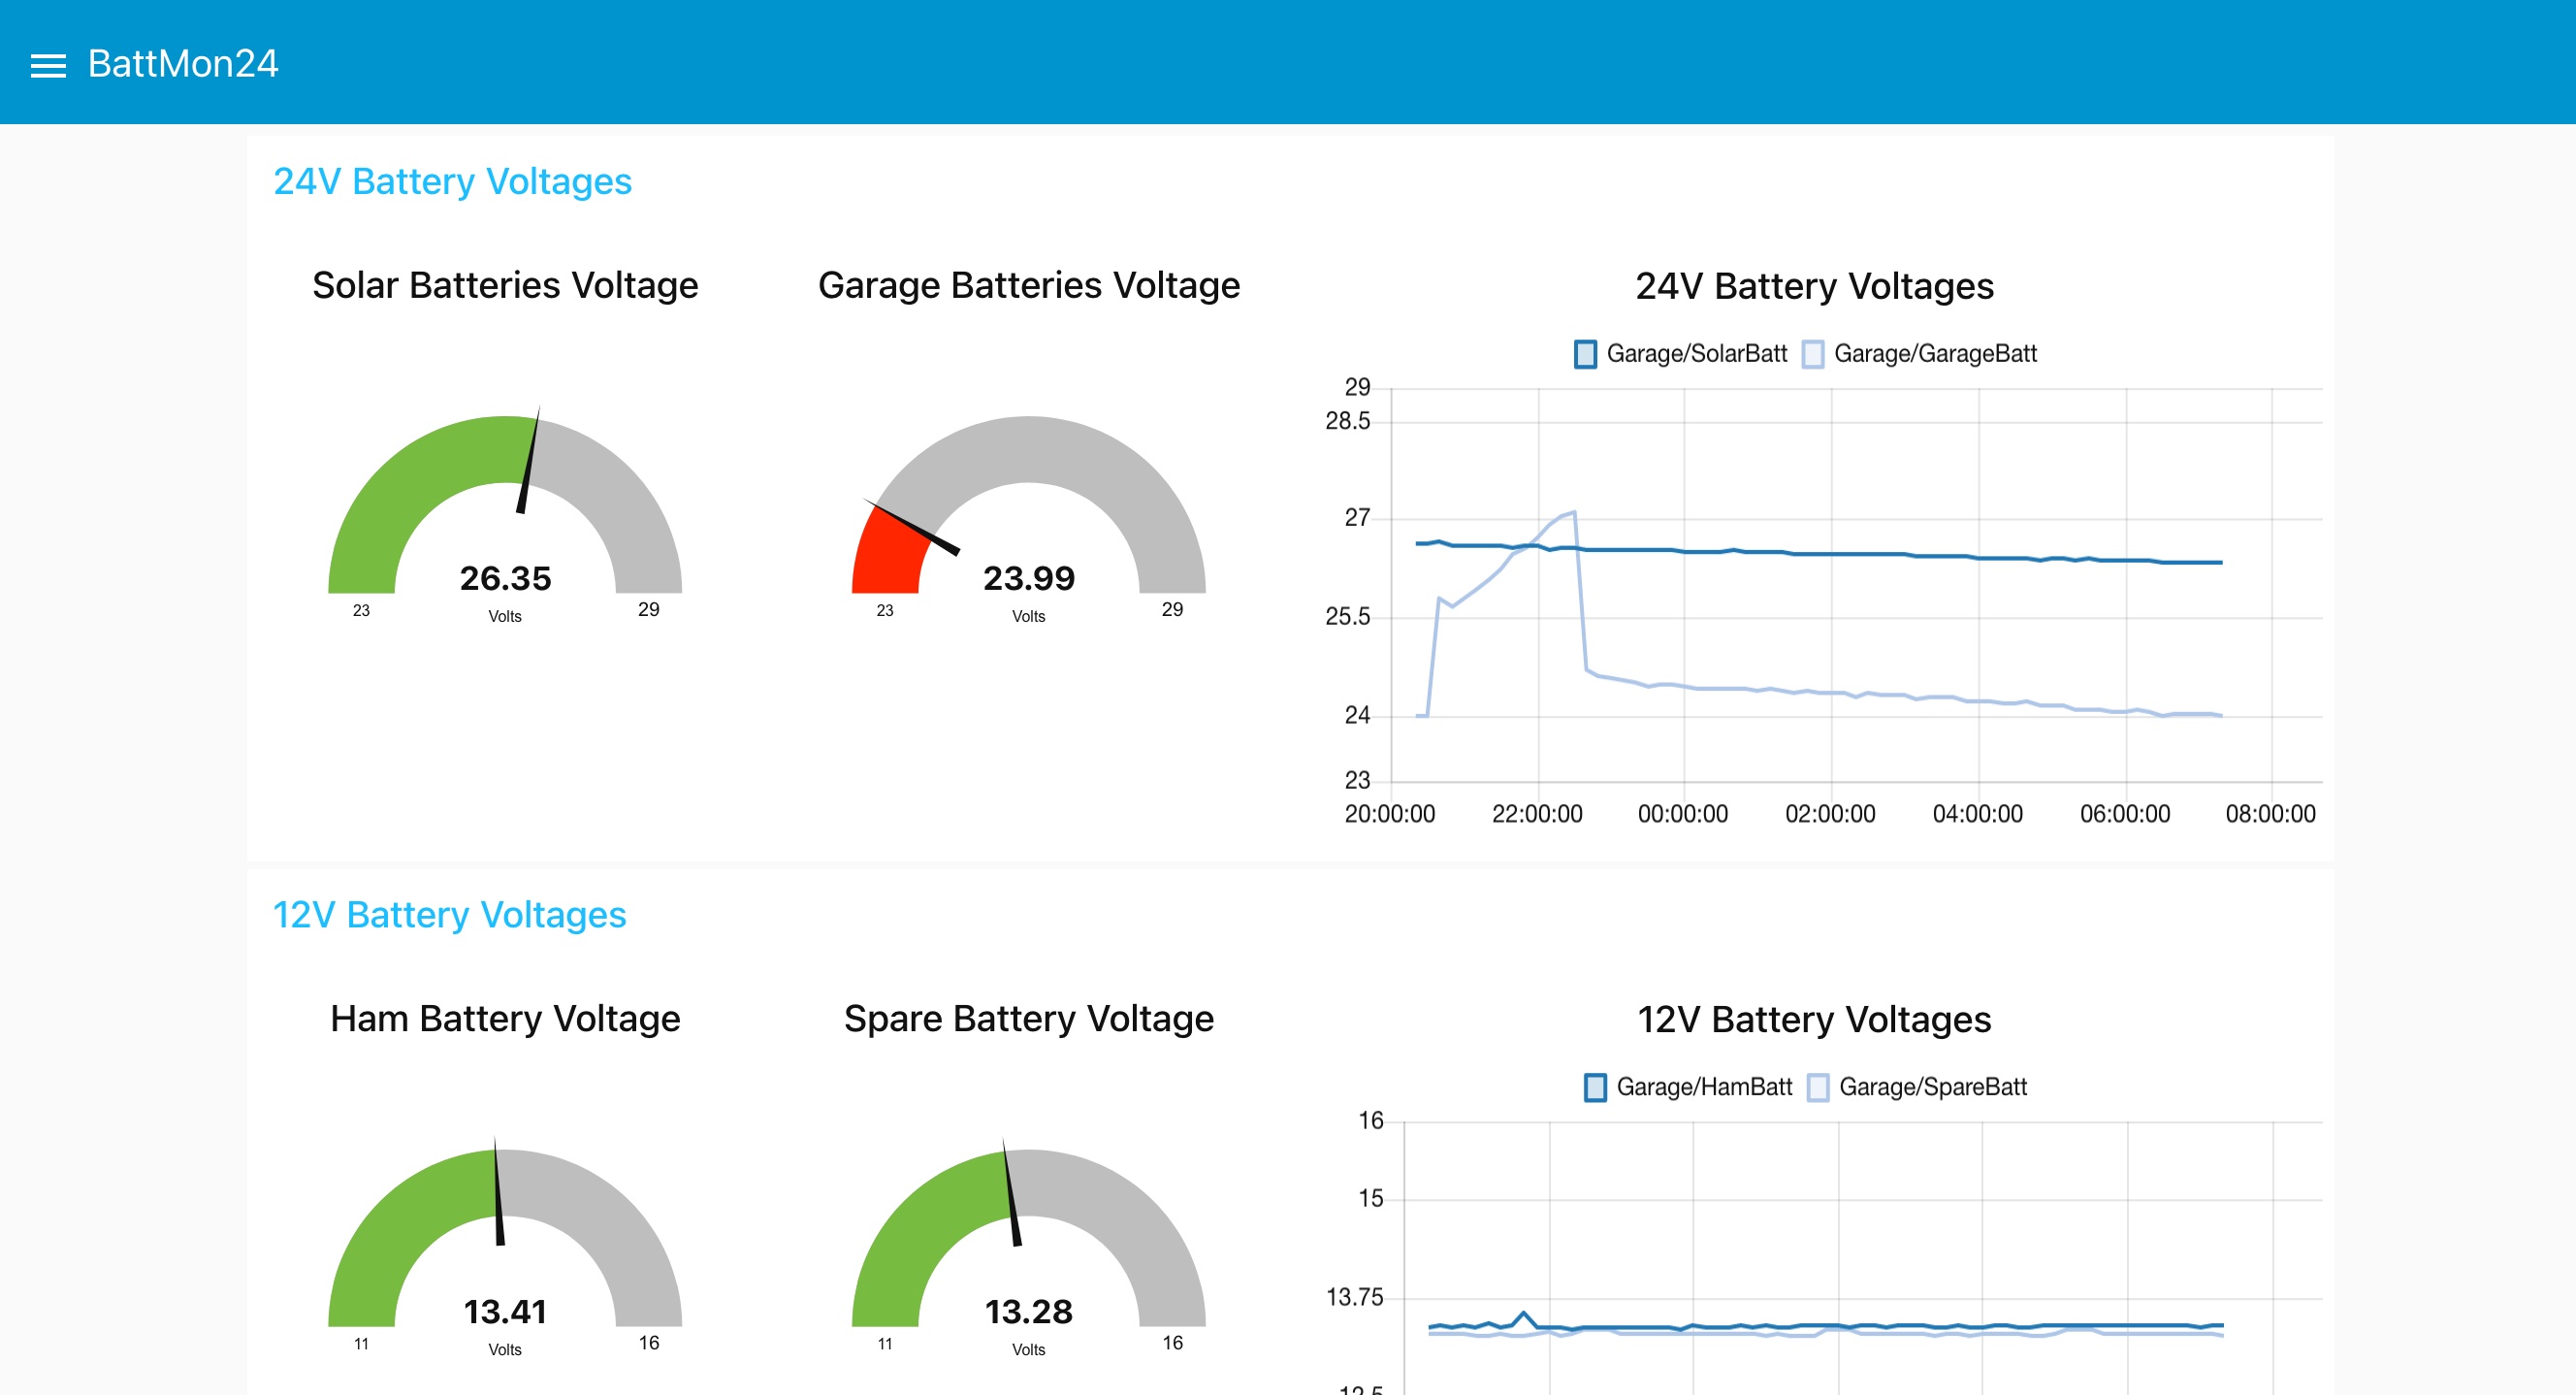
This is the webpage that my Pi battery monitor generates for the 4 sets of batteries in my garage. 2 x 24V Solar sets, and 2 x 12V batteries that I use when mobile with my Ham radio. All batteries are 'normally' charged via solar panels in the back yard, and have battery charges hooked up in case there isn't enough sunlight (or long enough days) to keep them charged up. You can see by the graph that my Garage Batteries are failing (after 15 years) and will need to be retired soon. I have an analogue to digital converter chip (MCP3008) change the analogue battery voltages to digital signals fed into the Pi, since it doesn't have Analogue to Digital capabilities built in. If the battery voltages go too low, as in the case of the Garage Batteries, the Python3 program running will activate one of those small blue relays (as I showed in post III) and turn on a 120VAC battery charger, as in this pic:
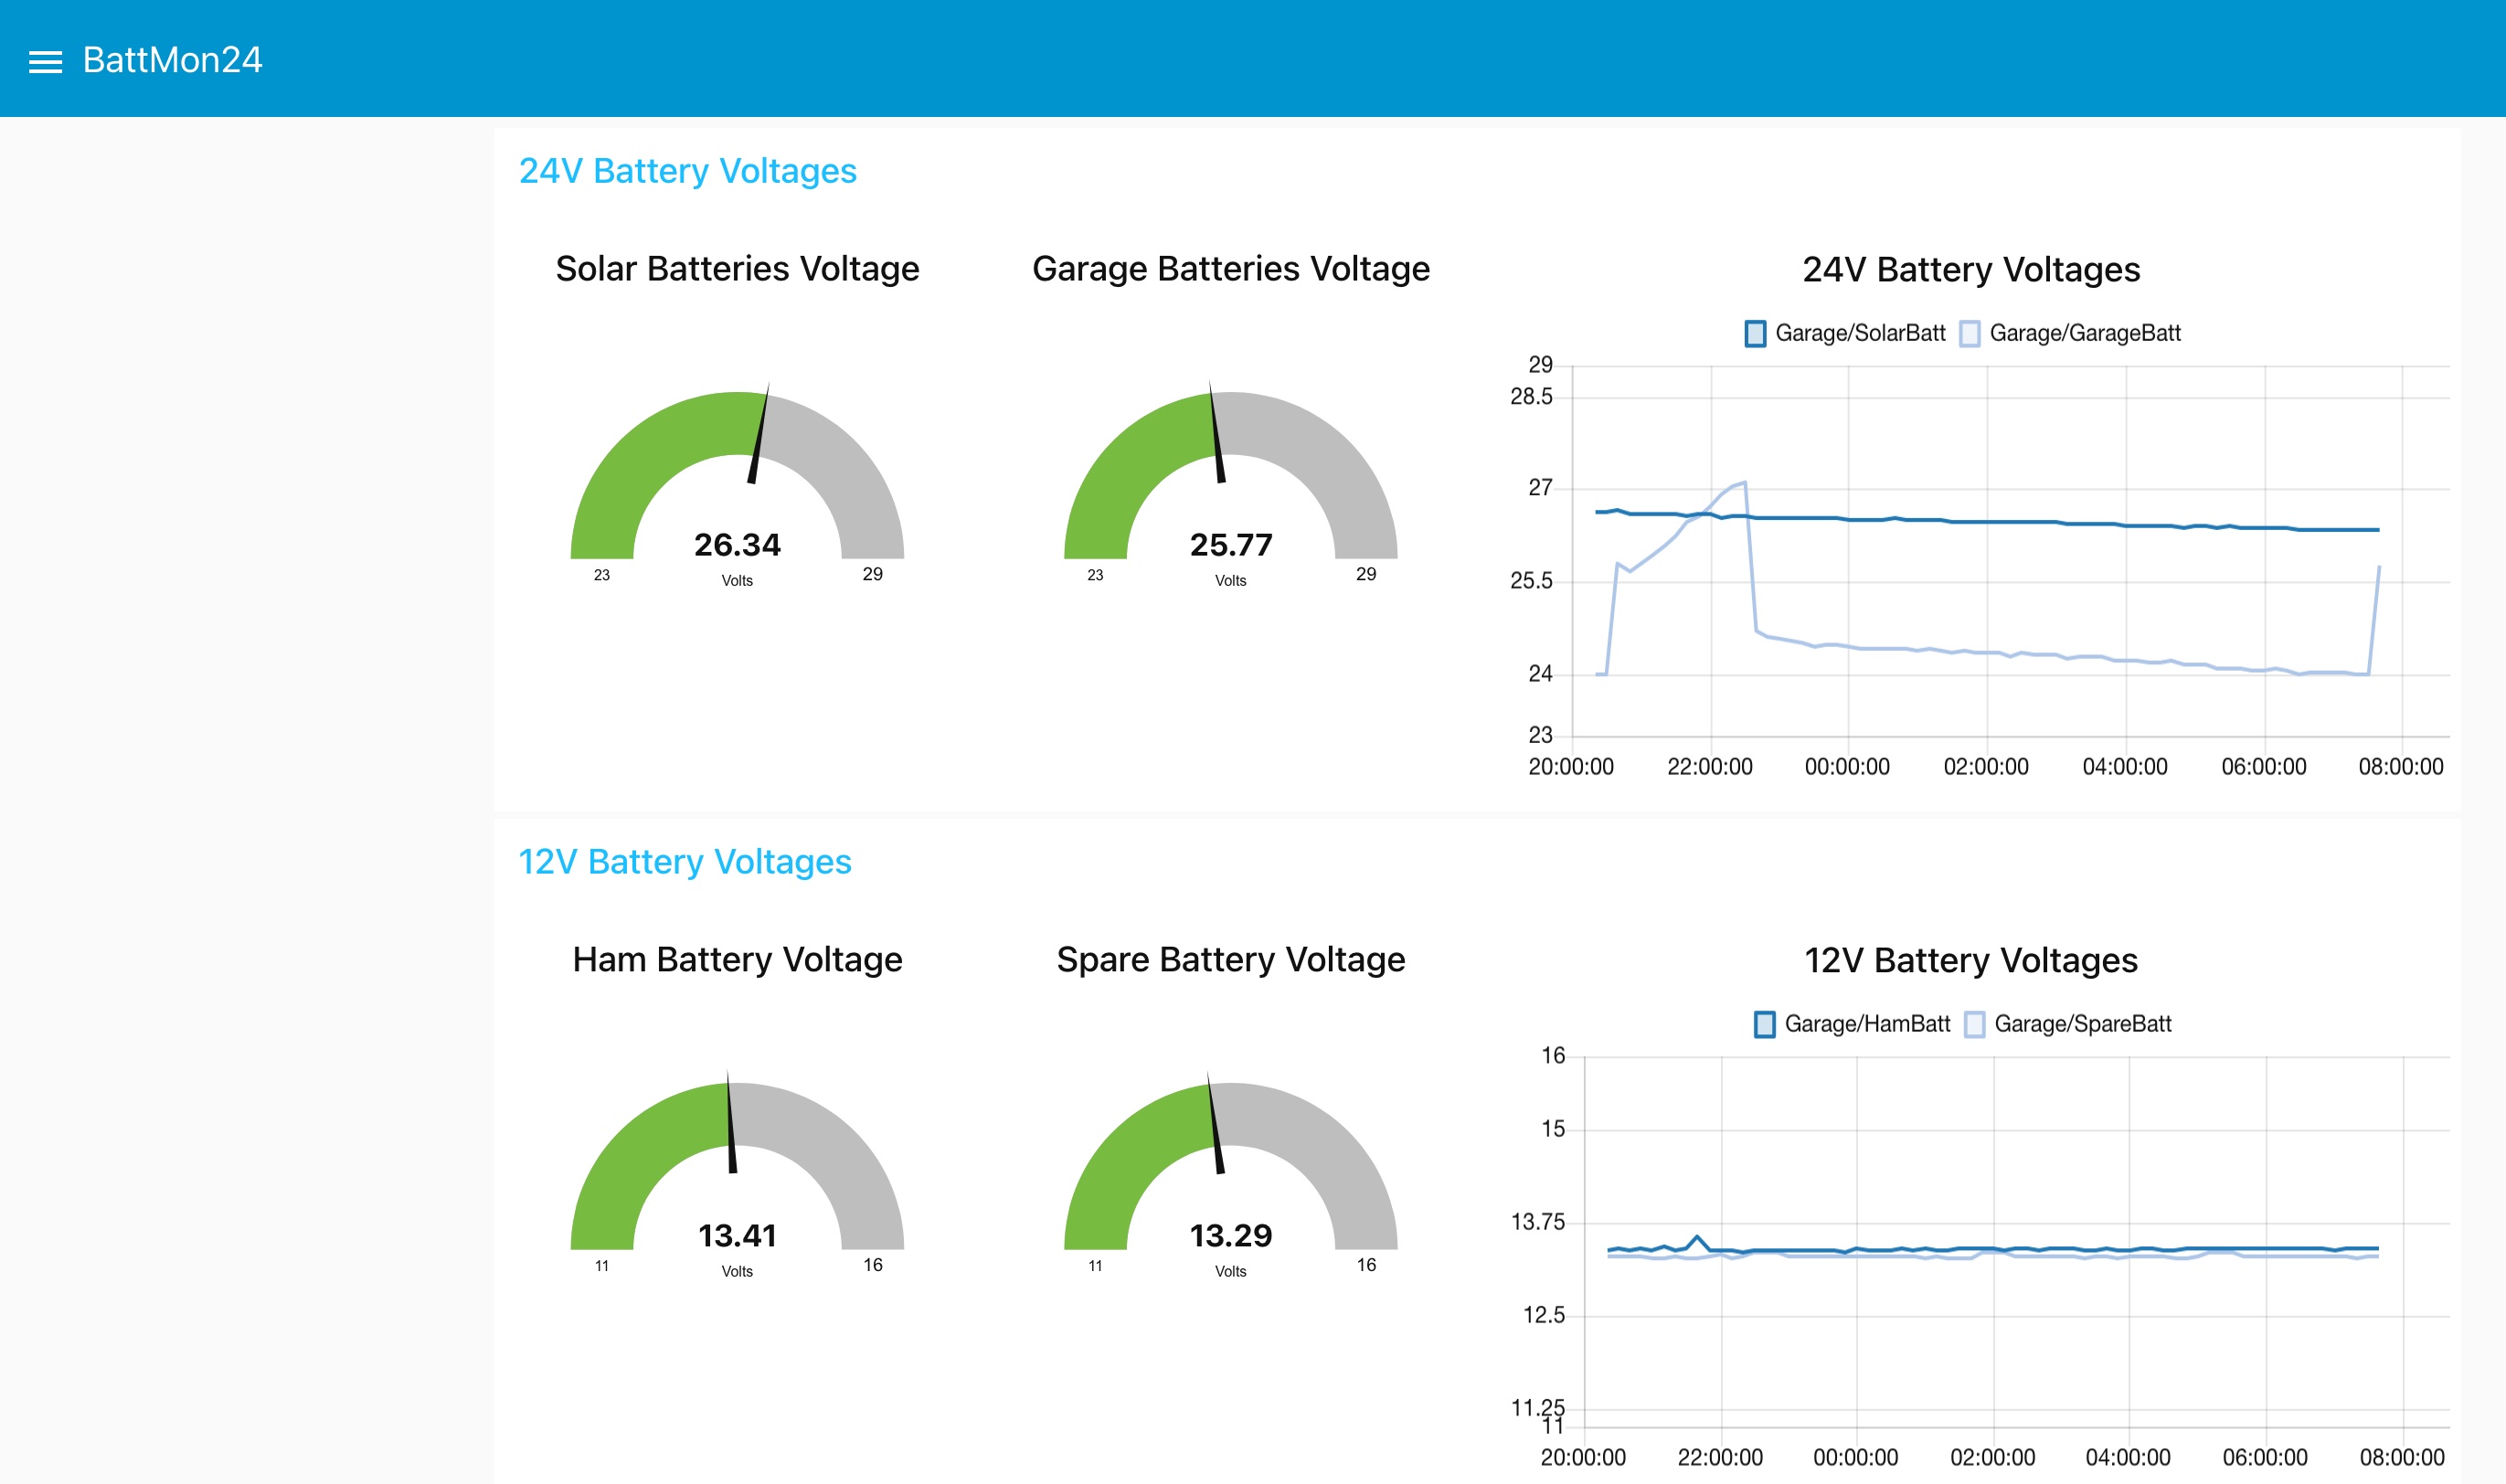
These 2 shots above were literally taken 10 minutes apart this morning and you can see that the battery charger is now on and recharging the Garage Batteries.
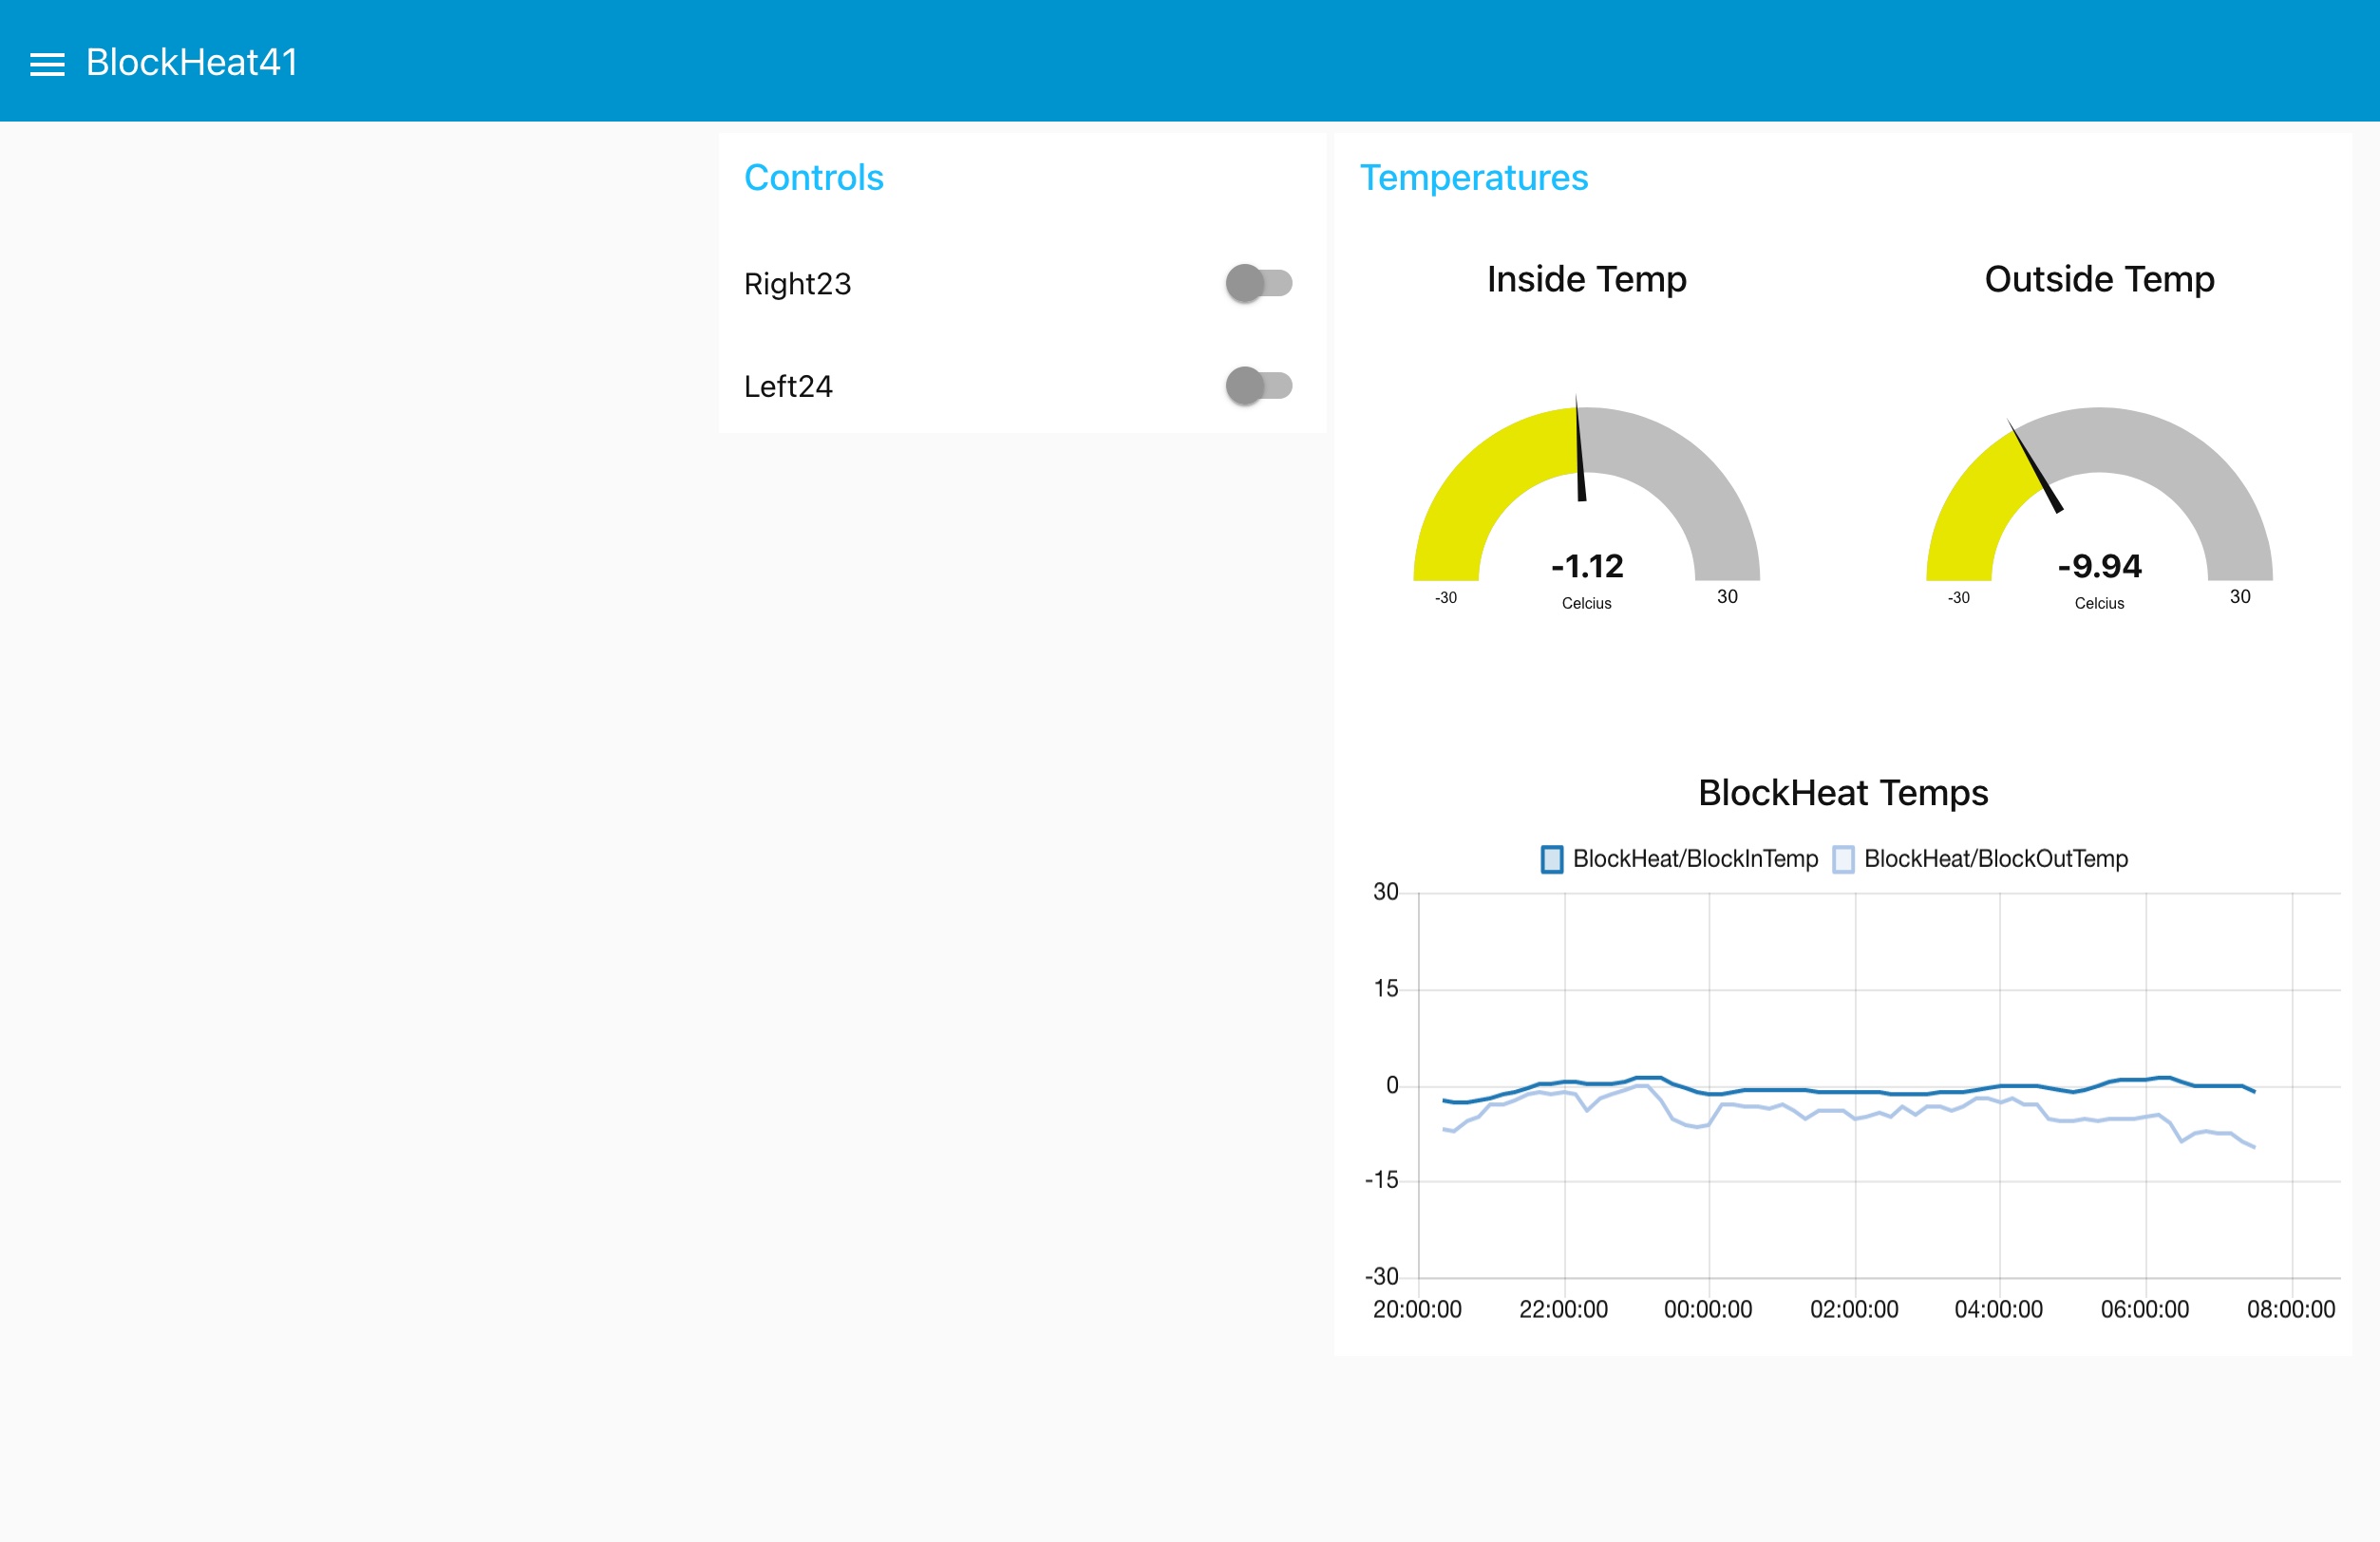
This is the webpage coming off of my BlockHeater Pi controller and shows that you can have measuring displays (gauges & graphs) as well as controls (switches). I use this one to monitor the outside temperature and when too cold (-20C or colder) turn on the power cords to our vehicles to energize the block heaters in the engine to keep them warm so they start easily.
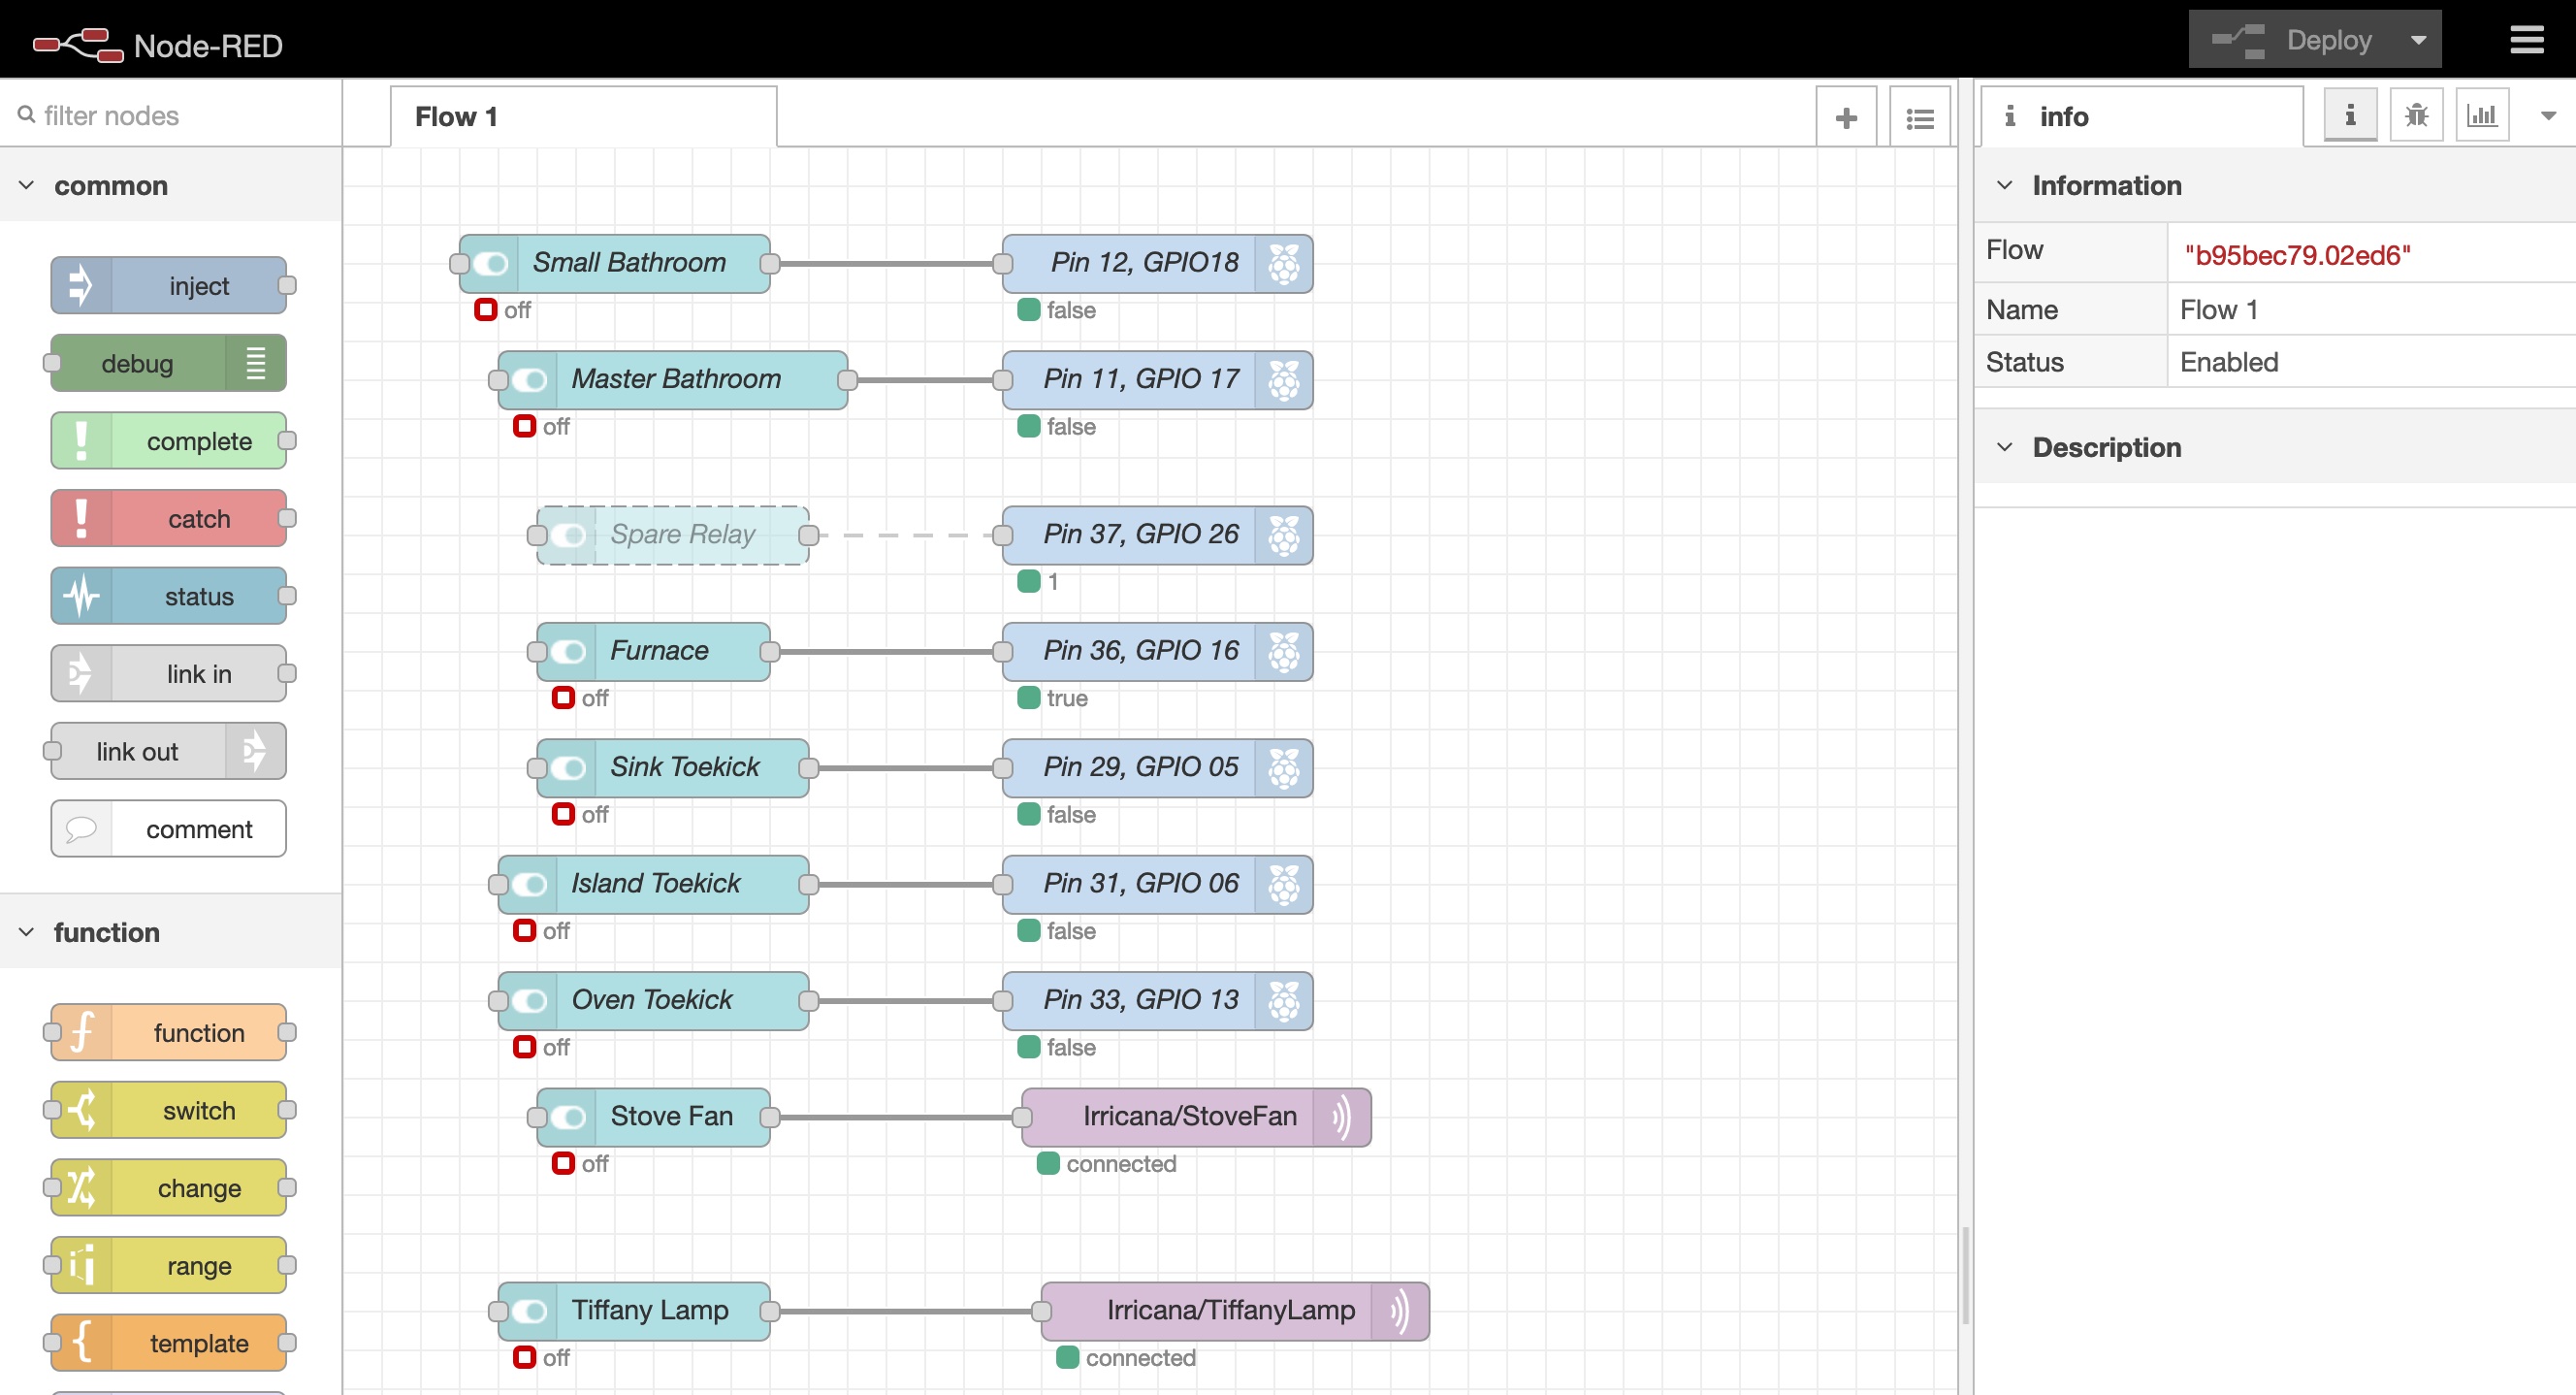
Finally here is a screenshot of the Node-Red flow that I have built for the LED lights and fans in my home. If you look closely, you can see the spare relay #8 node, on the third one down. It is literally this easy to pull the nodes from the left panel, join them together, and then configure them. The pink node on the bottom 2 are mqtt nodes that are used to interface with the Pi ZeroW's that control the 120V fans. Here is the link to the Node-Red getting started webpage and you'll note that they have an awesome set of instructions for installing it on the Pi. It does come with the Raspbian OS for the Pi, but I use the script on the Pi page to upgrade the Node-Red software.

Tomorrow I'll go into where I've used Node-Red and where I've needed to utilize mqtt to be able to control the various devices in my home.
Thanks for viewing!
Robin
Posted with STEMGeeks
Congratulations @robingreig! You have completed the following achievement on the Hive blockchain and have been rewarded with new badge(s) :
You can view your badges on your board and compare yourself to others in the Ranking
If you no longer want to receive notifications, reply to this comment with the word
STOPDo not miss the last post from @hivebuzz:
Have you not put the solar charge controller I sold you into service, or are you not talking to it yet?
I'm not talking to it yet, I was hoping someone might find the pi software they had used to decipher the serial data coming from the controller (hint, hint, grin!)!
I was able to connect my laptop into the serial port, but wanted the pi to be able to poll the data and then for me to be able to utilize it.
It is the charge controller (MPPT) for the Solar Batteries.
The 3 other sets are using MorningStar PWM controllers.
I believe I have found the sd card. I will check and let you know.
Very interesting post wanna make me use it
Thanks! I am continually amazed at what you can do with these small credit card sized Raspberry Pi computers!