Creating content for Tik Tok - ALL MY TOOLS [ENG/ESP]
*This cover was made using Canva and Bitmoji

A few days ago out of boredom I decided to experiment a bit, expanding the platforms I use to create content... Even though I'm a regular user of places like YouTube, Twitter, and Instagram (Apart from Hive), I admit that the idea of dedicating myself to tik tok was very interesting to me, firstly because I really enjoy consuming videos there, and secondly, because I feel that it is a social network where you can grow relatively "easy" with the right approach.
I have always been fascinated by cinema and television, in fact, since my beginnings in Hive it has been the main focus of my blog, I like to review series and movies, analyze why I like it and talk about the expectations I have regarding the things that will be released after.
For this very reason, the focus of my tik tok account was easy to find: use the outline of my Hive posts to translate it into a new format, short tik tok reviews using my narration and trailers or related clips that I found on YouTube.
As someone who has never been involved (at least extensively) in video editing, this meant familiarizing myself with many tools I was unaware of, trying to create decent material, and trying to improve with each video created.
What I wanted to show you today was precisely this, the process that I have used these days from start to finish to create these short videos. In this way you too could begin to know all these useful tools.
1.Write the script (Google Keeps)
I know that saying "script" is a bit pretentious, but this is the best word to describe what I do.
Not every movie or series I watch in my day-to-day life ends up being a video (Or Hive post), but in most cases I at least try to write something.
I have always been characterized by having a very informal style, I talk about my feelings regarding a work and spend little time on technical details of it.
Even before making videos, I always tried to make everything work more like a monologue than a formal book, something that may seem heavy for many, but in my opinion it gives my writing a rather fast pace, something I really enjoy.
Google Keeps is a very simple application but it fulfills its objective, I use it to save my day-to-day information and it allows me to keep all my notes saved in the cloud, an extra backup that you always want in case something goes wrong with your phone or your computer.
After writing the script I proceed to make some adjustments and start to practice reading it aloud, at first this is a bit strange (and it makes me a bit embarrassed) but progressively I've been adapting. Having a script with which I feel satisfied, I proceed to record.
2.Record my voice. (Xiaomi native recorder)
At the moment I haven't dared to show my face, but later I plan to do it... This means that I only have to worry about recording my voice.
There are many applications for this, some native to our phones and others from third parties that we can find in the App Store or Google Play, as I am starting I have not invested much in this aspect yet, but I know that there are multiple decent options on the market, both applications and software and microphones.
I usually save each paragraph of my script to a different file, this makes editing easier and gives me a lot of room for error, asking me to rewrite the last paragraph every time I make a mistake, and helping me regulate my breathing (something I struggle with a lot ).
After this I export all the recordings to the internal memory of my phone.
3.Edit my voice. (Supersound)
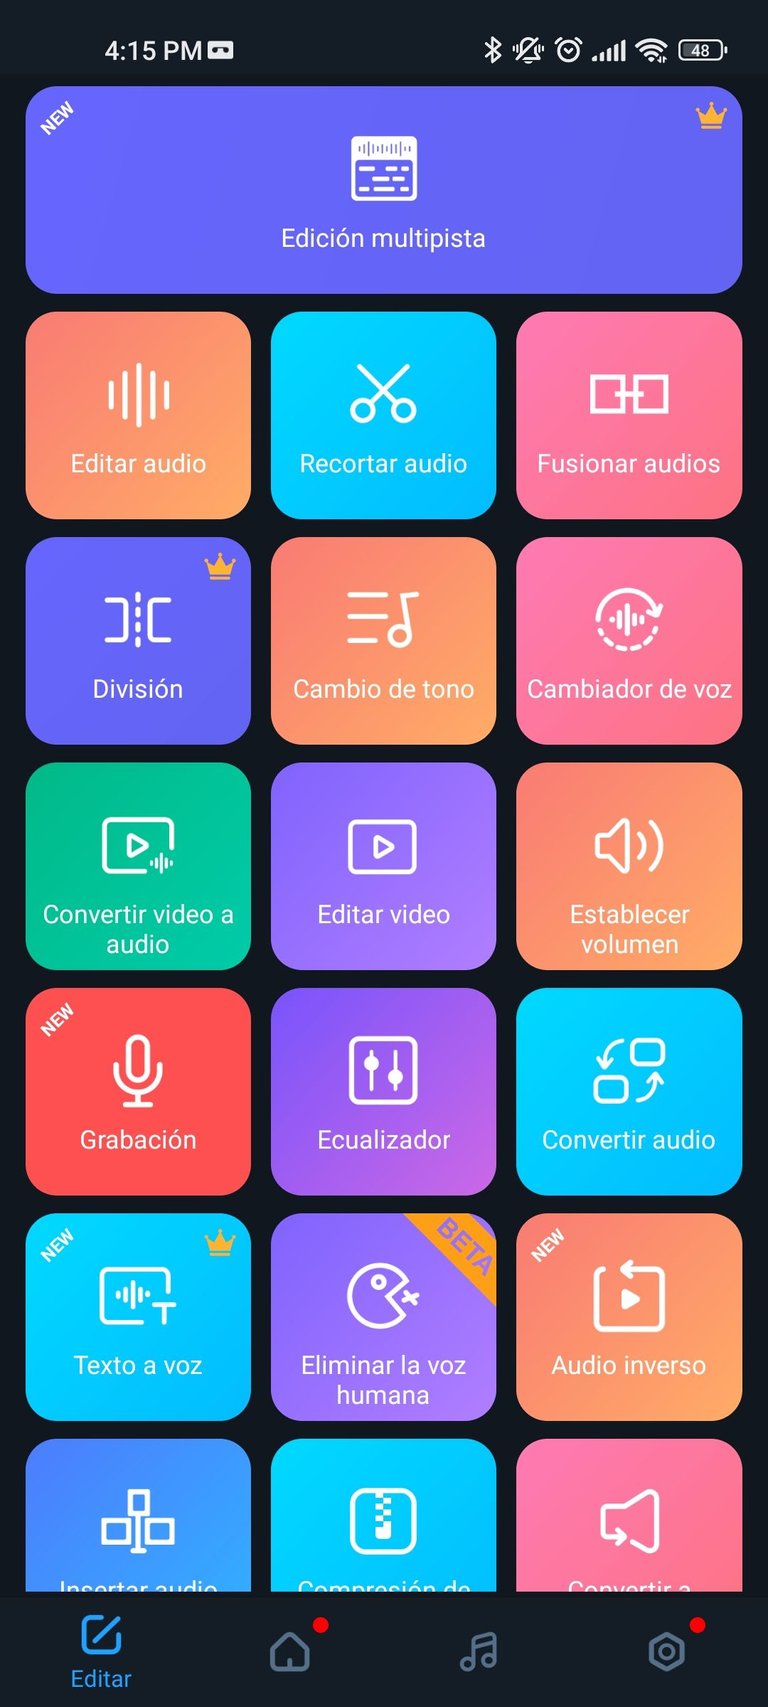
I've been using this application for a short time but I feel very satisfied with it, it allows me to gather all the recordings and cut out those fragments that don't work for me, exporting everything in the format I want.
I used to use YouCut for this, but ended up feeling it was more useful to have a separate audio editor, which is something I definitely recommend.
4.Improve the quality of my audio recording with artificial intelligence. (Adobe podcast)

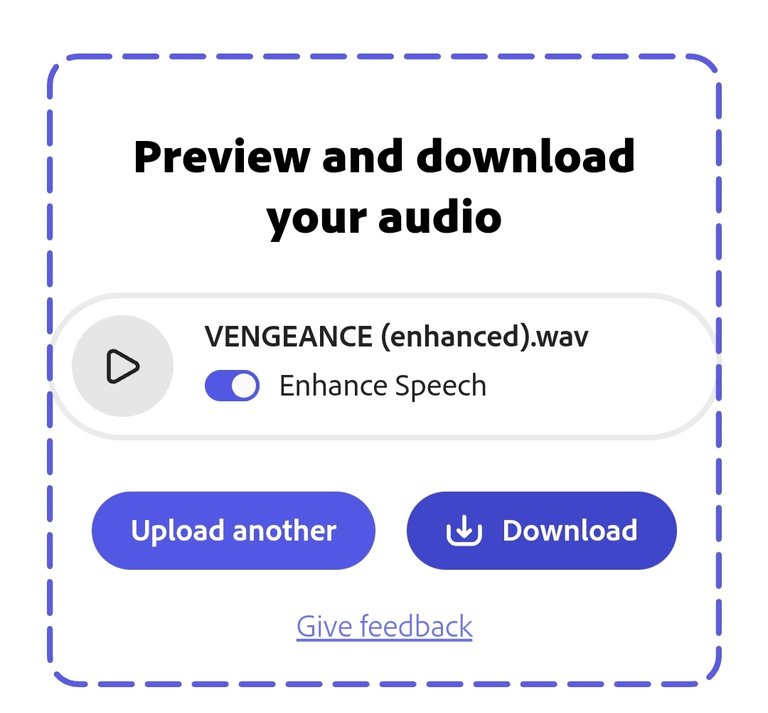
I know this step will be particularly helpful for many, although the microphone quality on my phone isn't terrible, it could certainly be improved a lot with quality hardware... However, AI can help us with this.
Adobe Podcast is a free platform to which we can upload our files, it will improve the audio quality and make our voice heard clearer, something essential if we do not have professional equipment.
Investigating a lot about it, I have found that the audio quality is even more important than the image quality, for this very reason this step has become essential in my process.
5.Get the clips.
Here I feel that I cannot go into details, there are many platforms that can help us find these clips, and due to the transformative nature of my content it all falls under fair use. Personally, the trailers are very helpful, since they are short and have multiple scenes that convey the essence of any series or movie very well (In most cases).
6.Join the clips with my audio. (YouCut)
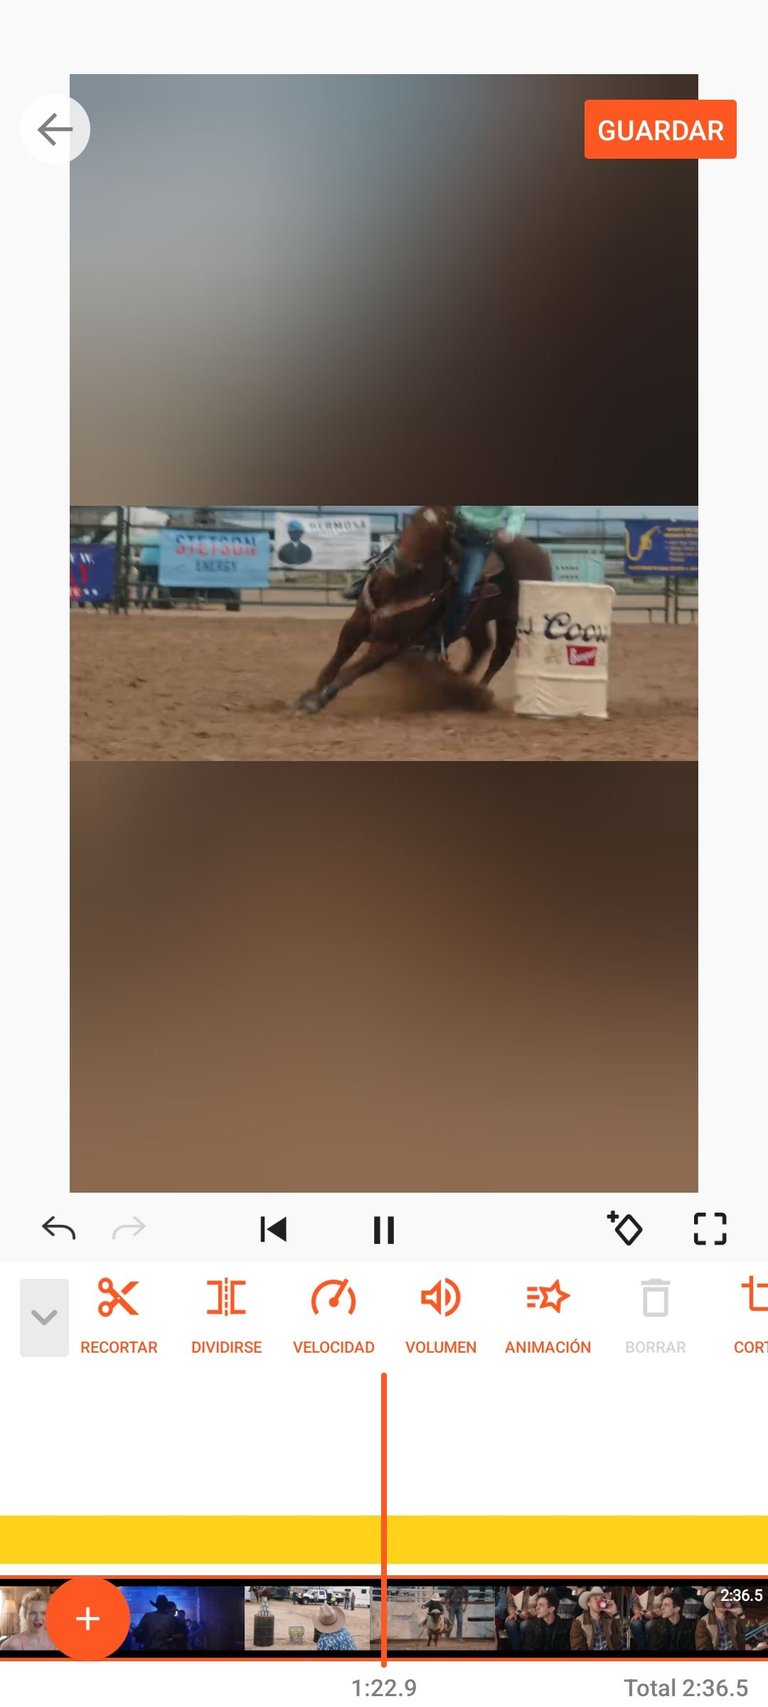
There are many great video editing apps out there, I've come across Capcut, Filmora and more, however at least I've quite liked YouCut for now, here the procedure is simple: add my enhanced audio, remove volume from clips , and I match the times of both things.
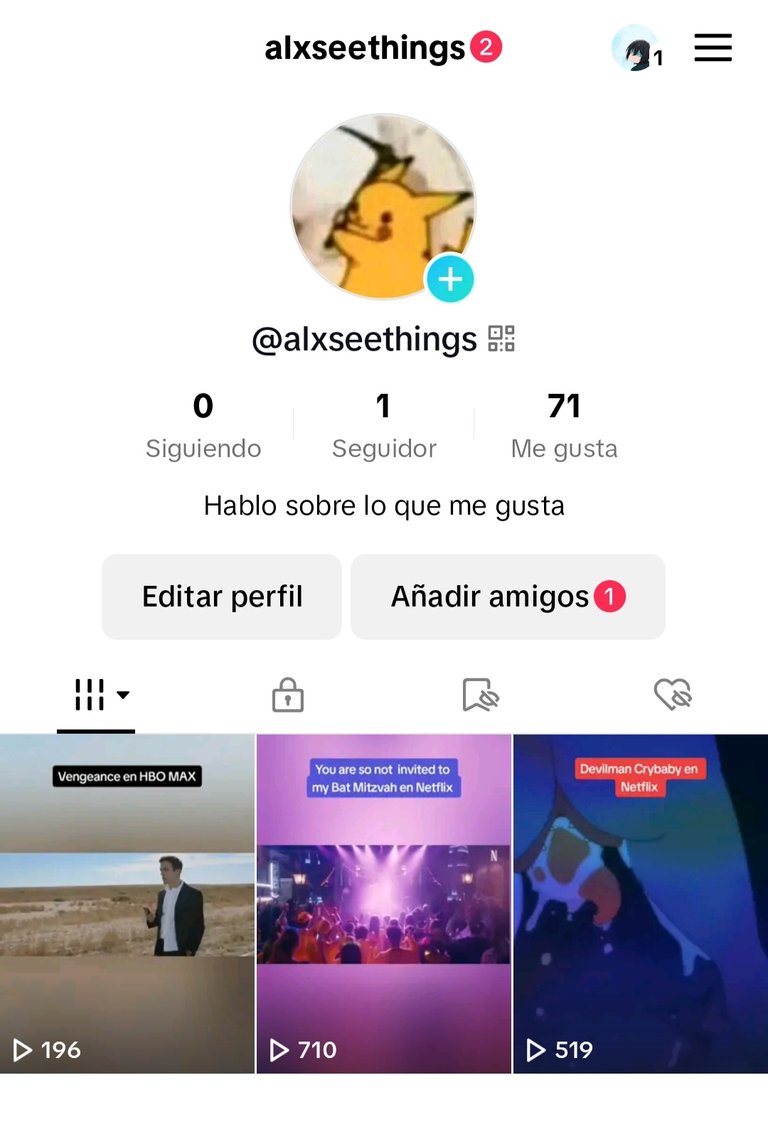
7.We finally uploaded it (Tik Tok)
There is not much to say here, we publish our Tik tok with added audio from the platform (with a moderate volume that does not overshadow our recording), we add a couple of HT and that's it.
In summary this is my process, I know there is a lot of room to improve and little by little I hope to achieve it, this type of activity can be a bit intimidating at first but we have too many tools that basically facilitate all areas of work, the idea it is learning to take advantage of all the potential they have.
Esta portada fue creada usando canva y Bitmoji
Hace unos días en medio del aburrimiento decidí experimentar un poco, ampliando las plataformas que utilizo para crear contenido... Aunque soy un usuario recurrente de lugares como YouTube, Twitter, e Instagram (Aparte de Hive), admito que la idea de dedicarme a tik tok se me hacía muy interesante, primero porque disfruto mucho consumir videos allí, y segundo, porque siento que es una red social en dónde se puede crecer relativamente "fácil" con el enfoque correcto.
Siempre he sentido fascinación por el cine y la televisión, de hecho, desde mis inicios en Hive ha Sido el enfoque principal de mi blog, me gusta reseñar series y películas, analizar por qué me gusta y hablar de las expectativas que tengo con respecto a las cosas que se estrenarán después.
Por esto mismo el enfoque de mi cuenta en tik tok fue fácil de encontrar: utilizar el esquema de mis publicaciones en Hive para trasladarlo a un nuevo formato, breves reseñas en tik tok utilizando mi narración y trailers o clips relacionados que encuentre en Youtube.
Cómo alguien que nunca se ha dedicado (al menos extensivamente) a la edición de video, esto suponía familiarizarme con muchas herramientas que desconocía, tratando de crear un material decente, y procurando mejorar con cada video creado.
Lo que quería mostrarles hoy era precisamente esto, el proceso que he empleado estos días de principio a fin para crear estos vídeos cortos. De esta forma ustedes también podrían empezar a conocer todas estas herramientas tan útiles.
1.Redactar el guión (Google Keeps)
Sé que decirle "guión" es un poco pretensioso, pero está es la mejor palabra para denominar lo que hago.
No todas las películas o series que veo en mi día a día terminan convirtiéndose en un vídeo (O publicación de Hive), pero en la mayoría de los casos al menos intento redactar algo.
Desde siempre me he caracterizados por tener un estilo muy informal, hablo de mis sentimientos con respecto a una obra y gasto poco tiempo en detalles técnicos de la misma.
Incluso antes de hacer videos, siempre procuraba que todo funcionara más como un monólogo que como un libro formal, algo que quizá pueda parecer pesado para muchos, pero que en mi opinión brinda a mis escritos de un ritmo bastante acelerado, algo que disfruto mucho.
Google Keeps es una aplicación muy simple pero cumple con su objetivo, la uso para guardar información de mi día a día y permite mantener todas mis notas guardadas en la nube, un respaldo extra que siempre quieres en caso de que algo salga mal con tu teléfono o tu computadora.
Luego de redactar el guión procedo a realizar algunos ajustes y empiezo a practicar leerlo en voz alta, al principio esto se hace un poco extraño (Y me da un poco de vergüenza) pero progresivamente me he ido adaptando. Teniendo un guión con el que me siento satisfecho ya procedo a grabar.
2.Grabar mi voz. (Grabadora nativa de Xiaomi)
De momento no me he animado a mostrar mi cara, pero más adelante tengo pensado hacerlo... Esto quiere decir que únicamente debo preocuparme por grabar mi voz.
Existen muchas aplicaciones para esto, algunas nativas de nuestros teléfonos y otras de terceros que podemos encontrar en la App Store o Google Play, como estoy empezando aún no le he invertido mucho a este aspecto, pero sé que hay múltiples opciones decentes en el mercado, tanto de aplicaciones y software como de micrófonos.
Generalmente grabo cada párrafo de mi script en un archivo diferente, esto me facilita la edición y me da mucho margen de error, pidiendo regrabar el último párrafo cada vez que cometo un error, y ayudándome a regular mi respiración (algo con lo que sufro mucho).
Luego de esto exporto todas las grabaciones a la memoria interna de mi teléfono.
3.Editar mi voz. (Supersound)
Llevo poco tiempo utilizando está aplicación pero me siento muy satisfecho con ella, me permite juntar todas las grabaciones y recortar aquellos fragmentos que no me sirven, exportando todo en el formato que desee.
Solía usar YouCut para esto, pero terminé sintiendo que era más útil tener un editor de audio aparte, es algo que sin duda las recomiendo.
4.Mejorar la calidad de mi grabación de audio con inteligencia artificial. (Adobe podcast)
Sé que este paso resultará particularmente útil para muchos, aunque la calidad de el micrófono de mi teléfono no es pésima, es evidente que podría mejorar bastante con hardware de calidad... No obstante, la inteligencia artificial puede ayudarnos con esto.
Adobe Podcast es una plataforma gratuita a la que podemos subir nuestros archivos, el mejorará la calidad de audio y hará que nuestra voz se escuche más clara, algo esencial si no contamos con equipo profesional.
Investigando mucho al respecto me he encontrado con que la calidad del audio es incluso más importante que la calidad de imagen, por esto mismo este paso se ha vuelto esencial en mi proceso.
5.Conseguir los clips.
Aquí siento que no puedo entrar en detalles, hay muchas plataformas que pueden ayudarnos a encontrar estos clips, y debido a la naturaleza transformativa de mi contenido todo entra en el fair use. Personalmente los trailers son de mucha ayuda, ya que son de duración corta y tienen múltiples escenas que transmiten muy bien la esencia de cualquiera serie o película (En la mayoría de los casos).
6.Juntar los clips con mi audio. (YouCut)
Hay muchas aplicaciones de edición de video estupendas, me he encontrado con Capcut, filmora y otras más, no obstante, al menos de momento me ha gustado bastante YouCut, aquí el procedimiento es simple: añado mi audio mejorado, elimino el volumen de los clips, y encajo los tiempos de ambas cosas.
7.Finalmente lo subimos (Tik Tok)
Aquí no hay mucho que decir, publicamos nuestro Tik tok con un audio añadido de la plataforma (con un volumen moderado que no opaque nuestra grabación), añadimos un par de HT y listo.
De manera resumida este es mi proceso, sé que hay mucho espacio para mejorar y poco a poco espero lograrlo, este tipo de actividades pueden ser un poco intomidantes al principio pero tenemos demasiadas herramientas que facilitan básicamente todas las áreas del trabajo, la idea es aprender a aprovechar todo el potencial que tienen.
Twitter/Instagram/Letterbox: Alxxssss
Yo también uso todas estas increíbles herramientas para trabajarle las redes sociales a mis clientes y de verdad que la que más me encanta es la de adobe podcast sin duda la calidad del audio lo eleva por 1000.
Muy de acuerdo, aparte es super fácil de usar y gratuito