Tweaking The Printer - With A Fidget Cat
Hello Everyone,
I've been tweaking some technical inputs with the Creality Ender 3 V2 in the slicer settings.
This first half of this post will contain information that is somewhat useless to anyone who does not 3D print.
If not interested in the technical information, please just scroll to the second part of the post which will be labelled as Fidget Cat in a larger font size.
Technical Information
The Creality Ender 3 V2 comes standard with two different motherboards.
One is the 4.2.2 board, and the updated (community preferred) board is the 4.2.7
I have the 4.2.2 motherboard.
This motherboard cannot handle the voltage required for travel moves, which should be (up for debate) at least 75 mm/s.
When travel moves are triggered, this causes a layer shifting issue, which looks quite a bit like Z-banding, but it is not Z-banding, and generally stays consistent throughout repeat prints. It is a rogue signal to the stepper motor, which causes a misalignment of the extruding material from the nozzle. This is the simplest explanation possible.
The only way to combat this is by slowing down the travel moves.
Through my research, others have suggested increasing cooling will solve this issue.
While this could be true with other Creality motherboards, it just didn't seem to be the case with mine, as I completely overhauled the motherboard cooling system and even designed my own open box case. None of this made a difference.
There were a few people in forums who mentioned travel speeds, and this is what set me on course for properly diagnosing and fixing the layer shifting.
150 mm/s is the stock setting for Cura Ultimaker slicer, and on a 4.2.7 board, this likely will not be an issue, since the stock profile generally consists of safe settings.
It doesn't become clear how big of a problem we have, until discovering the 4.2.2 board will not function correctly unless set for a maximum speed of 55 mm/s!
This is substantially lower, and problematic for retraction.
For the print I will show in this post, I printed at these speeds:

Cura Ultimaker
We can see here, highlighted are the travel speeds. These are of course the fastest speeds the machine will produce, and in turn will require higher voltage spikes to the stepper motors.
The print I produced is acceptable, but it is showing signs of the previous issues.
Very little, but they are there to the trained eye.
I managed to print the succulent planter with 56 mm/s travel speeds, with no obvious signs of the layer shifting problem.
What this tells me, is that I have found the highest possible speed.
And that speed is 56 mm/s.
I don't want to run it at the highest possible speed, because it's like having a cup of water that is filled to the brim and just a little shake might cause a spill... This is my thinking.
I do not want to have the motherboard at its absolute peak point of voltage handling, because this could be detrimental to the board, and rogue signals could occur once in a while with some prints.
The proper setting in this case, will now be 55 mm/s travel speed.
It's very slow, and makes retraction a nightmare. Currently I am running 14 mm retractions, with 61 mm/s retraction speed. (the extruder motor doesn't seem to suffer from this over voltage issue) and prime speed of 41 mm/s.
With backing down to 55 mm/s, I might have to increase these retraction speeds even more, and with the current material I can deduce that I am running a little hot, because of the stringing. This can be drastically reduced with a temperature reduction.
That is pretty much it regarding the technical tweaking on this Creality 4.2.2 board.
Now that I've found the sweet spot, I'll never be increasing it again. (unless I replace the board eventually.)
Now on to some fidget fun:
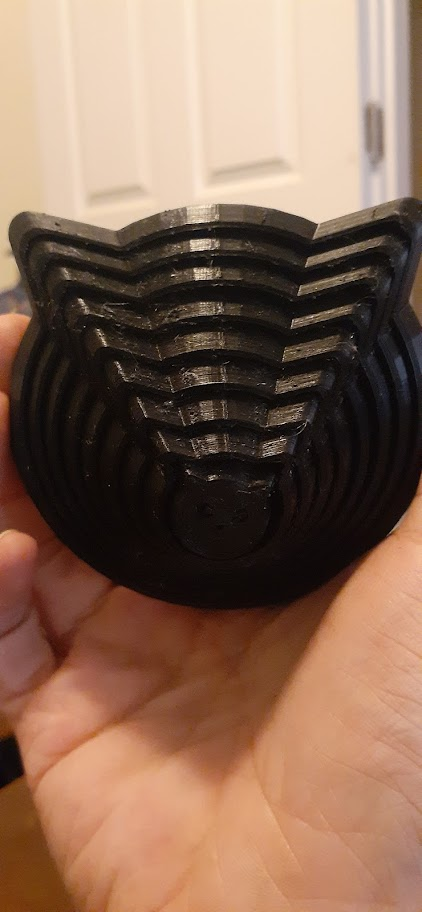
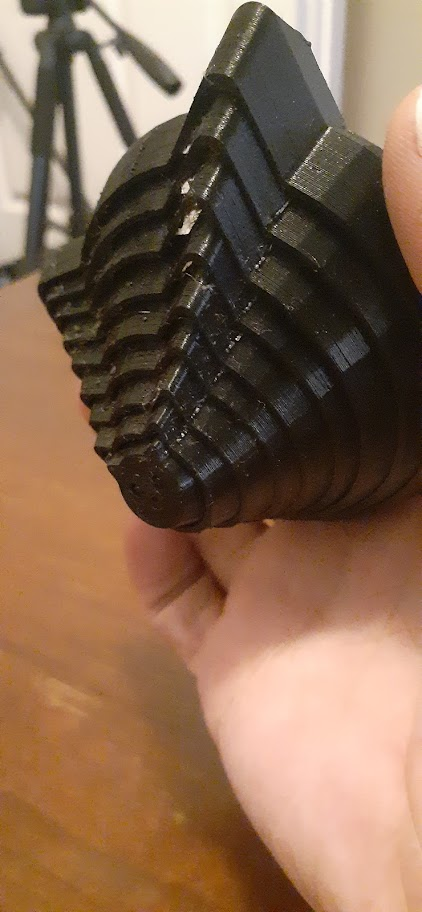
Fidget Cat
Fidget Cat by JustinSDK September 25, 2021
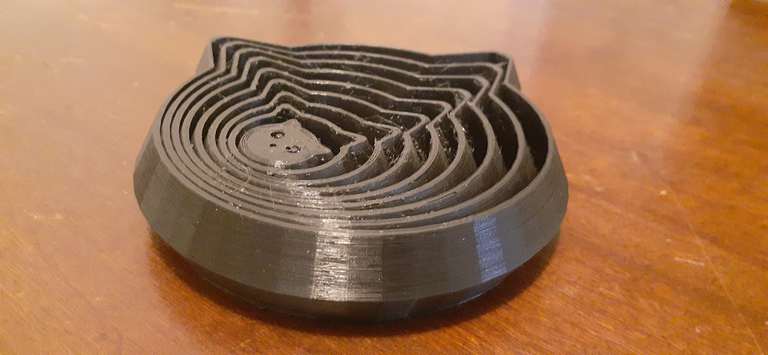
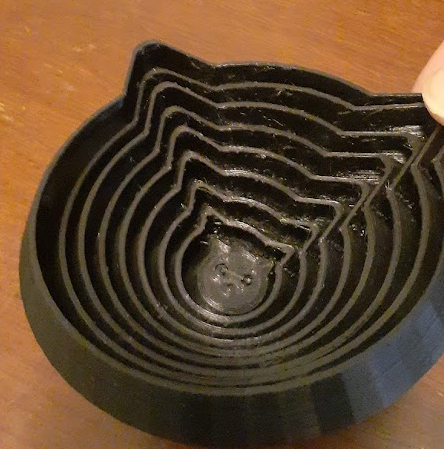
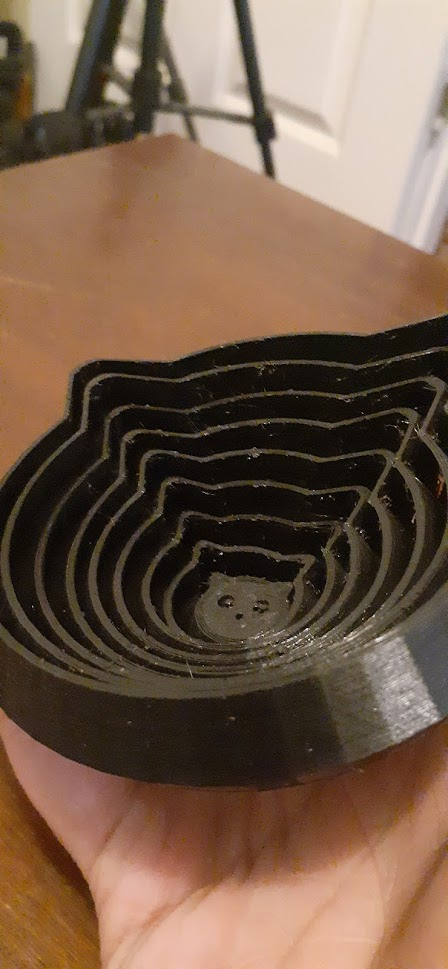
What I love about this fidget toy is the telescoping like ability, and that it's a print in place toy, which means only one file is needed for the printer!
Let's have a look at the build process.
First, the basic technical details of the print:
Printer: Creality Ender 3 V2
Filament: TECBEARS BLACK
Amount used: 56 grams
Resolution: 0.12 mm
Infill: 100% LINES
Raft: Yes
Supports: No
Print Time: 15 hours
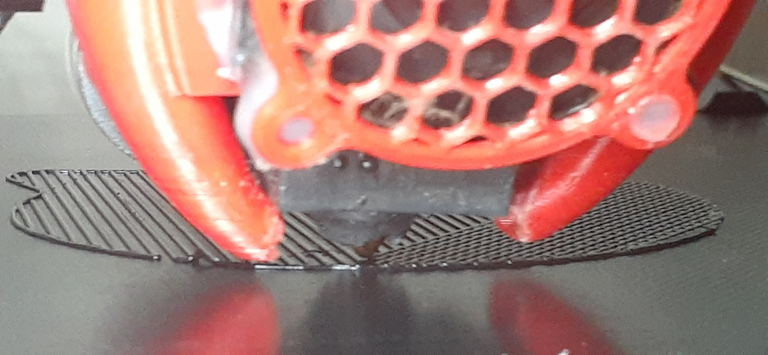
The first layers we can see the raft building. Build plate adhesion, bed level, and Z-offset is perfect.
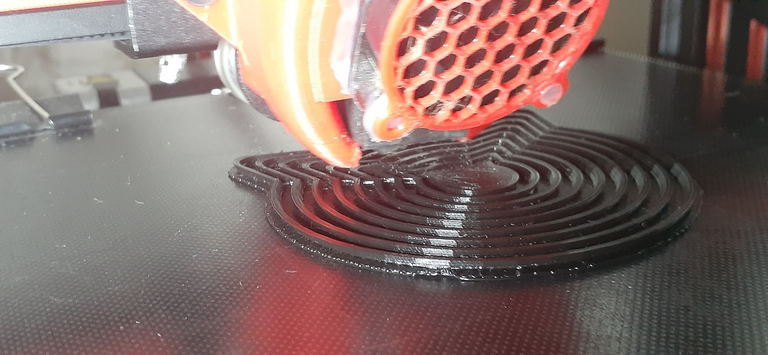
Here we can see we are well past the raft, and also if you look close, you can see a small area of the raft that didn't adhere perfectly, but since the raft is not part of the print and will be disposed of, this is not creating an issue. This could have been the actual print, so in essence these small peels that happen sometimes could destroy a print, where a raft will eat this peel and it simply will not matter for the end result.
At this point I am feeling very confident that the print will be a success, and since it was a 15 hour print, this was a relief knowing I could "sleep on it." There's just not much getting around this when you're working with 15 hours of printing. Sometimes day plans need to be made accordingly when it comes to 3D printing! Unless a remote option with power cut off is set up, and it's possible I just haven't set it up yet.
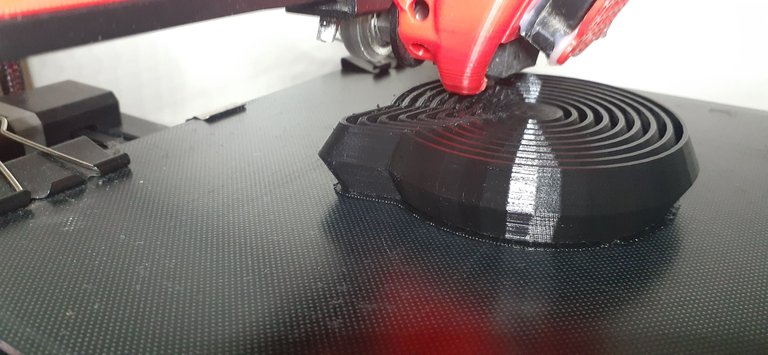
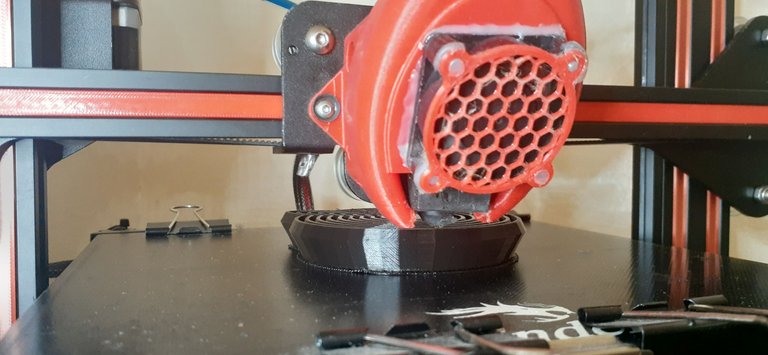
At this point the print was at around 96% and looking really nice!
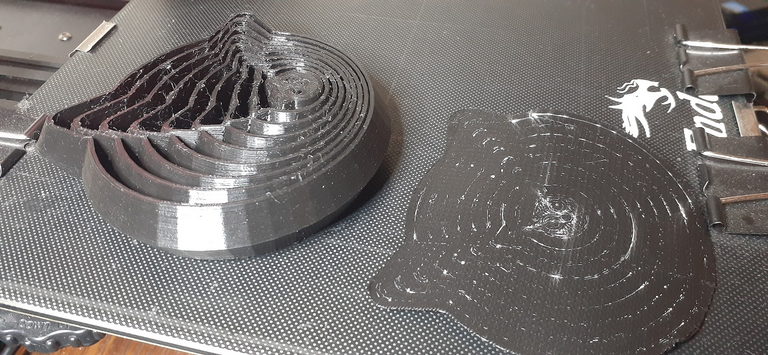
Here we can see the raft peeled from the print. When working with PLA, if you manage to get the print hot off the bed, removal of this raft is so much easier. It will generally just peel right off. If it cools, then surgery might become necessary.
Rafts don't leave the most pretty end result, and we have a little stringing, but it's not as bad as the intense white light makes it look and can be cleaned up :)
That's it for today!
Do you all love this fidget cat as much as me?
Let's chat in the comments!
Thank you for stopping by, have a great day! ~~@print3dpro
Thanks for showing how it works and what you can make : )
Question... what does the Fidget Cat do? Is it one of those hand toys to keep the fingers busy and/or limber? Or one of those squeeze toys you smash for comfort and stress relief?
Thanks bro! :)
The fidget cat is the same idea as a fidget spinner yeah. Just like a stress relief toy..
I mostly printed it as a printer test while I brainstorm my plans for starting up a little business. I think you mentioned that in our last convo on my 3D printing blog, and yes I totally would like to make some return with this thing.
It's not an easy process, as designs on thingiverse come with different licenses, (chosen by the desinger/uploader) and some cannot be sold, like the one above, maintains an attribution license, but not for commercial use, which means selling can only happen legally if permission is granted.
With licenses not requiring permission, it's still generally accepted as proper etiquette to try to get permission through all possible avenues.
The little pot I have been printing, I want to sell them.. but first I'm going to reach out and try to get permission. If he doesn't answer, then legally I can go ahead and the moral aspects have been dutifully covered. It's just frowned upon to not talk with the designer first, ask, and offer a % of return.
I like to upload short videos to this site streamable to show friends 3D print videos. Here you can see it in action for 30 seconds :)
https://streamable.com/noyul3
lol so the cat goes up and down and the sides?
@tipu curate
Upvoted 👌 (Mana: 63/83) Liquid rewards.
Yes! :D
Thank you for the tipu friend :)
Try this link, it's a 30 second clip. You can see me playing with it :D
https://streamable.com/noyul3
Congratulations @print3dpro! You have completed the following achievement on the Hive blockchain and have been rewarded with new badge(s) :
Your next target is to reach 300 comments.
You can view your badges on your board and compare yourself to others in the Ranking
If you no longer want to receive notifications, reply to this comment with the word
STOPTo support your work, I also upvoted your post!
This time the finishing a lil rough. Need to brush it up a lil.
Yes indeed, good eye!
It actually became much worse after this, to the point of failed prints again.
Luckily I figured out what it was, and it was not the machine this time.
Post about it dropping soon :)
Thanks for stopping by bro!