NAVIGATING DISCORD PART 2.
Discord is a space where members of web 3 connect with each other. The reason why discord is loved by all is still a mystery to me as everyone have different reasons for loving discord.

Personally, I like its security, layouts and easy navigation. Also, video calls and screen sharing is very good with discord. The use of bots and many other tools are what makes discord unique and stand out.
In the previous post, I talked about a lot of things about discord. Ranging from how to create a discord account to how to add up friends in discord.
Click here to be redirected to the post.
This post will be a continuation of the link you just clicked.
Here,I will talk about what to do when you join a discord community, and how to get and edit your own discord community.
Ready? Then let's dig in.
WHAT TO DO WHEN YOU JOIN A DISCORD COMMUNITY
Here on hive, after reading a post of community accounts, you will see at the end where they shared a discord invite.
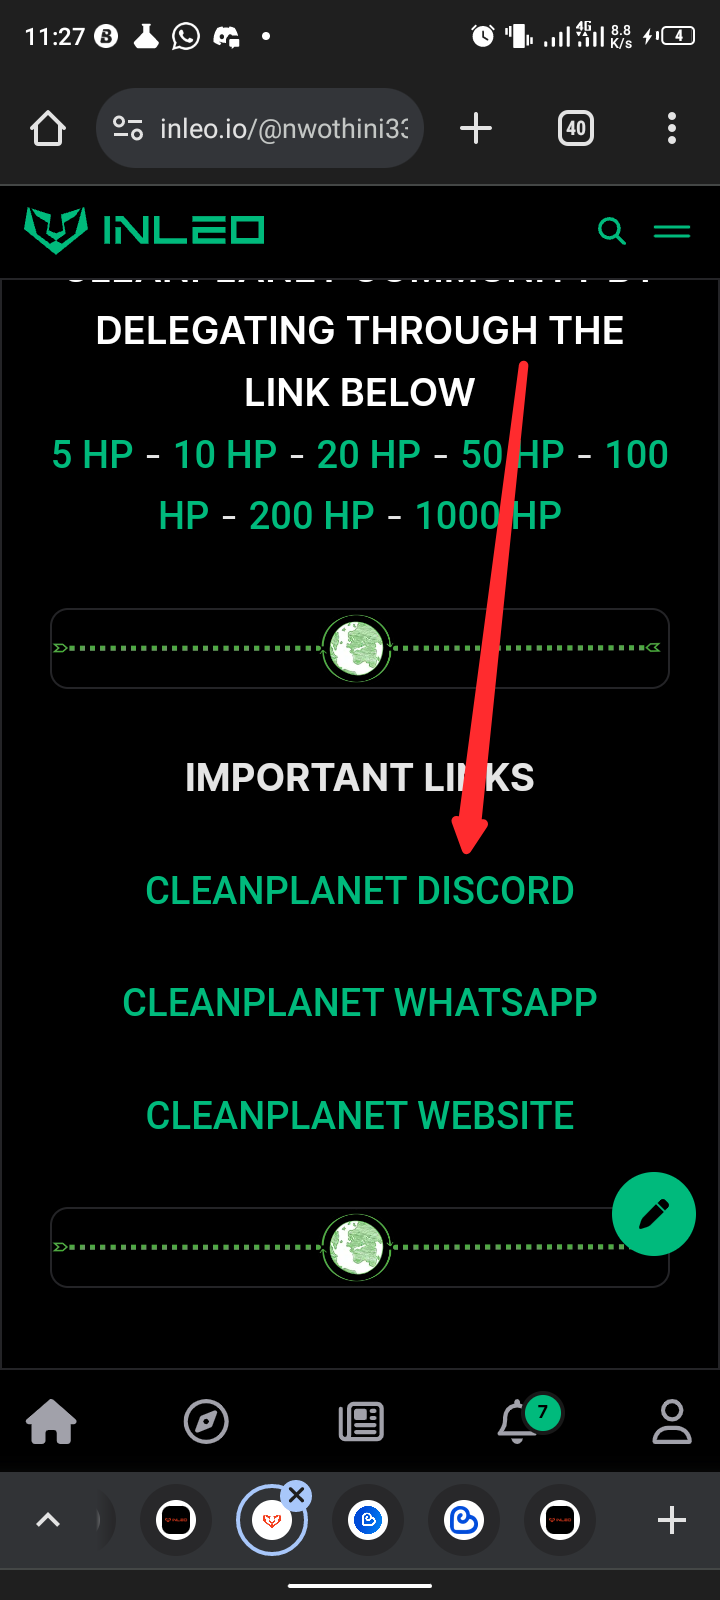
Something like this above.
Good.
When you click on the link, you will be automatically redirected to discord. If you are using your phone and you have the discord application, you will be redirected to the application. If you don't have the application, then you'll be encouraged to get the app before being able to access the discord community.
There's a hack though
If you are using Google chrome, you can always switch to desktop site, then login your discord account to continue.
When you enter a community for the first time, the first thing you should do is to look for their rules.
Read community rules and make sure to not break any of them.
Next, go to the pinned messages. Some community will want you to introduce yourself before anything. So make sure that you do it.
Read the pinned messages and acclimatize yourself with he environment.
Next, you can send a "hi" in the genera chat or any server that supports chat.
Serves are like the branch of a community. This banch have a purpose they serve. Some are for chatting, some for contest announcement, some for rules, general announcements e.t.c
Make sure that you do not act recklessly to avoid being kicked out of a discord community.
HOW TO CREATE MY OWN DISCORD COMMUNITY
Let's say you have a hive community, you can create your community by doing the following.
The first obvious step is to open the discord application.
You can also use the web version.
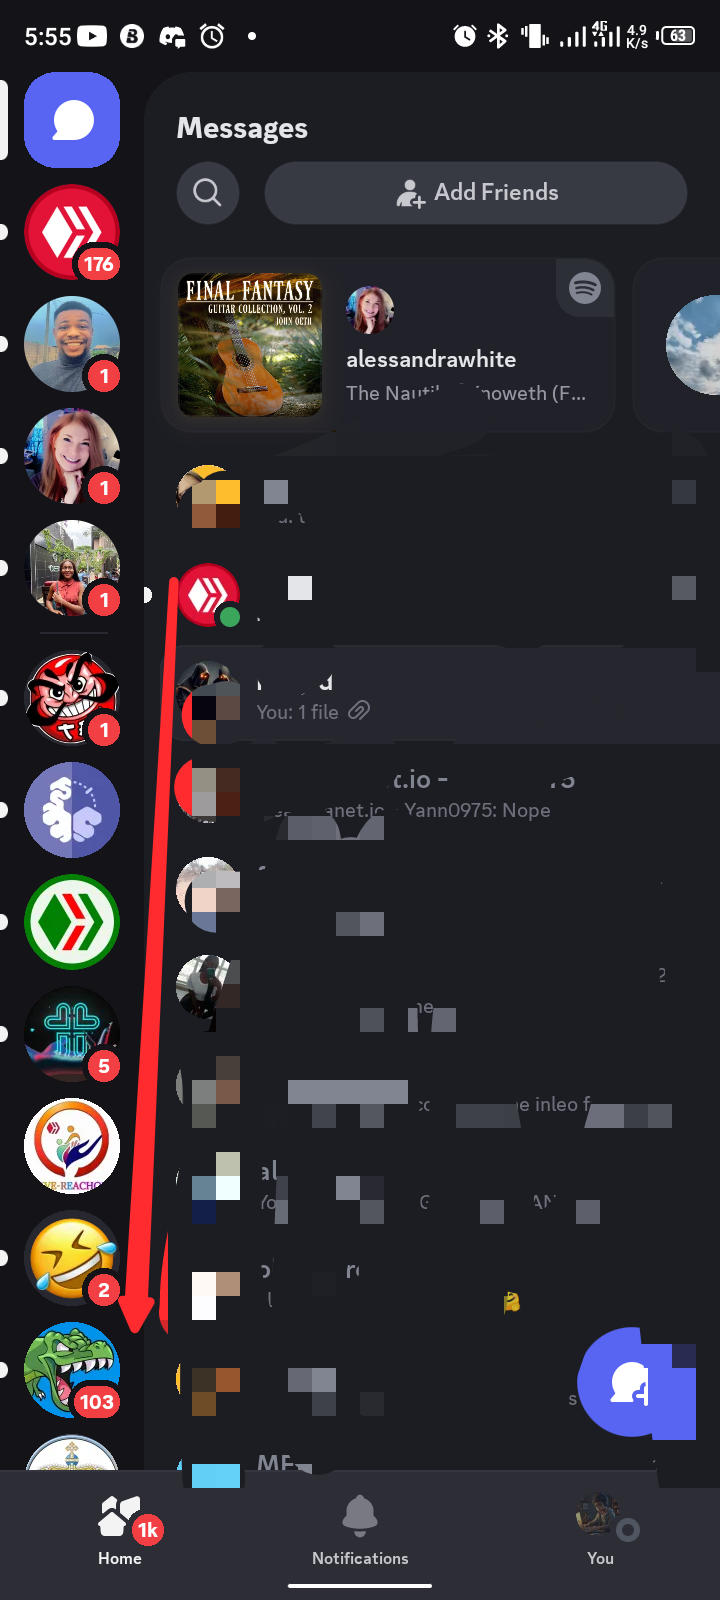
Scroll down as seen in the picture above.
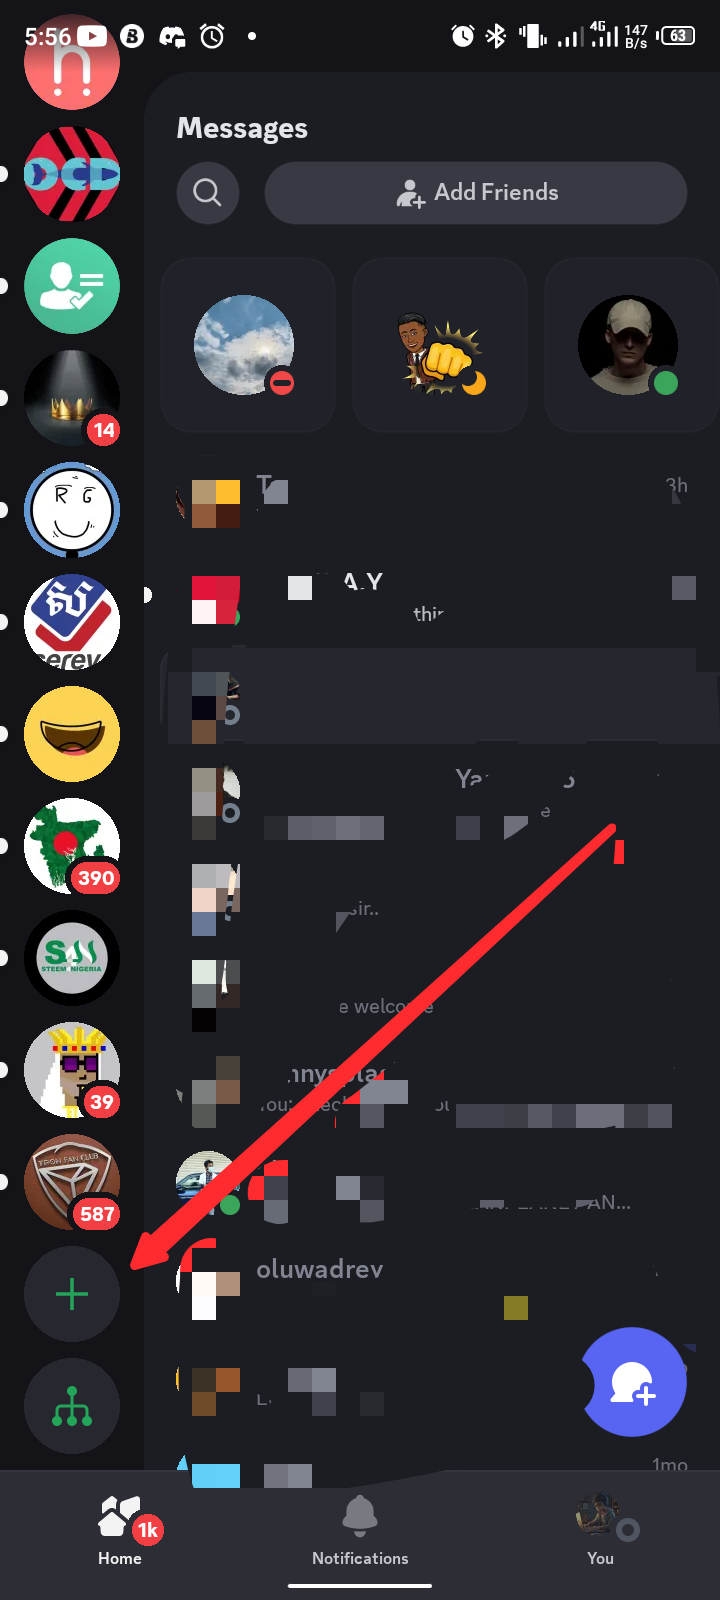
Click on where the arrow points at.
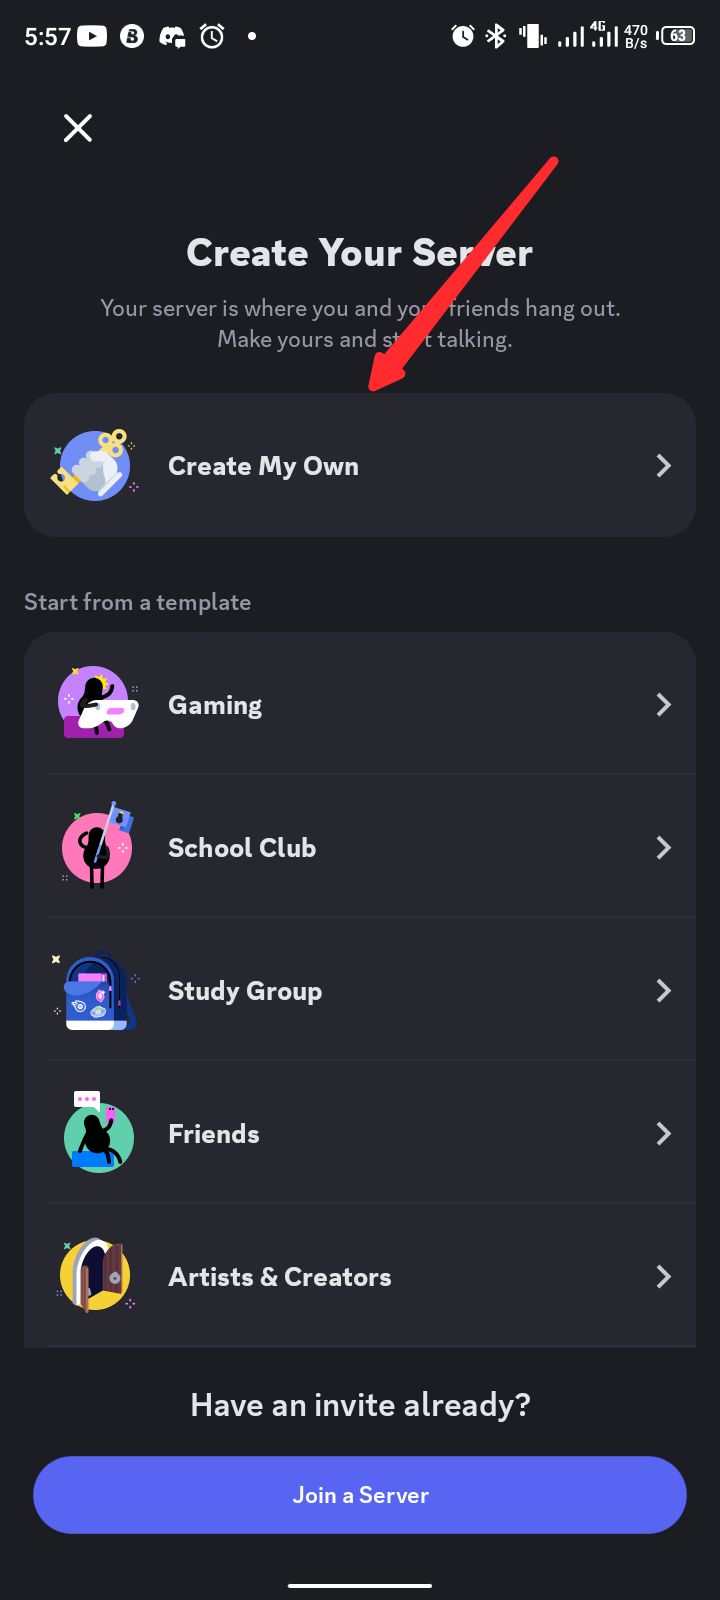
You can decide to creat your own server or choose from the templates that have been provided. In this tutorial, I choose to create my own community
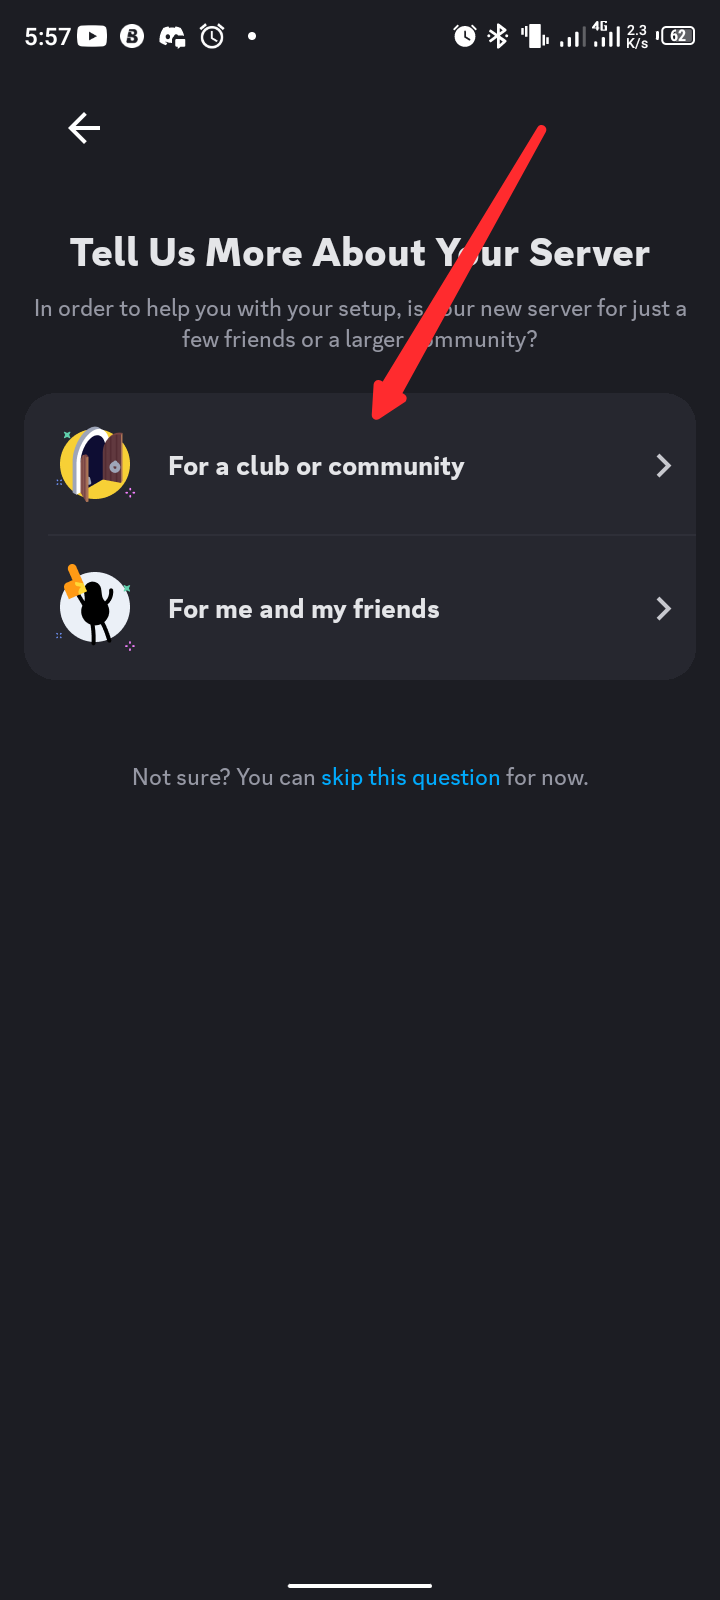
Next, you choose what the community is for.
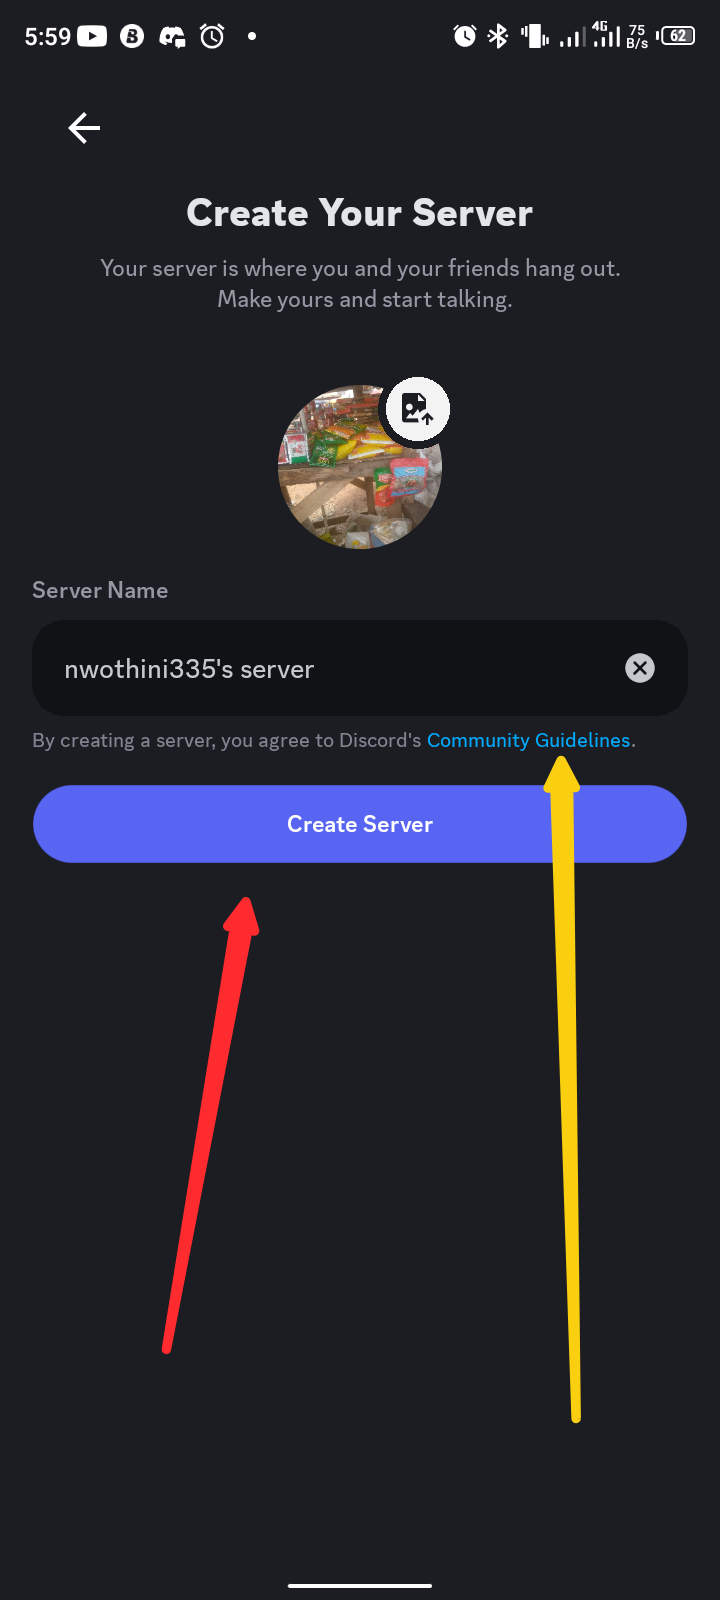
The next step is to edit the community profile photo, edit the name then click on create server. Don't forget to always read the community guidelines.
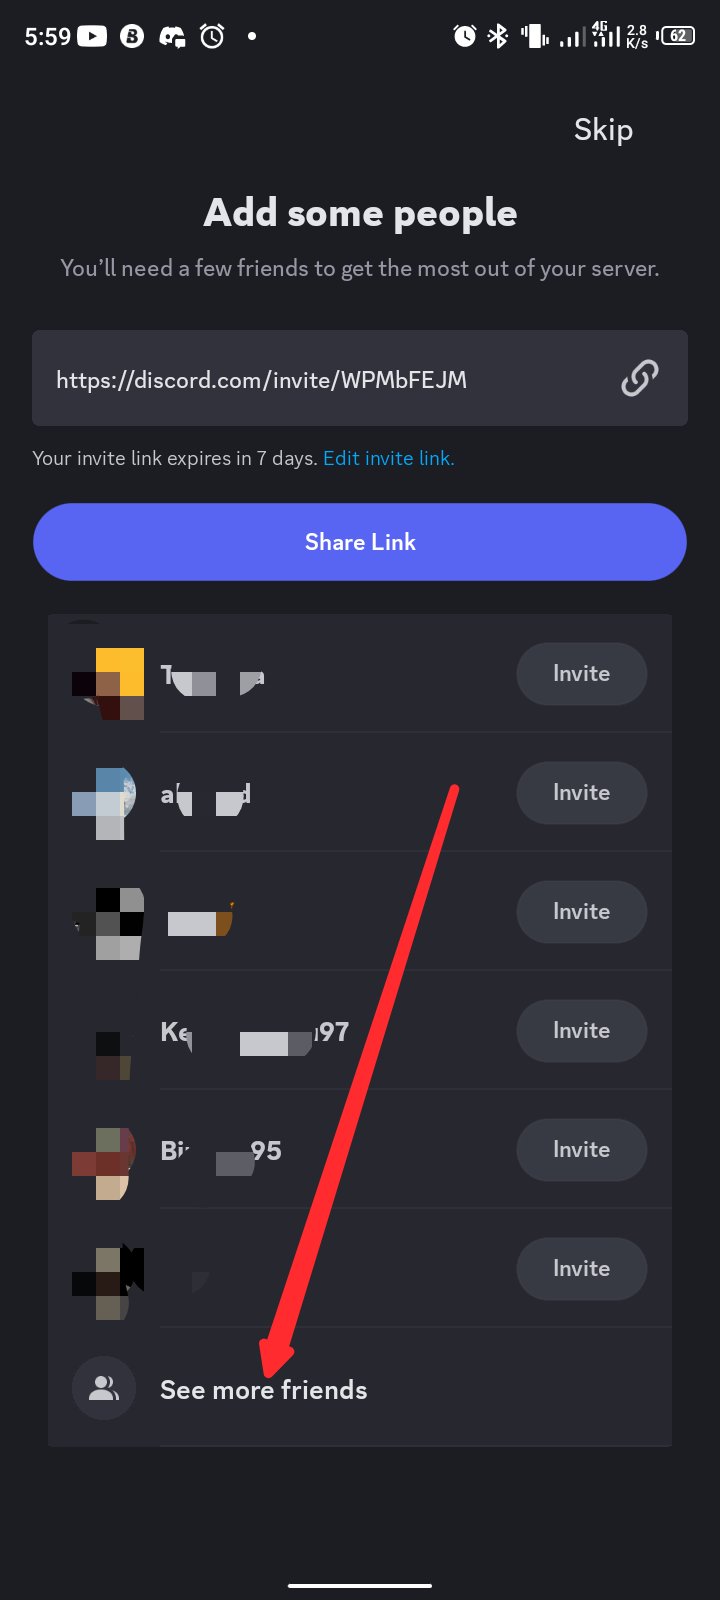
You will be directed to another page where you can add friends to the community. Add your friends, then continue. Since this is a demo, I decided not to add nobody.
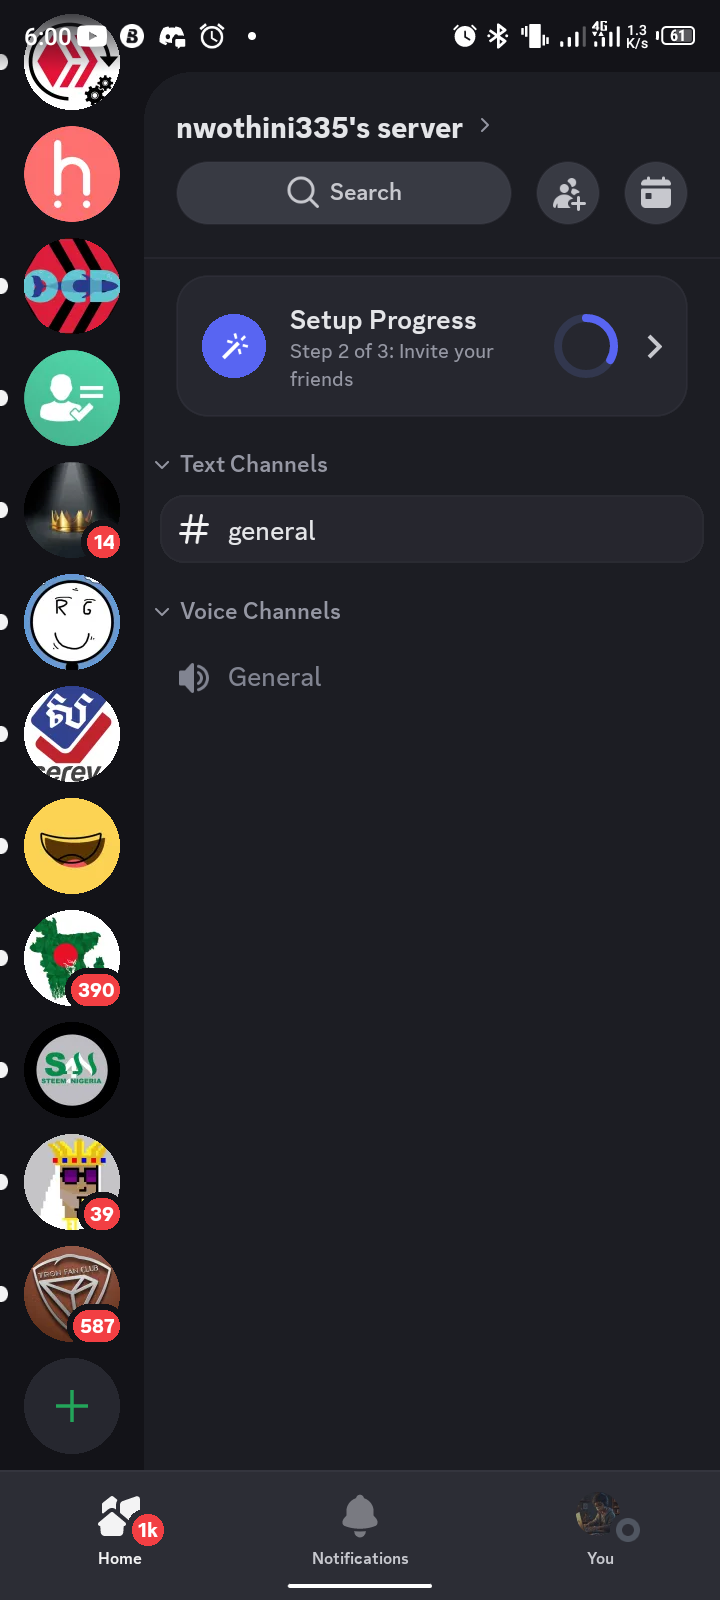
This is what the community looks like.
Click on the set up progress to complete it.
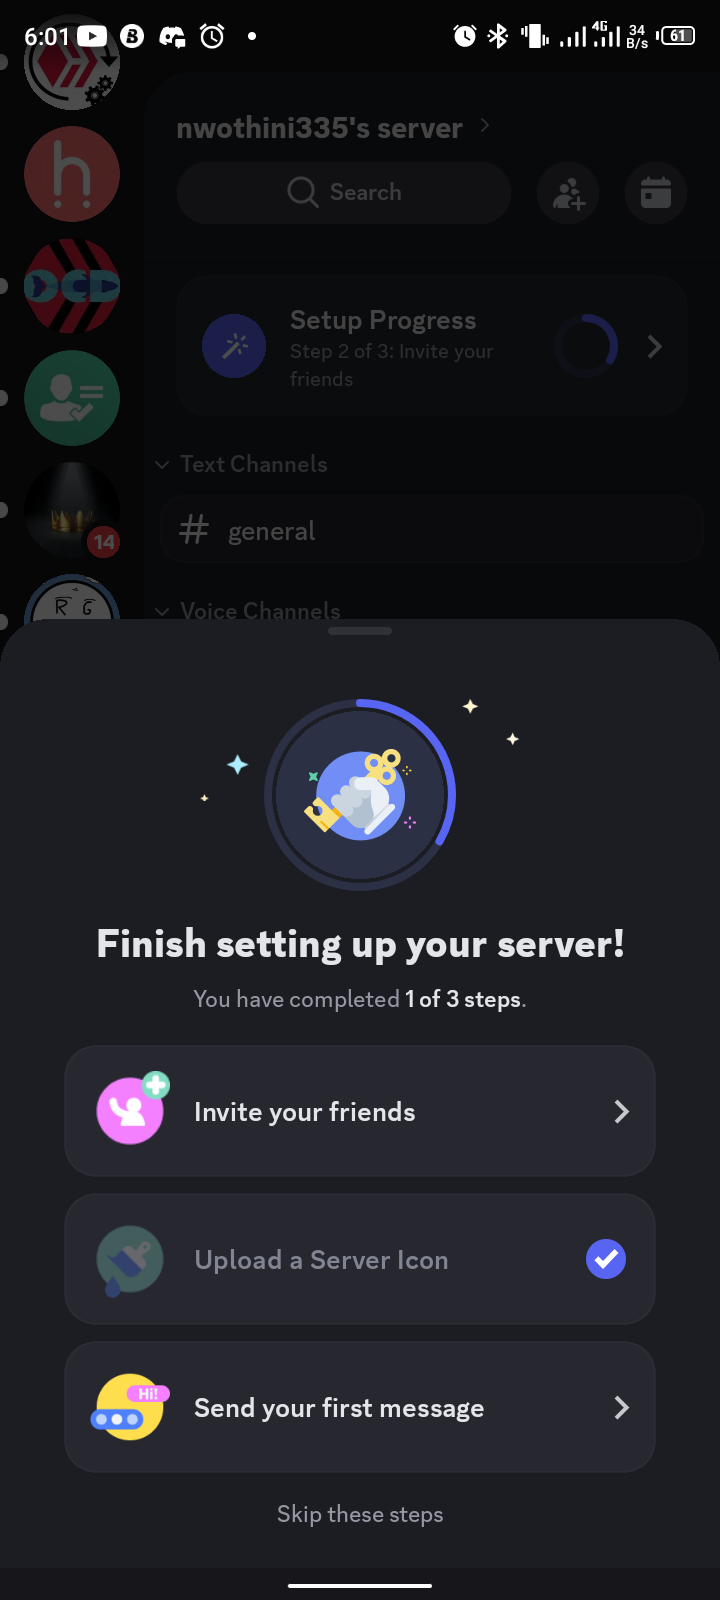
Do the following to complete your community creation.
LETS ENABLE THE COMMUNITY
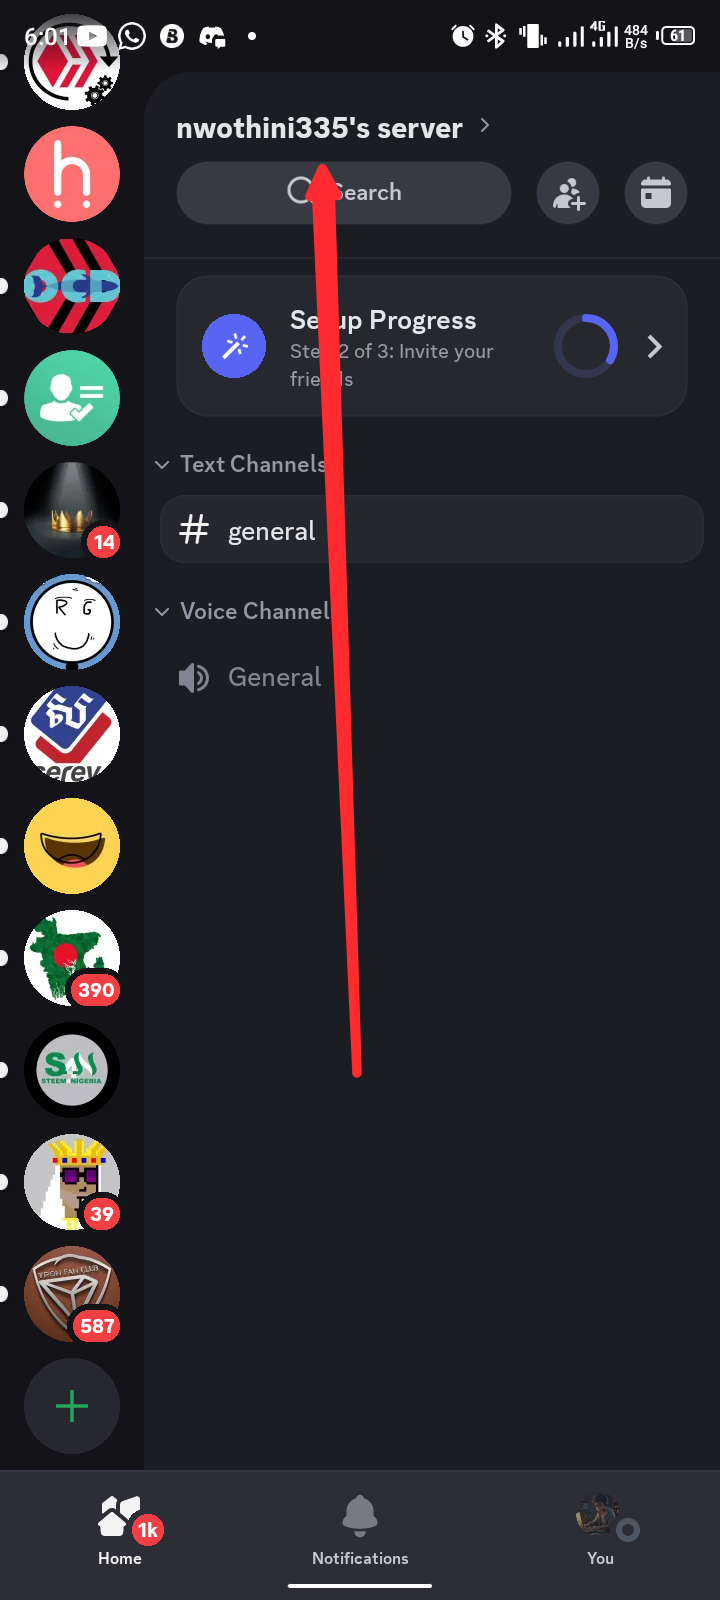
To do this, click on the community name as seen in the picture above.
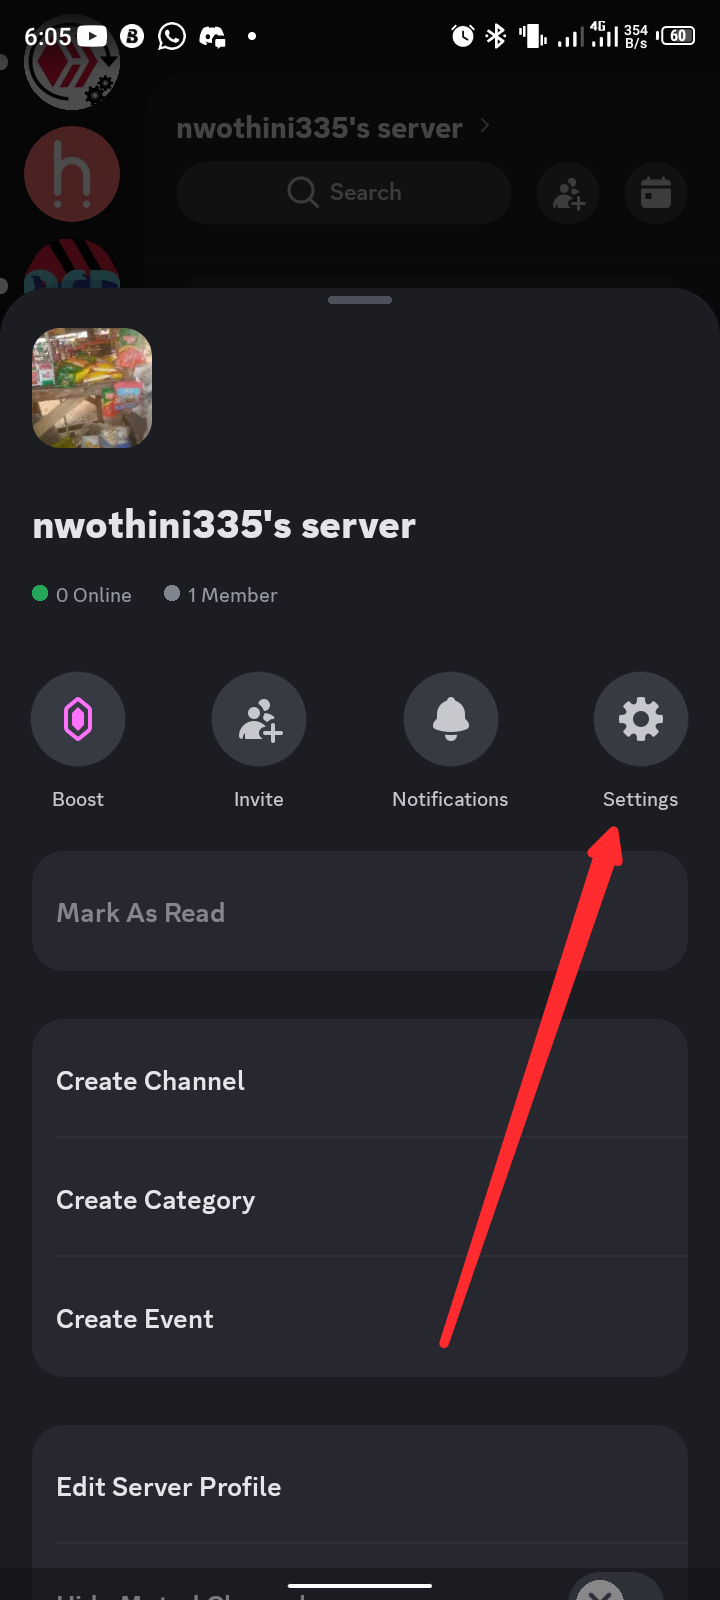
Next, click on settings.
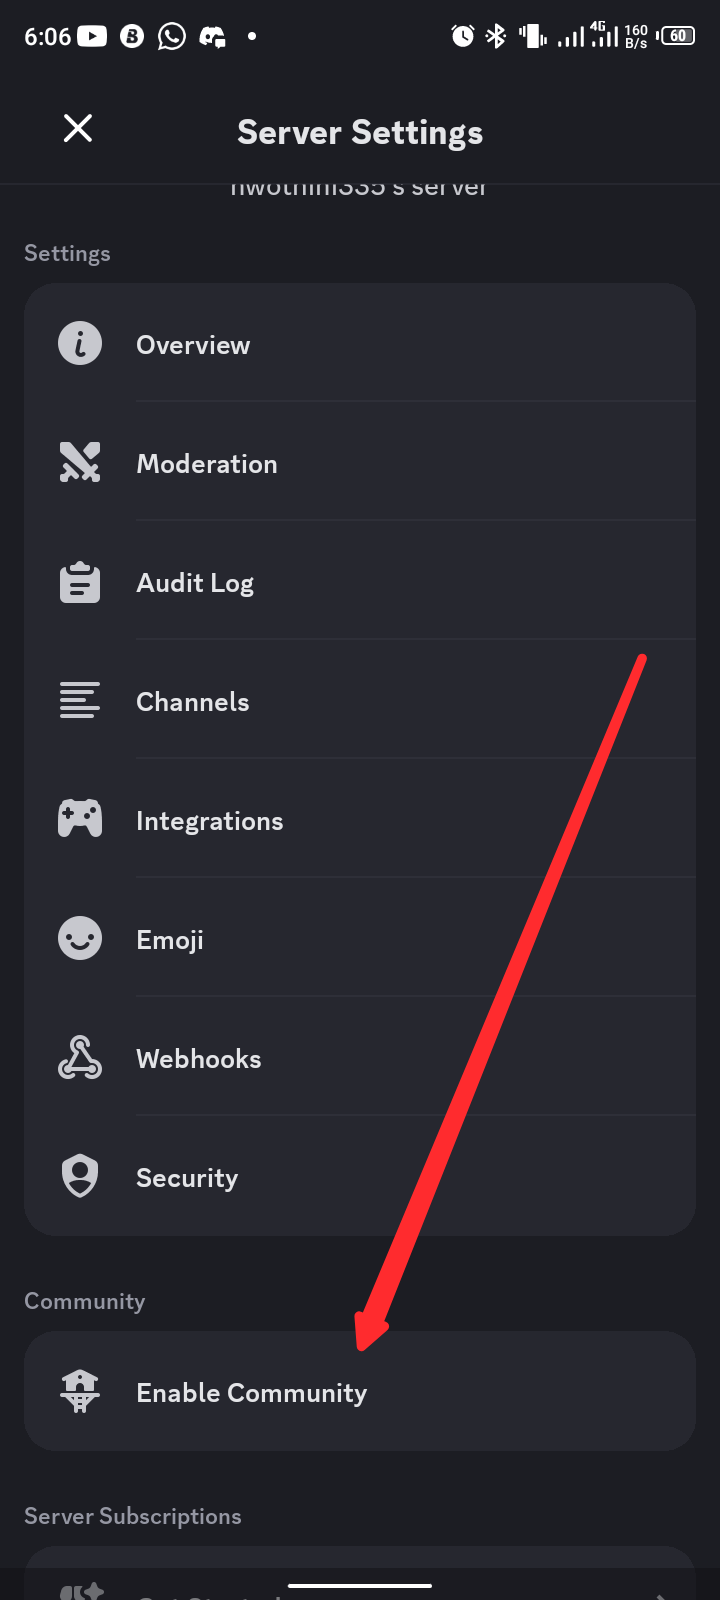
Scroll down, then click on enable community
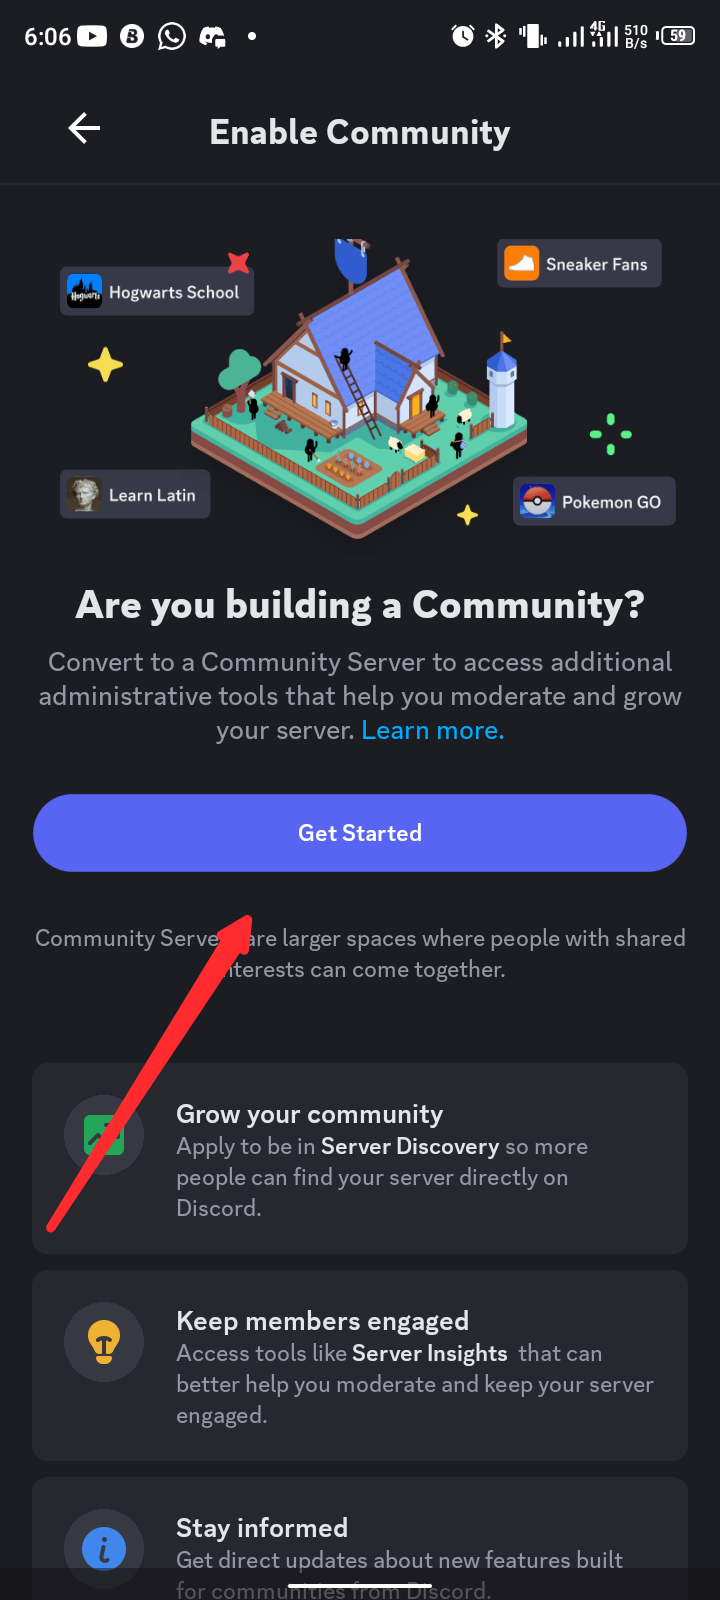
Click on get started.
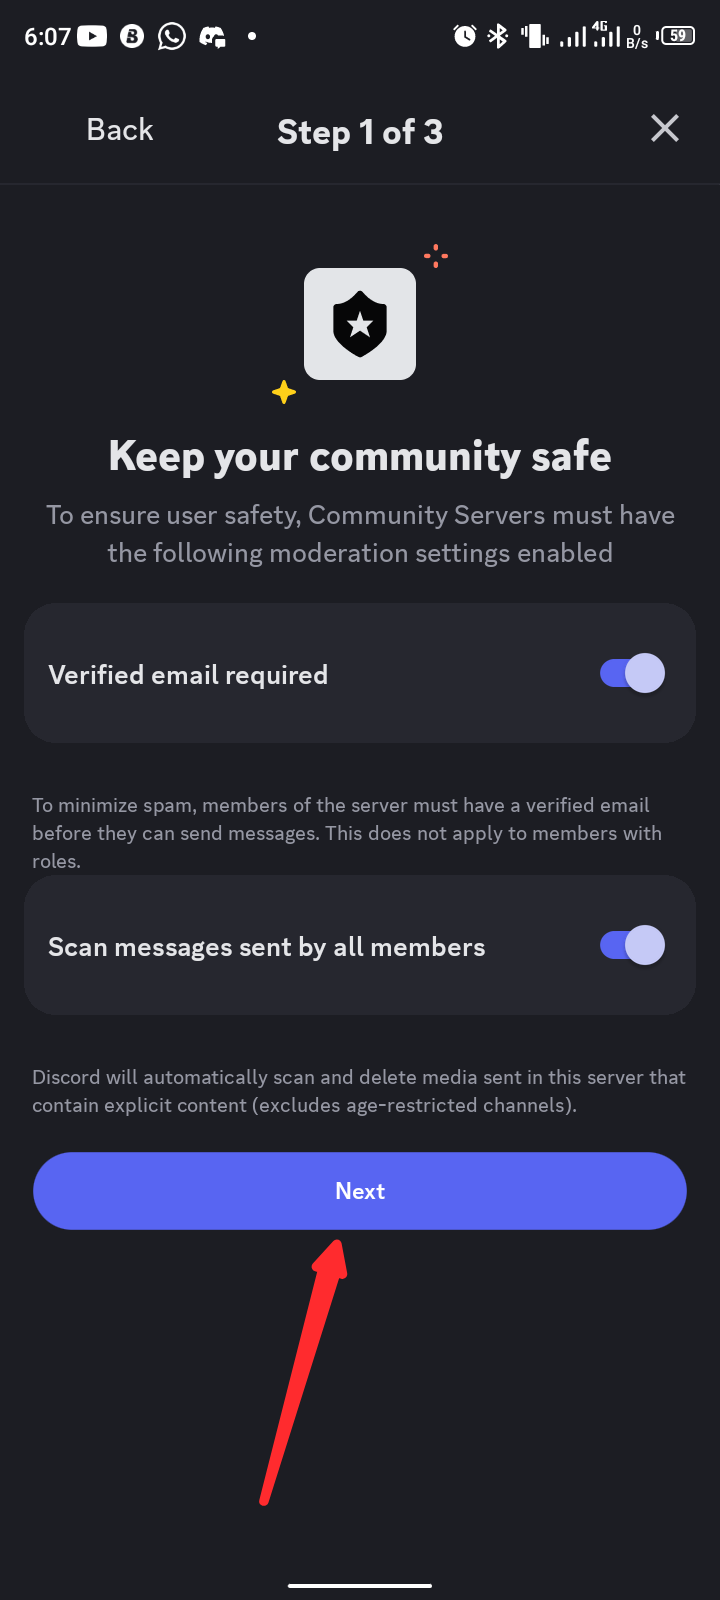
Click on verify email and scam messages.
As explained in the pictures, this is to help reduce the risk of spam. basically, it is for the communitys security.
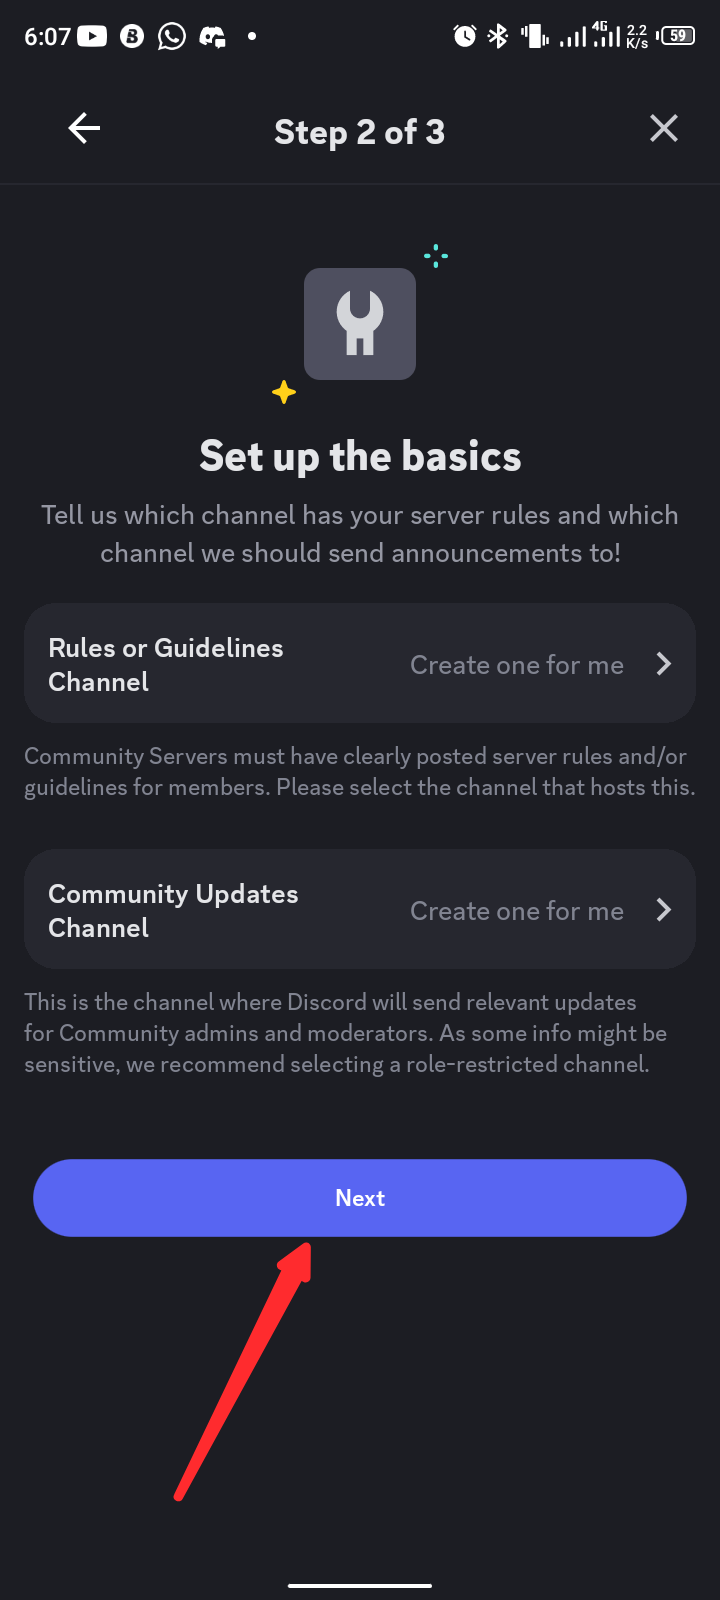
Read and understand the details and click on next.
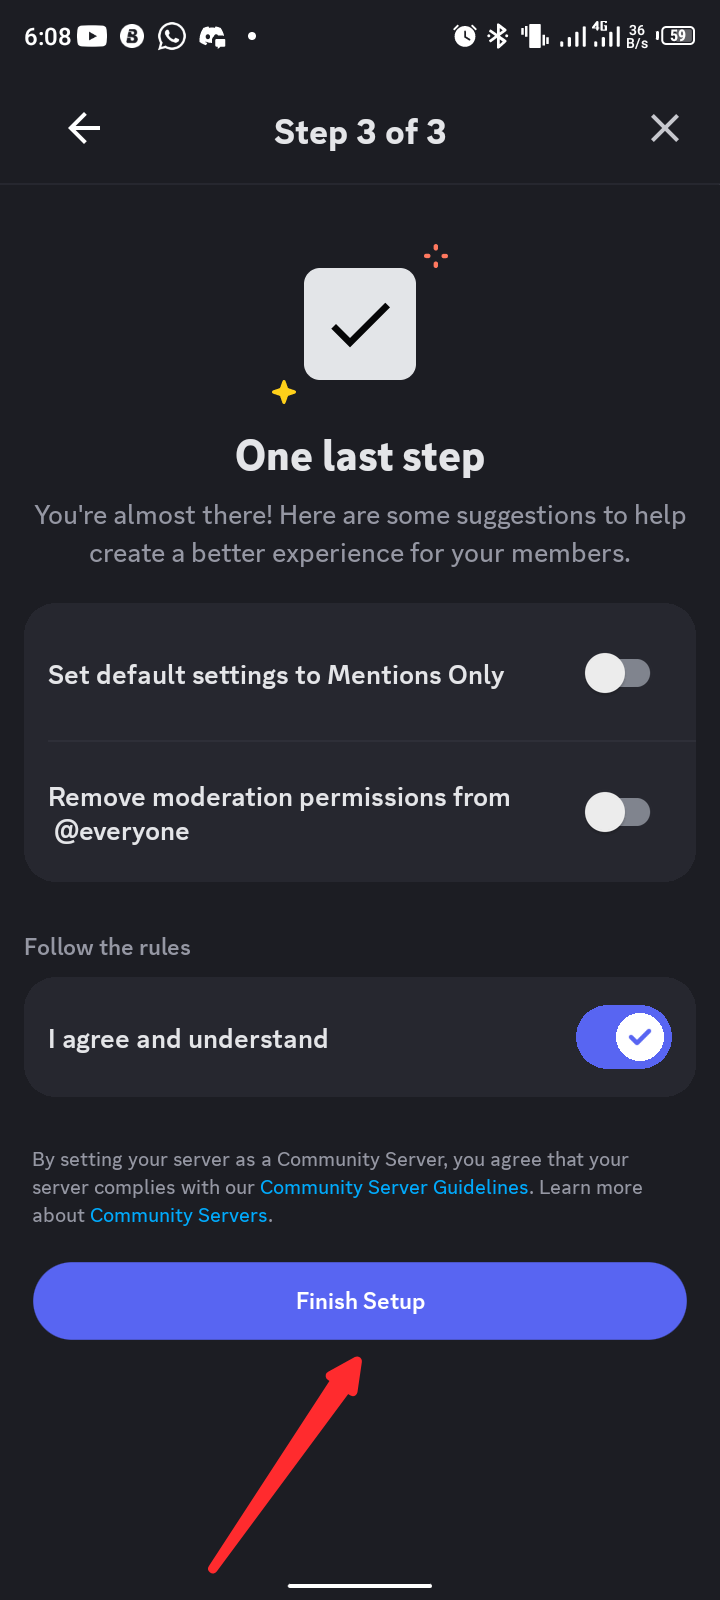
Tick the agree and continue then click on finish.
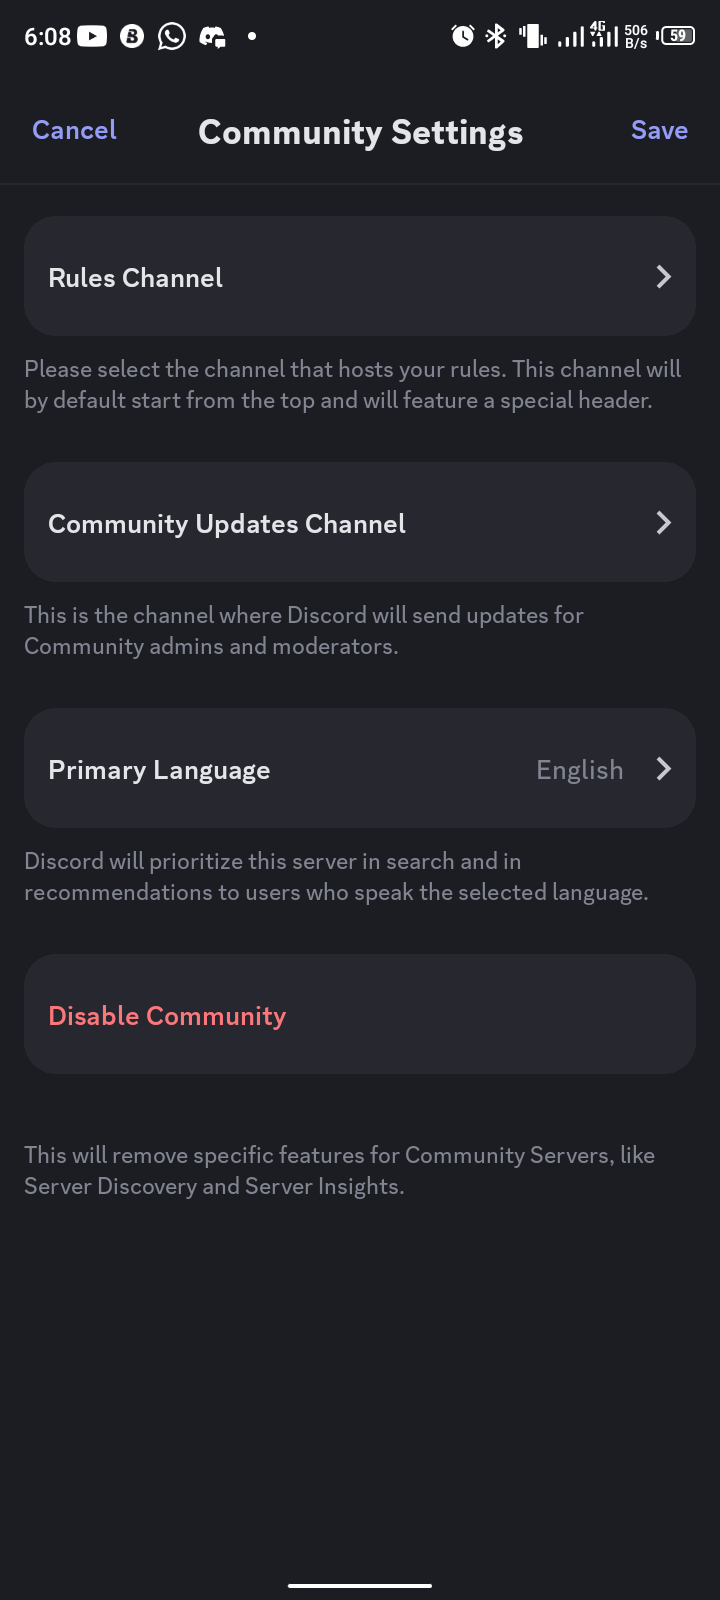
Now you have your community.
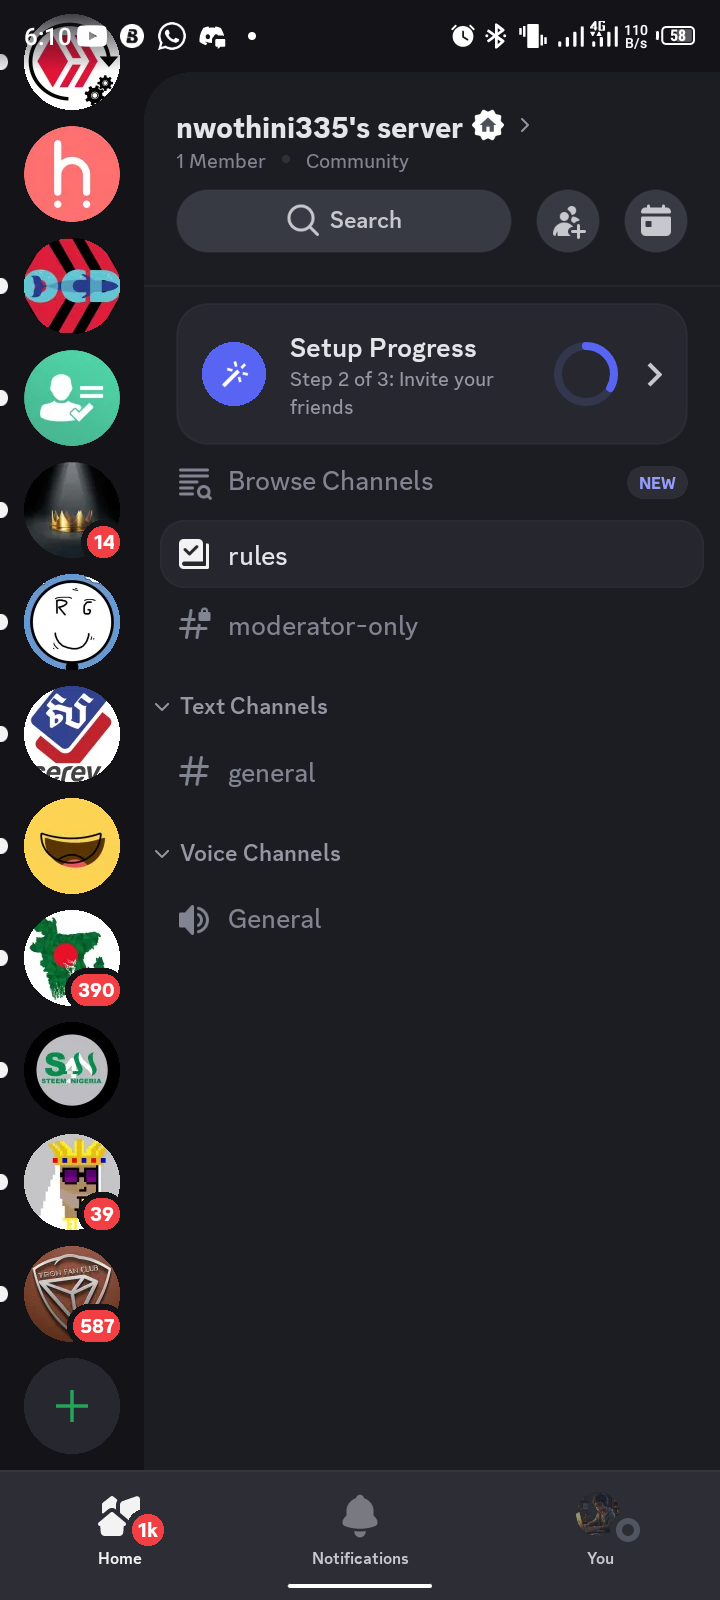
This is what it looks like now.
LETS EDIT SERVER PROFILE
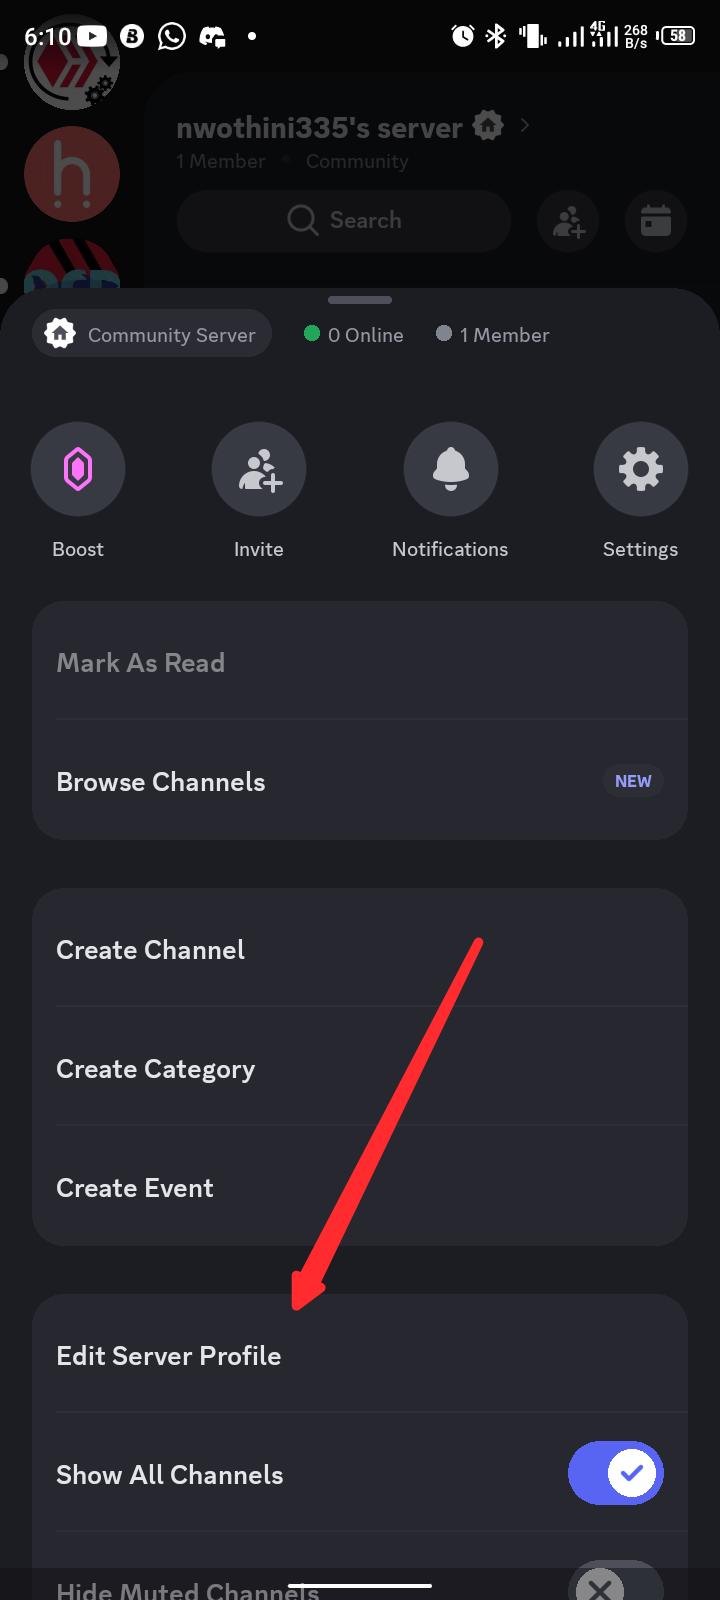
Click on the community name, scroll down, then click on edit server profile.
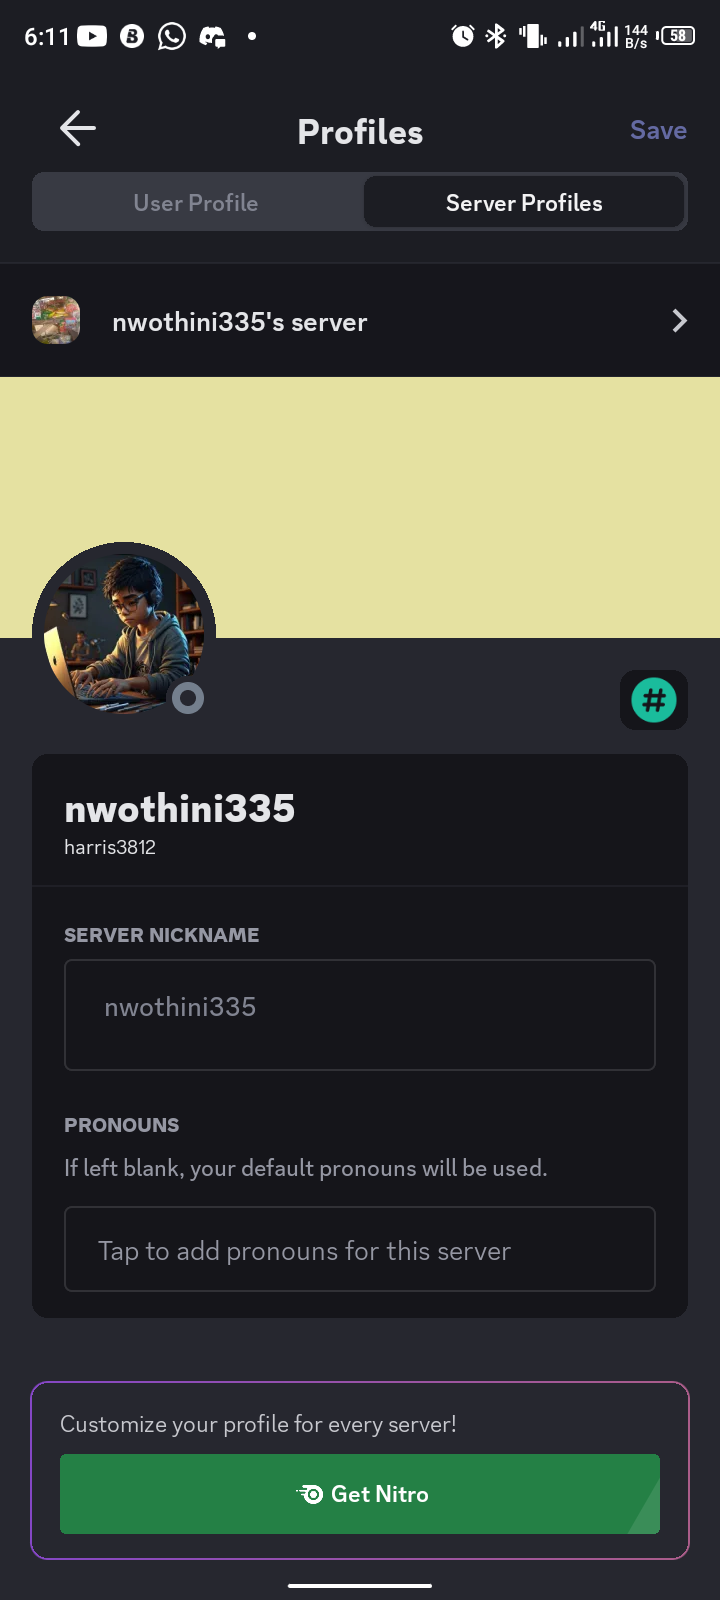
You can edit the profile then save up.
Also, for more features, you can buy nitro.
Click on get nitro
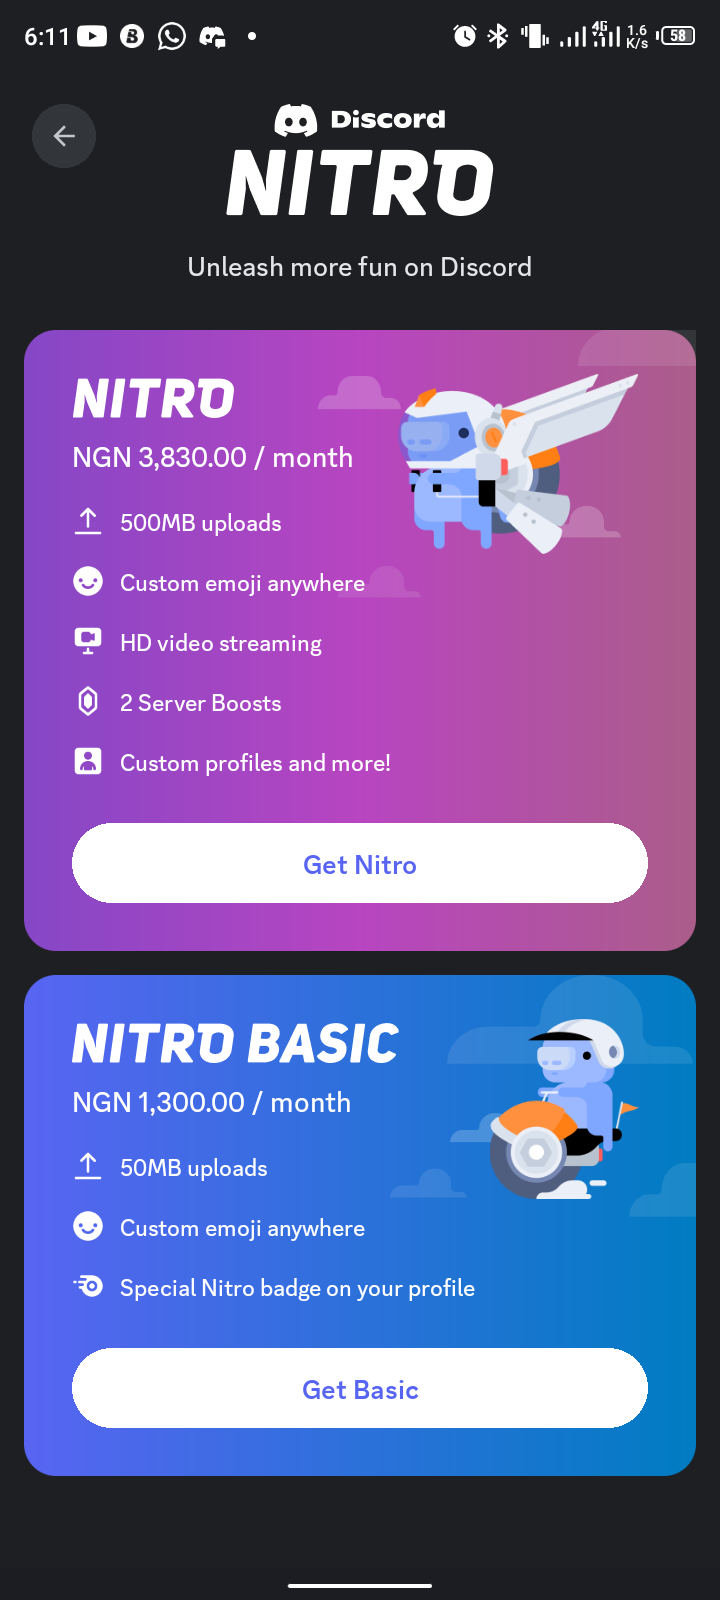
Choose what plan you can afford then continue to make payment.
This is all about it for discord. You can navigate and discover other features for yourself.
Thank you for reading 😊
Posted Using InLeo Alpha
A lot of people need this more than you even think
Thanks for sharing
You're welcome