How I changed the Room on my Xiaomi (valid for all models) and I didn't have to pay for this
Saludos, comunidad Tecnológica de Hive
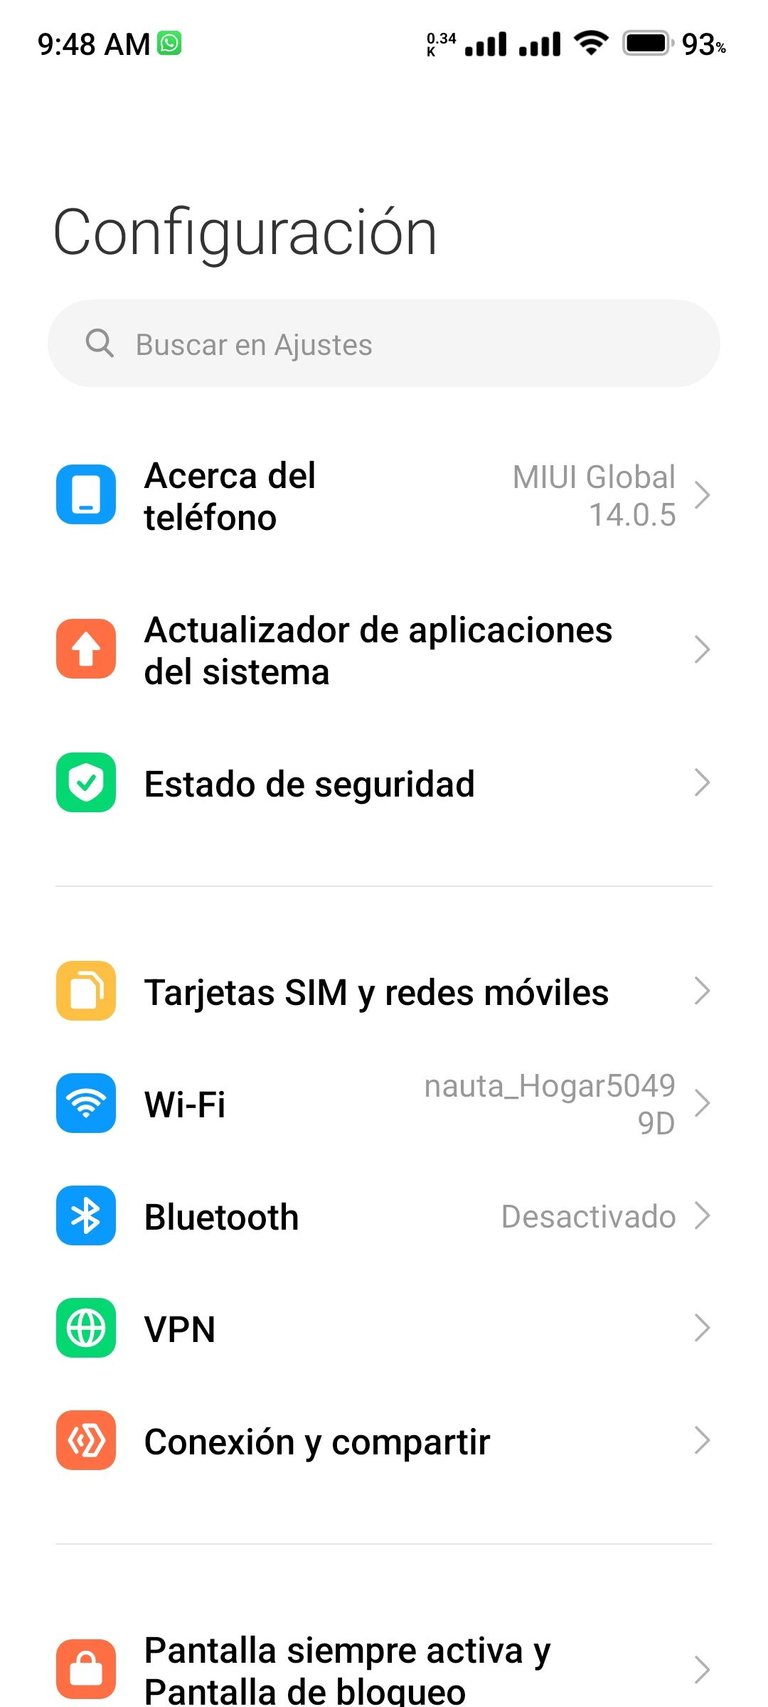
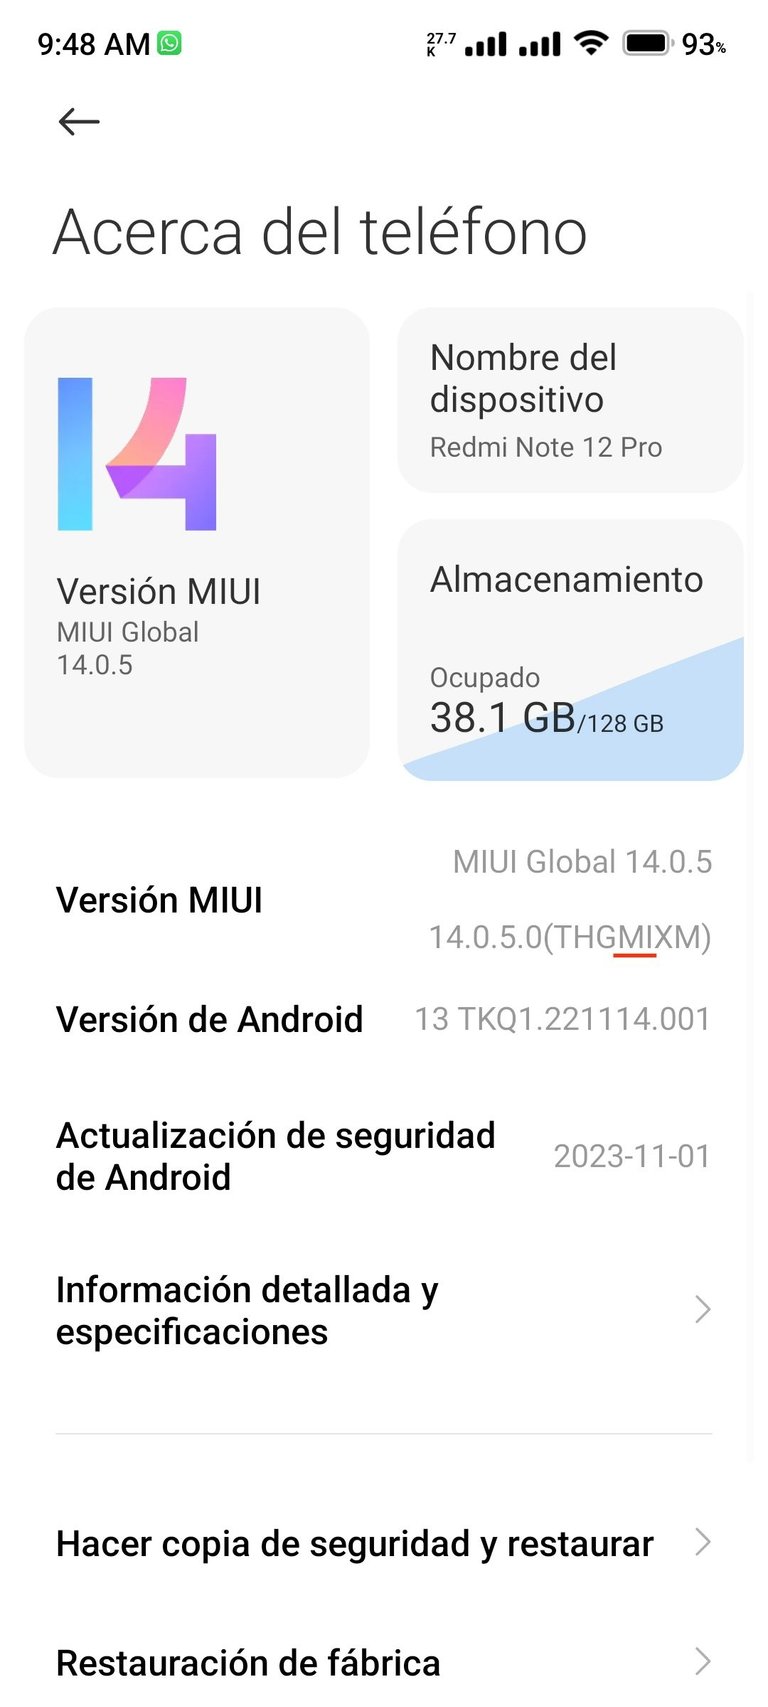
Los que me siguen ya saben que me he obsesionado con el tema de instalar HyperOs en mi móvil Xiaomi. Lastimosamente, puedo decirles que no lo he podido hacer porque Xiaomi no ha liberado la Room para el modelo de mi dispositivo aún. Lo que sí anunciaron y están liberando es para algunos modelos que están en la Mi pilot y tienen Rooms globales. Así que el primer paso que tenemos que averiguar es determinar nuestra Room. Para esto accedemos a Configuración>Acerca del teléfono>y donde dice versión MIUI tenemos que fijarnos en los caracteres marcados en la foto.
Greetings, Hive Tech community Those who follow me already know that I have been obsessed with the issue of installing HyperOs on my Xiaomi phone. Unfortunately, I can tell you that I have not been able to do so because Xiaomi has not released the Room for my device model yet. What they did announce and are releasing is for some models that are on the Mi pilot and have global Rooms. So the first step we need to figure out is to determine our Room. For this we go to Settings>About phone>and where it says MIUI version we have to look at the characters marked in the picture.
 |  |
|---|
Esos caracteres que visualizamos corresponden a una Room especifica y esta puedes saberla mediante la siguiente leyenda. Yo tenía la europea(EU) y cambié para Global(MI):
MI: Global
EU: Europea (EEA)
CN: China
IN: India
RU: Rusa
ID: Indonesia
MX: México
Una vez identificada vamos a descargar los programas y Drivers necesarios para el cambio.
Mi Flash(Nunca descarguen la primera opción):https://www.xiaomiflash.com/download/#google_vignette
Room deseada(buscar el modelo especifico del teléfono):https://c.mi.com/global/miuidownload/index
Drivers(obligatorio): https://www.dropbox.com/scl/fo/fxsim2s9iwsj1rap48f0m/h?rlkey=9dig0t7mbr2me7x3uuos5j9yr&dl=0
Those characters that we visualize correspond to a specific Room and you can know it through the following legend. I had the European(EU) and I changed it to Global(MI):
MI: Global
EU: European (EEA)
CN: China
IN: India
RU: Russian
ID: Indonesia
MX: MexicoOnce identified we will download the programs and Drivers needed for the change.
My Flash(Never download the first option):https://www.xiaomiflash.com/download/#google_vignette
Desired Room(look for the specific phone model):https://c.mi.com/global/miuidownload/index
Drivers(required): https://www.dropbox.com/scl/fo/fxsim2s9iwsj1rap48f0m/h?rlkey=9dig0t7mbr2me7x3uuos5j9yr&dl=0
Drivers
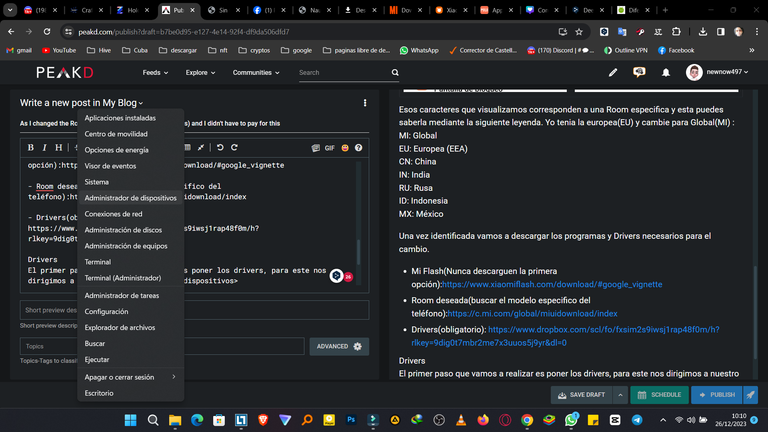
El primer paso que vamos a realizar es poner los drivers, para este nos dirigimos a nuestro administrador de dispositivos haciendo click derecho en el menú inicio>Acción>Agregar hardware agregado.
Drivers The first step we are going to do is to put the drivers, for this we go to our device manager by right clicking on the start menu>Action>Add added hardware.
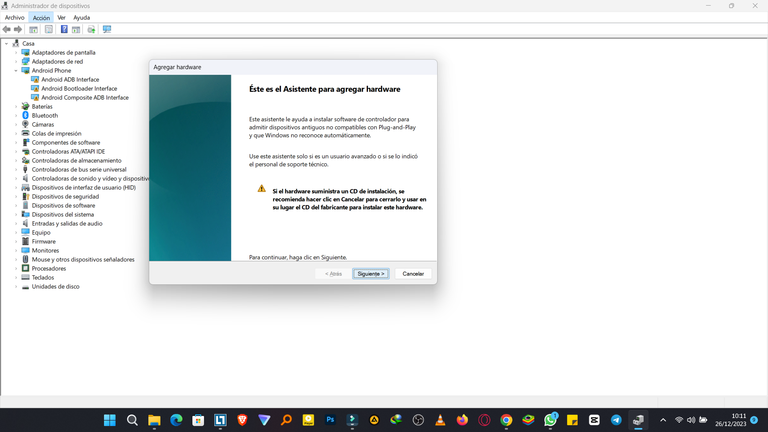
Damos siguiente.
Next.
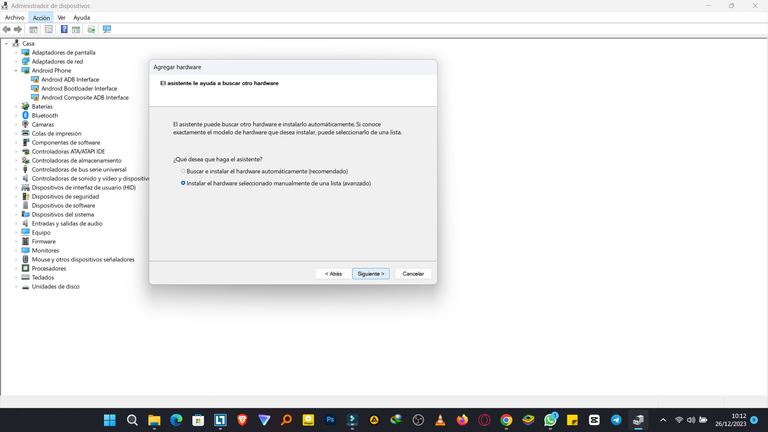
Seleccionamos la opción avanzado.
Select the advanced option.
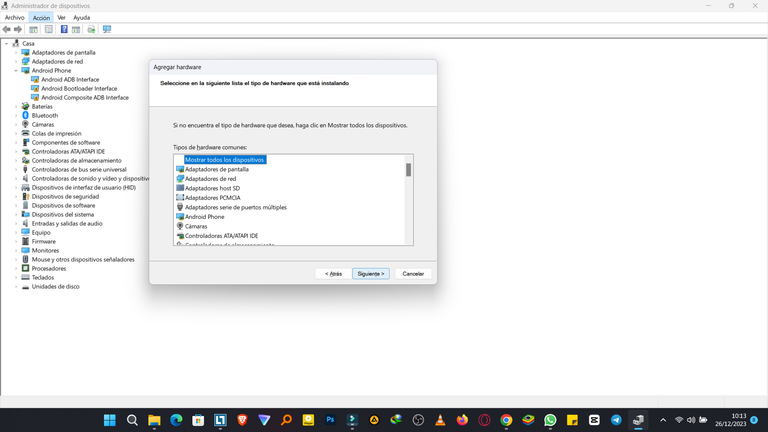
Siguiente.
Next.

Usar disco.
Use disc.
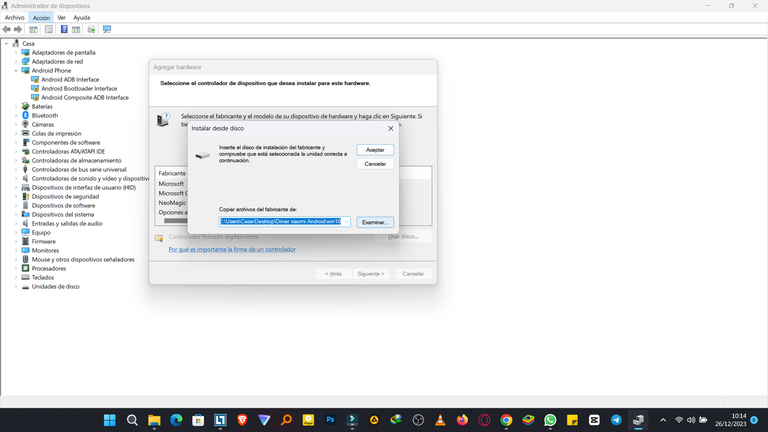
Examinar y buscamos la dirección de los drivers que descargamos, una vez hecho esto damos aceptar.
Examine and we look for the address of the drivers that we downloaded, once this is done we accept.
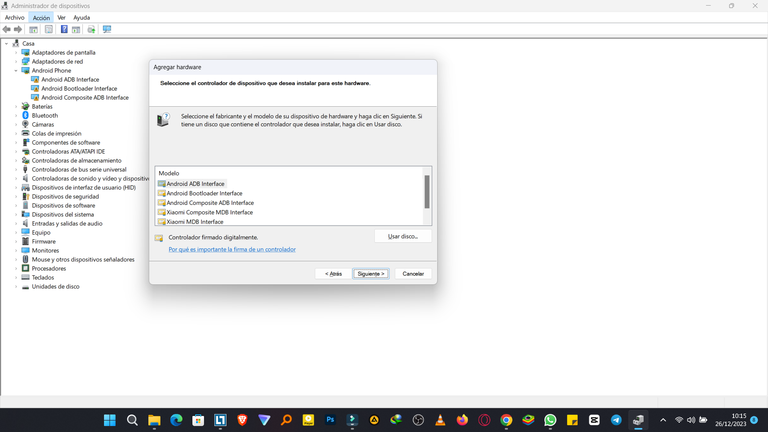
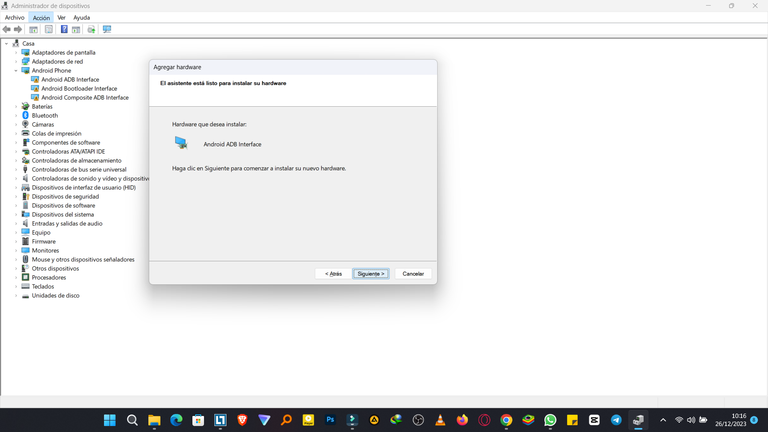
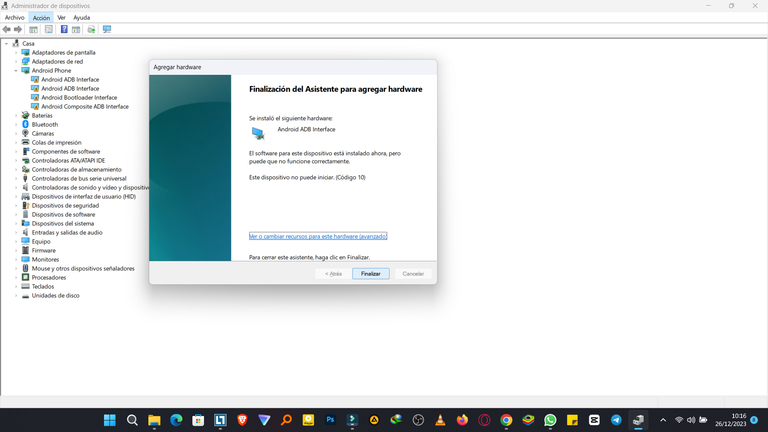
Instalamos el primero y repetimos el proceso con todos para que no nos dé problema alguno.
We install the first one and repeat the process with all of them so that it does not give us any problem.
Download Room
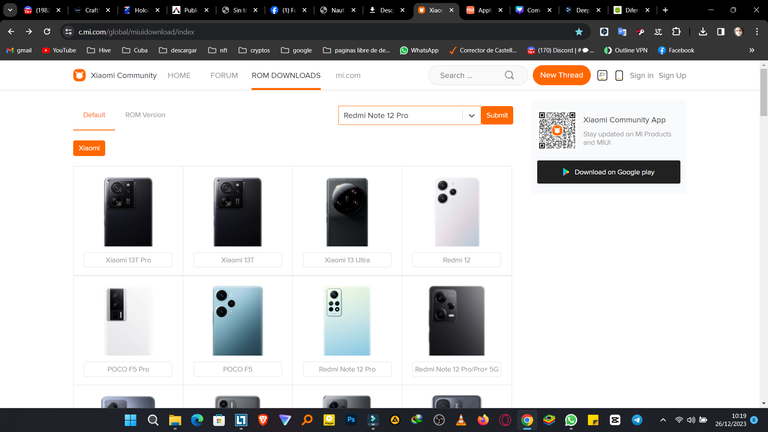
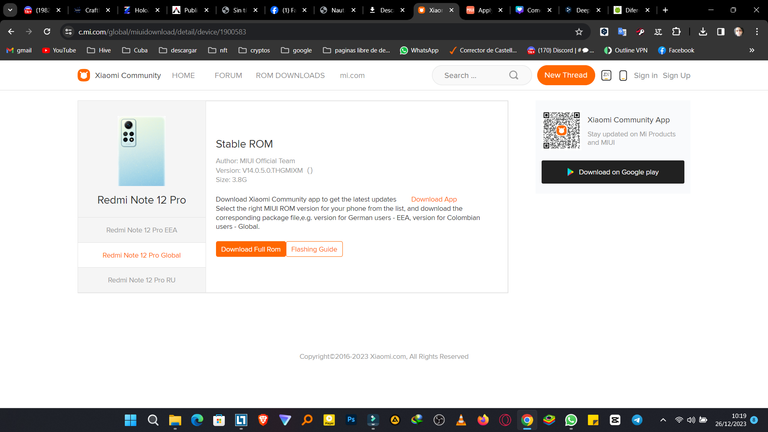
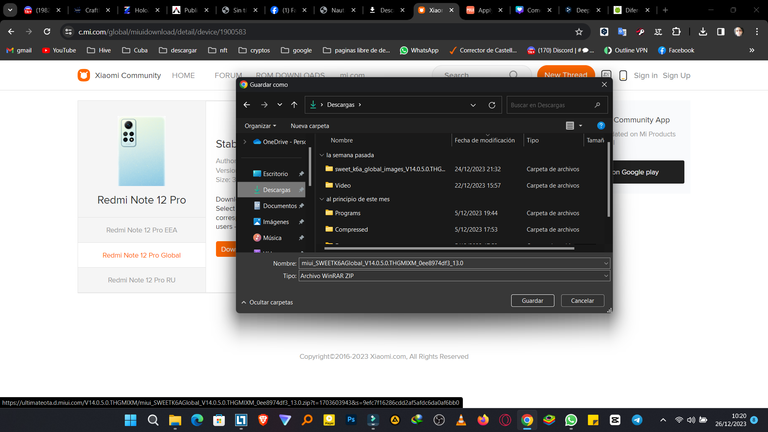
Una vez entrado al enlace de arriba. Escribimos en el buscador de la web el modelo de nuestro celular. En mi caso Redmi Note 12 Pro. Si ves te sale otra foto con la parte trasera de tu dispositivo. Tiene que coincidir con el tuyo. Debajo de la foto nos salen la Rooms que tenemos. Aconsejo poner Global y en la parte derecha el botón para descargar. Después se nos abre una ventana para seleccionar la ubicación de descarga. Pónganlo en la carpeta Descargas si pueden.
Once entered the link above. We write in the web search engine the model of our cell phone. In my case Redmi Note 12 Pro. If you see you get another picture with the back of your device. It has to match yours. Below the photo we get the Rooms we have. I advise you to put Global and on the right side the button to download. Then a window opens to select the download location. Put it in the Downloads folder if you can.
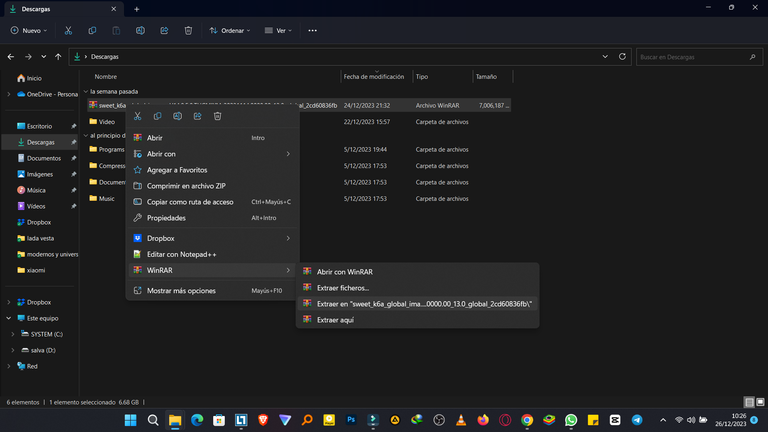

Una vez descargado lo descomprimen en la misma ubicación. Si usan Winrar solo tenemos que darle click derecho>Winrar>Seleccionamos la opción más larga para que nos cree una carpeta.
Es hora de poner el móvil en modo FastBoot. Para esto lo apagamos y presionamos el boton de encender y el de volumen abajo unos segundos. Este prendera con la palabra FastBoot y el fondo en negro. No se preocupen, es normal. Recuerden que teníamos que tener el Bootloader abierto, si no sabes como remítete a mi último post. Ahora lo conectamos a la PC, a un puerto USB 2.0 de preferencia y vamos para el último paso.
Once downloaded unzip it in the same location. If you use Winrar we just have to right click>Winrar>Select the longest option to create a folder.
It's time to put the mobile in FastBoot mode. To do this we turn it off and press the power button and the volume down button for a few seconds. It will turn on with the word FastBoot and the background in black. Do not worry, it is normal. Remember that we had to have the Bootloader open, if you do not know how refer to my last post. Now we connect it to the PC, preferably to a USB 2.0 port and go to the last step.

Mi Flash
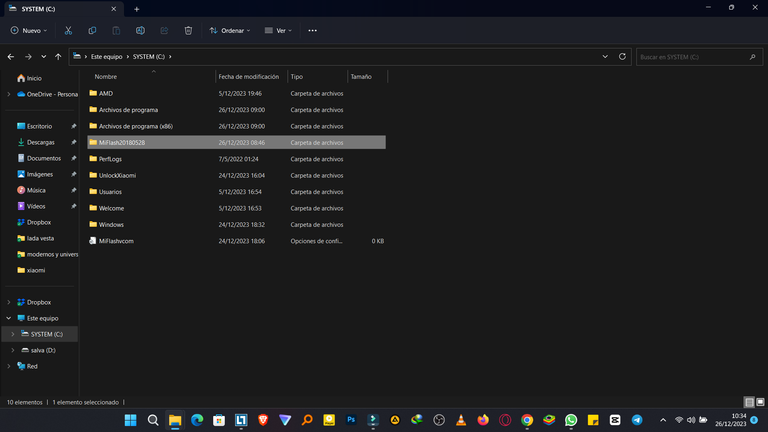
Una vez en este punto ya estamos finalizando. Descargamos esta herramienta y la descomprimimos como mismo hicimos el paso anterior en el disco LOCAL C:. si pueden apreciar yo descargue como 2 versiones anteriores para no tener problemas.
Once at this point we are finishing. We download this tool and unzip it as we did in the previous step in the LOCAL disk C:. If you can see I downloaded as 2 previous versions to avoid problems.
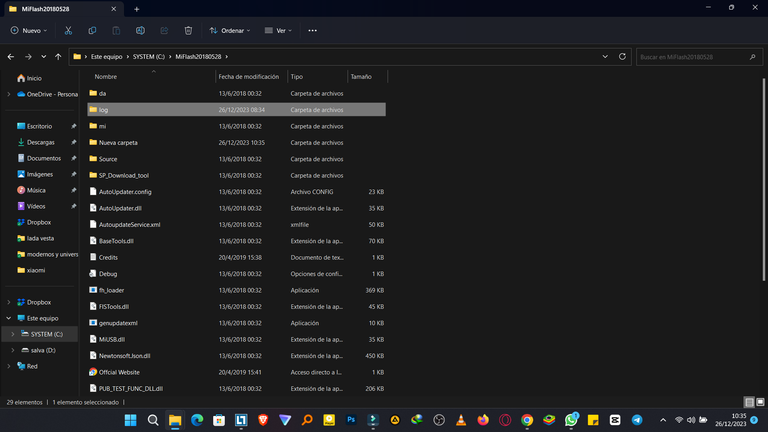
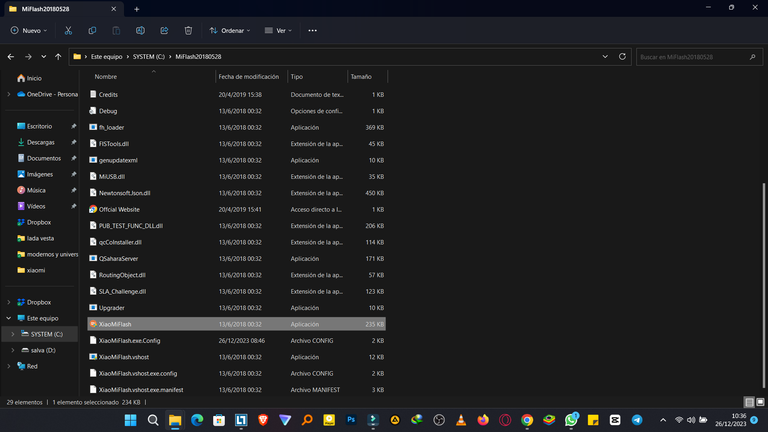
Si lo ejecutamos ahora nos dará problemas, por lo que tenemos que hacer una nueva carpeta llamada "log". Después sí podemos proceder a abrirlo haciendo click en "XiaoMiFlash".
If we run it now it will give us problems, so we have to make a new folder called "log". Then we can proceed to open it by clicking on "XiaoMiFlash".
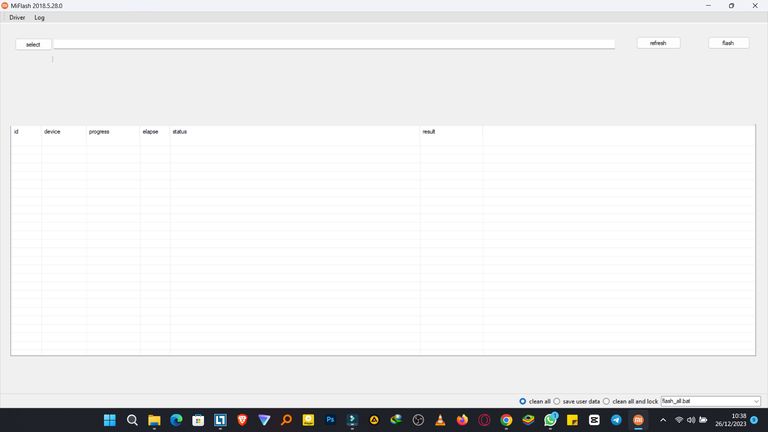
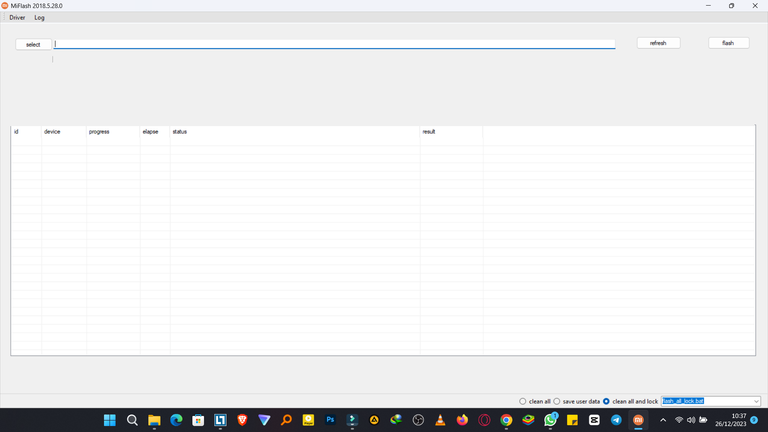
Antes de hacer nada más les recomiendo que toquen la opción "clean all", para que dejen el bootloader abierto. Yo no sabía esto y la deje con la que viene por defecto de "Clean all and lock". En la esquina inferior derecha pueden ver estas opciones.
Before doing anything else I recommend you to touch the "clean all" option, so that you leave the bootloader open. I didn't know this and left it with the default "clean all and lock". In the bottom right corner you can see these options.
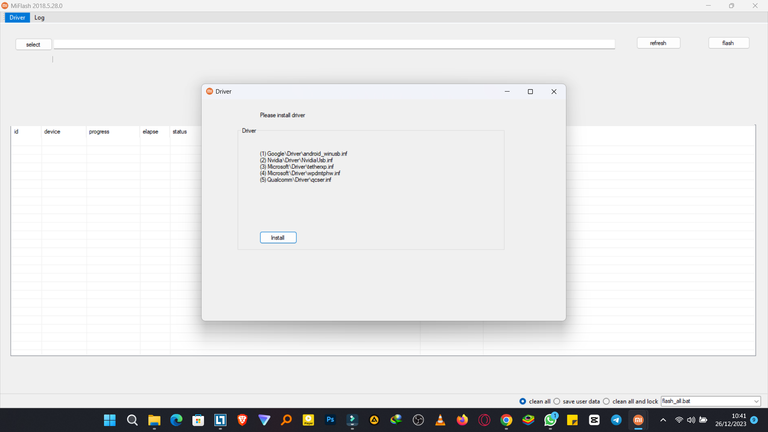
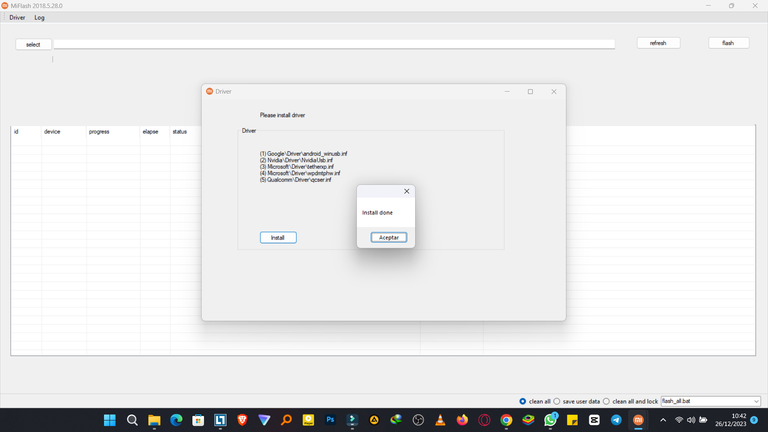
Ahora vamos a "Driver" y seleccionamos "Install", esto cargará los Drivers que anteriormente habíamos instalado, en el programa saliendo un cartel diciendo que está listo.
Now we go to "Driver" and select "Install", this will load the Drivers that we had previously installed, a sign will appear in the program saying that it is ready.
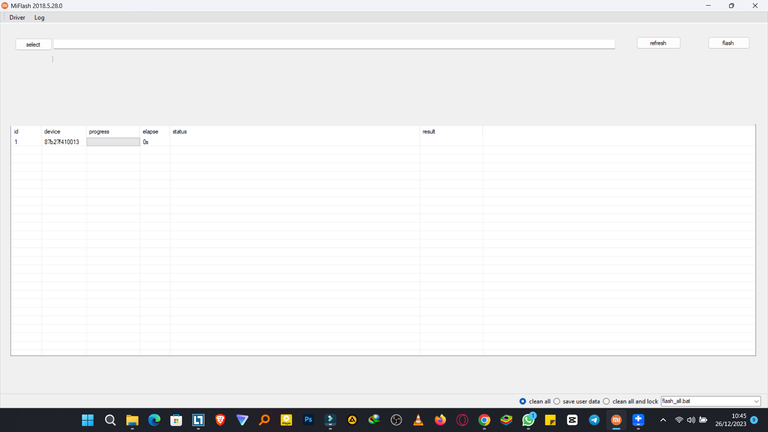
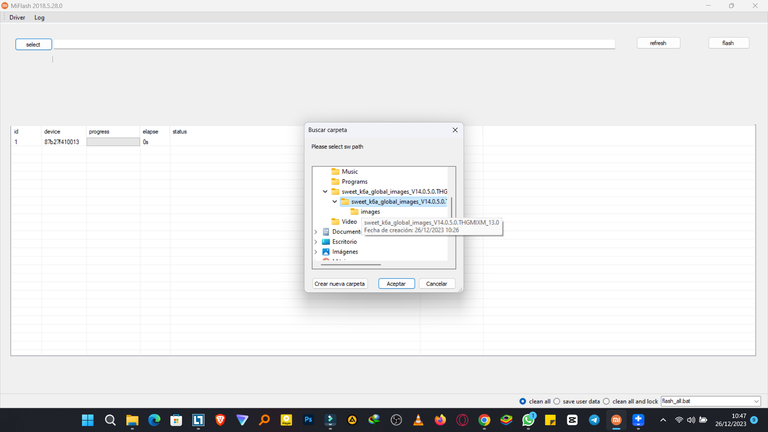
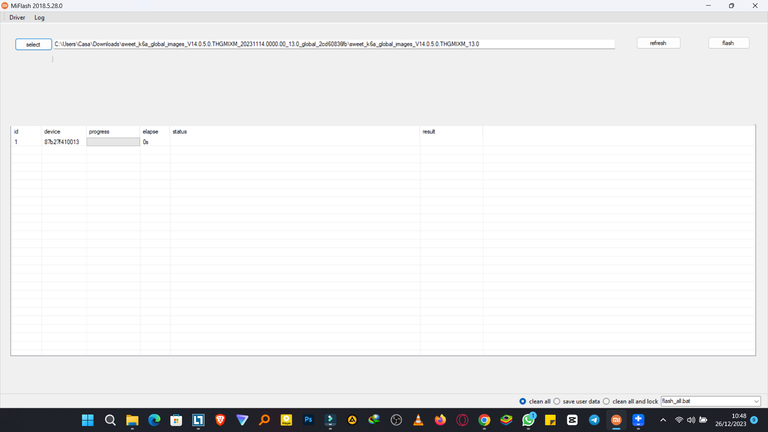
Para comprobar que se instalaron bien tenemos que darle al botón refresh y saldrá nuestro móvil debajo. Solo nos queda buscar el fichero de la Room descargado. Hacemos click en Select y buscamos la dirección de descarga.
To check that they were installed well we have to press the refresh button and our mobile will appear below. We only have to look for the downloaded file of the Room. We click on Select and look for the download address.
Una vez damos Flash, comenzará el proceso a caminar. No toquen ni hagan nada en la PC durante este tiempo. Demora de 10 a 15 minutos en dependencia de las características de nuestra PC. Una vez finalizado el proceso, el móvil se reiniciara solo y levantara nuestro nuevo sistema operativo.
Once we hit Flash, the process will start to walk. Do not touch or do anything on the PC during this time. It takes 10 to 15 minutes depending on the characteristics of our PC. Once the process is finished, the mobile will restart by itself and will start our new operating system.
Haciendo este proceso me ahorré cerca de 2500 CUP la mitad del salario que gano en el mes por trabajarle al estado. Así que saque sus propias conclusiones porque yo me ahorre dinero y encima de eso aprendí a hacer algo nuevo en este día y el conocimiento se queda para toda la vida. Sin más, me despido cordialmente. Espero tu like y tu comentario en el cajón debajo.
By doing this process I saved about 2500 CUP, half of the salary I earn in a month for working for the state. So draw your own conclusions because I saved money and on top of that I learned to do something new on this day and the knowledge stays for life. Without further ado, I bid you a cordial farewell. I wait for your like and your comment in the box below.


▶️ 3Speak
A perfect tutorial for a less techy person like me.
!PGM
BUY AND STAKE THE PGM TO SEND A LOT OF TOKENS!
The tokens that the command sends are: 0.1 PGM-0.1 LVL-0.1 THGAMING-0.05 DEC-15 SBT-1 STARBITS-[0.00000001 BTC (SWAP.BTC) only if you have 2500 PGM in stake or more ]
5000 PGM IN STAKE = 2x rewards!
Discord
Support the curation account @ pgm-curator with a delegation 10 HP - 50 HP - 100 HP - 500 HP - 1000 HP
Get potential votes from @ pgm-curator by paying in PGM, here is a guide
I'm a bot, if you want a hand ask @ zottone444
Very thanks bro. This tutorial is good For all Xiaomi ussers.
Siempre es muy útil tu contenido, este tutorial me ha llegado en el momento justo
Genial poder ayudar gracias por estar al tanto de mi blog 😊
Yay! 🤗
Your content has been boosted with Ecency Points, by @newnow497.
Use Ecency daily to boost your growth on platform!
Support Ecency
Vote for new Proposal
Delegate HP and earn more