Adaptación de un botón de encendiodo de un móvil Moto e5 Play, sin contar con el respuesto original / Adapting a power button on a Moto E5 Play without having the original replacement part.

Buenas tardes para la gran comunidad @geekzone y demás integrantes de Hive.
Good afternoon to the great @geekzone community and all the other members of Hive.
Continuamos con las reparaciones en el taller. Hoy les traemos una reparación sencilla, pero muy necesaria para el cliente. Decidimos mostrarle cómo en ocasiones hay que innovar para resolver y reparar un móvil.
We continue with the repairs in the workshop. Today we bring you a simple repair, but a very necessary one for the customer. We decided to show how sometimes we have to innovate in order to solve a problem and repair a mobile phone.
Ya hemos referido en múltiples ocasiones que no todas las personas pueden adquirir un móvil y les toca luchar con uno antiguo o en mal estado que alguien les regaló. Nos toca a nosotros entonces tratar de resolver, pues en muchos casos no contamos con el repuesto original. Es uno de los mayores retos, pues en mi país, Cuba, no tenemos acceso a compra online como los técnicos en otros países.
We have mentioned on multiple occasions that not everyone can afford to purchase a mobile phone, and they have to make do with an old or damaged one that someone gave them. We then have to try to find a solution, because in many cases we do not have access to the original replacement part. This is one of the biggest challenges, because in my country, Cuba, we do not have access to online purchases like technicians in other countries do.
Hoy les presentamos el caso de un Motorola Moto E5 Play, que enciende según el cliente, pero no tiene cómo, pues le falta el botón de power. Haremos como siempre el diagnóstico y la reparación si está a nuestro alcance.
Today we present the case of a Motorola Moto E5 Play, which, according to the customer, turns on, but there is no way to turn it on because the power button is missing. As always, we will carry out the diagnosis and repair if it is within our capabilities.

DIAGNÓSTICO
DIAGNOSIS
1- En la inspección visual externa, se ve claramente que le falta por completo la regleta externa que comprende los botones de subir y bajar volumen, además del botón power. Le faltan, además, los botones físicos que son los que se presionan y actúan también sobre los de la regleta y originan la acción de encendido y controles de volumen. Así que este es el diagnóstico. A priori, la falta de la regleta principalmente.
1- During the external visual inspection, it is clearly visible that the external flex cable assembly containing the volume up and volume down buttons, as well as the power button, is completely missing. The physical buttons are also missing; these are the ones that are pressed and act on the buttons of the flex cable, triggering the power-on action and volume controls. So, this is the diagnosis. At first glance, the main problem is the missing flex cable assembly.

REPARACIÓN
REPAIR
1- La reparación en sí consiste en colocar una nueva regleta y luego los botones. Pero no tenemos ninguno de estos repuestos, ni siquiera la posibilidad de comprarlos en una de las tiendas Online. Así que haremos una adaptación aquí para poder resolverle al cliente.
1- The repair itself consists of installing a new flex cable assembly and then the buttons. But we do not have any of these replacement parts, nor even the possibility of purchasing them from one of the online stores. So, we will make an adaptation here in order to solve the customer's problem.
2- Abrimos el teléfono, identificamos el conector de la regleta faltante. En este caso tiene 5 pines, pero no sabemos en sí cuál es el que tiene que ver con el encendido porque aquí también están los de volumen y GND, que es la tierra. Generalmente, el pin del power on debe tener o el voltaje de la batería o 1.8 V. Así que usaremos nuestro multímetro para medir uno por uno. Colocamos el multímetro en escala de voltaje continuo, punta negra a tierra y con la punta roja o positivo medimos uno por uno de los 5 pines. Ya tenemos el resultado. Es el tercer pin de izquierda a derecha con una medida de 1.83 V.
2- We open the phone and identify the connector for the missing flex cable. In this case, it has 5 pins, but we do not know exactly which one is related to the power function because the volume lines and GND, which is ground, are also there. Generally, the power-on pin should have either the battery voltage or 1.8 V. So, we will use our multimeter to measure them one by one. We set the multimeter to the DC voltage range, place the black probe on ground, and use the red or positive probe to measure each of the 5 pins. We now have the result. It is the third pin from left to right, with a measurement of 1.83 V.


3- Haremos ahora una prueba para verificar si realmente es el pin de encendido. Con una pinza, hacemos contacto con este tercer pin y con la otra punta tocamos cualquier punto que represente tierra. Al hacerlo, el teléfono enciende, así que ya tenemos la certeza de que es el power on o encendido.
3- We will now perform a test to verify whether it really is the power pin. Using tweezers, we make contact with this third pin and touch any point that represents ground with the other tip. When we do this, the phone turns on, so now we are certain that it is the power-on pin.


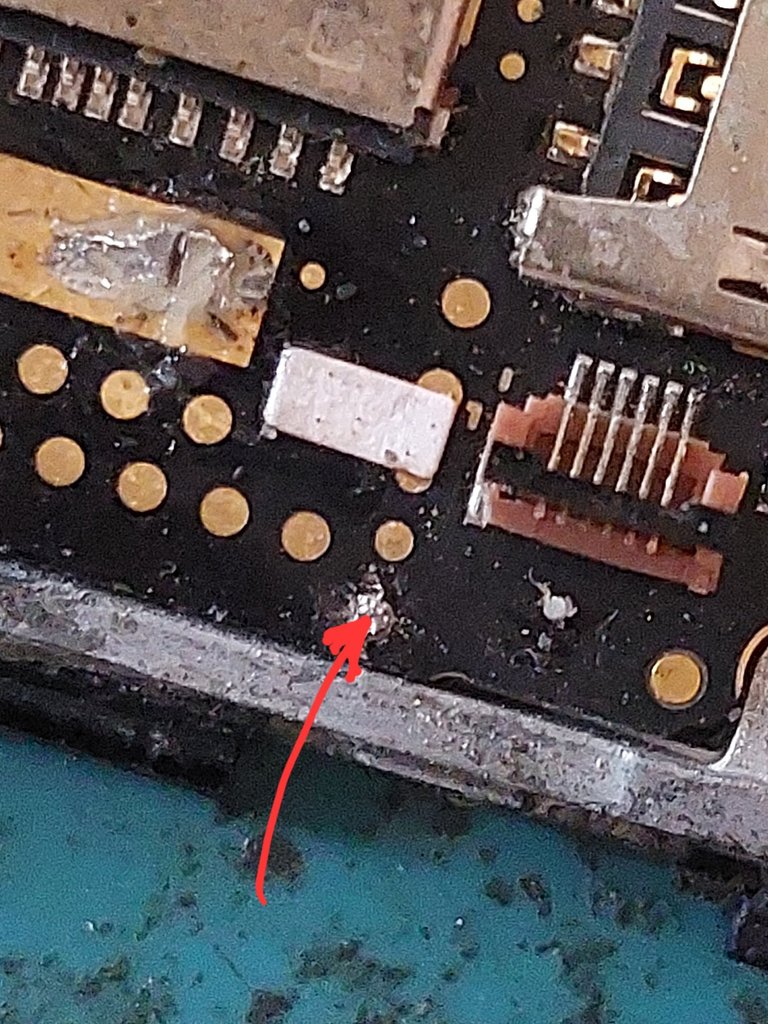
4- La adaptación que haremos es con un pequeño pulsador, soldarle un cable a cada uno de los dos extremos, para luego unir uno de esos cables en el power on y el otro en cualquier punto GND. Pero sabemos que es complejo soldar en estos pines tan pequeños, así que con pericia de los años de experiencia buscaremos un mejor lugar para soldar, solo que ese lugar debe pertenecer a la misma línea de este tercer pin. Con el multímetro en continuidad, ponemos una punta en el tercer pin y con la otra, empezamos a tocar varios puntos de test que están cerca del lugar. Encontramos uno con el que el multímetro marcó continuidad, así que lo usaremos para montar nuestro pulsador adaptado.
4- The adaptation we will make involves a small push button. We solder a wire to each of its two terminals, then connect one of those wires to the power-on line and the other to any GND point. But we know that soldering onto these very small pins is complicated, so, using the skill gained through years of experience, we will look for a better place to solder. This point must belong to the same line as this third pin. With the multimeter set to continuity mode, we place one probe on the third pin and use the other to touch several test points located nearby. We found one where the multimeter showed continuity, so we will use it to install our adapted push button.


5- Preparamos nuestro pulsador soldando ya los dos cables en los puntos especificados, entonces hacemos una prueba. Lo pulsamos y, listo, el teléfono ha encendido. Así que hemos tenido éxito. Ahora solo nos queda ya pegar nuestro pulsador a la placa de forma tal que permita quitar y poner la tapa trasera sin ser dañado. Lo hacemos usando silicona caliente y rellenando el alrededor, así quedará más firme. Armamos el equipo y listo para entregar.
5- We prepare our push button by soldering the two wires to the specified points, and then we perform a test. We press it and, that's it, the phone turns on. So, we have been successful. Now all that remains is to attach our push button to the board in such a way that it allows the back cover to be removed and installed without damaging it. We do this using hot glue and filling around it, so it will be more firmly secured. We assemble the device and it is ready to be delivered.


Este tipo de reparación que pudiéramos considerar como adaptaciones, pudieran parecer algo rústicas, sin embargo, un cliente sin posibilidad económica de un mejor móvil siempre las agradece. También se nos hace más engorroso a los técnicos, puesto que con un repuesto original es solo colocarlo y ya.
This type of repair, which we could consider an adaptation, may seem somewhat crude; however, a customer who cannot afford a better mobile phone will always appreciate it. It also makes things more cumbersome for us technicians, since with an original replacement part, you simply install it and that's it.
Hasta aquí, este post. Espero les haya parecido interesante. Todas las imágenes son de mi total autoría. Gracias a los lectores por su atención.
That's all for this post. I hope you found it interesting. All the images are entirely my own. Thank you to all the readers for your attention.
Traducido con ayuda del traductor de Google.
Translated with the help of Google Translate.
Hasta pronto.
See you soon.