FreeCAD Part Modeling Tutorial 49
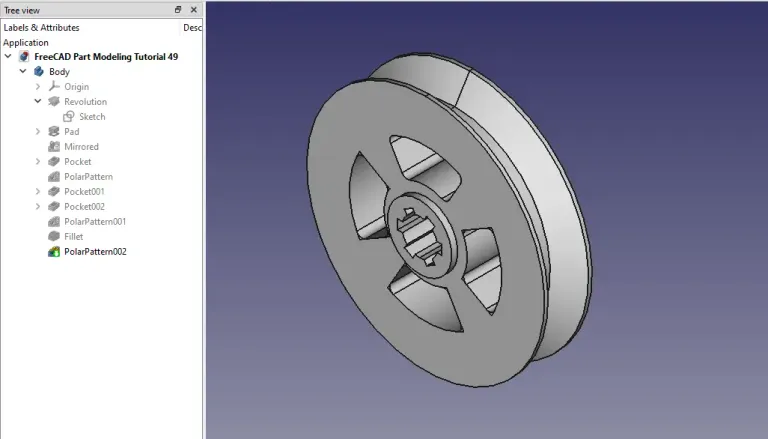
In our previous tutorial we have did FreeCAD Part Modeling Tutorial 48. In this Tutorial we will convert below sketch into 3D model. This Tutorial is designed for beginner user to understand part design Workbench in FreeCAD and basic modeling approach in FreeCAD.
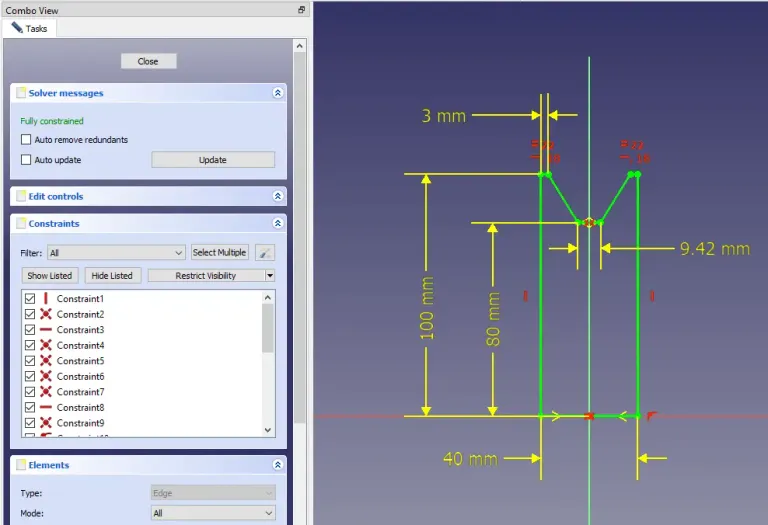
STEP 01-: Select the right plane and create the sketch as shown in below image.
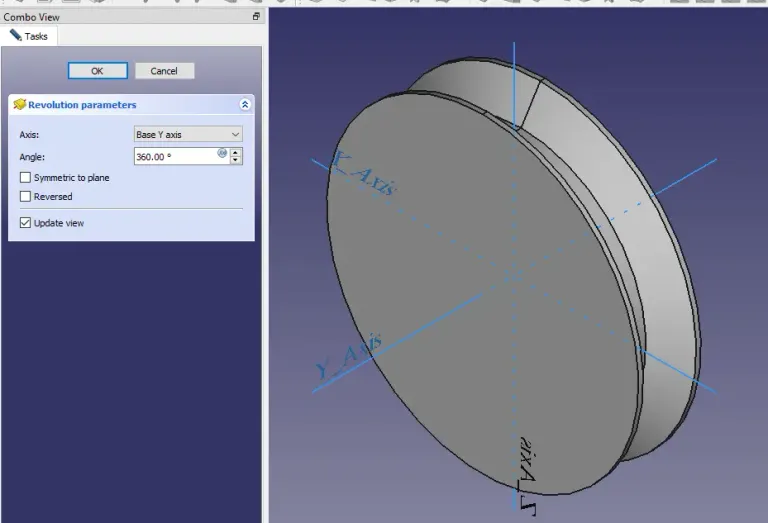
STEP 02-: Choose revolve feature and revolve it with respect to Y-Axis.
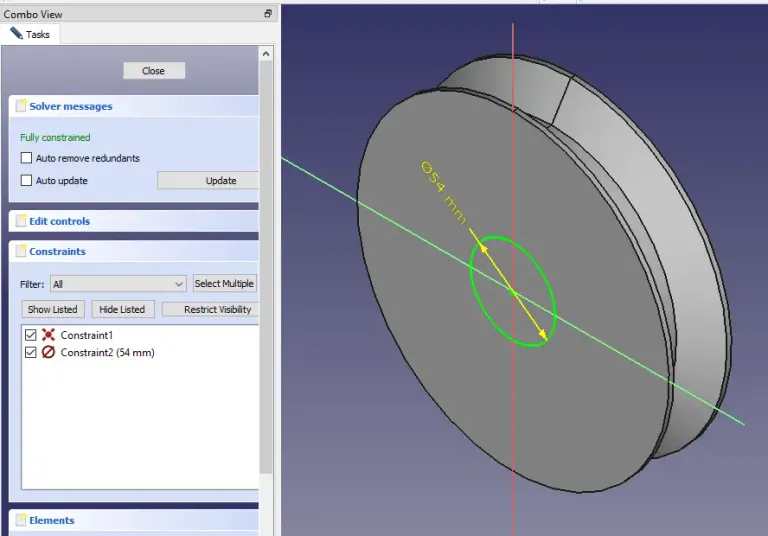
STEP 03-: Now select the face and create the circle of diameter 54.
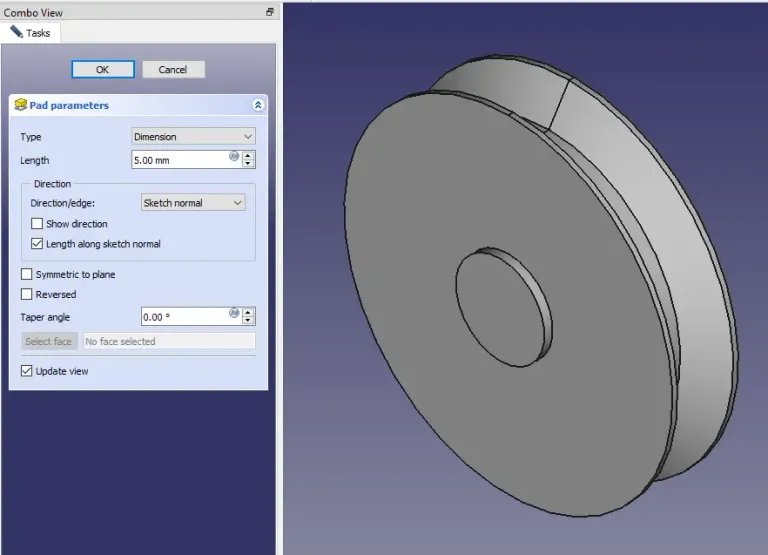
STEP 04-: Now Select Pad tool and extrude it to 5mm length as shown in below image.
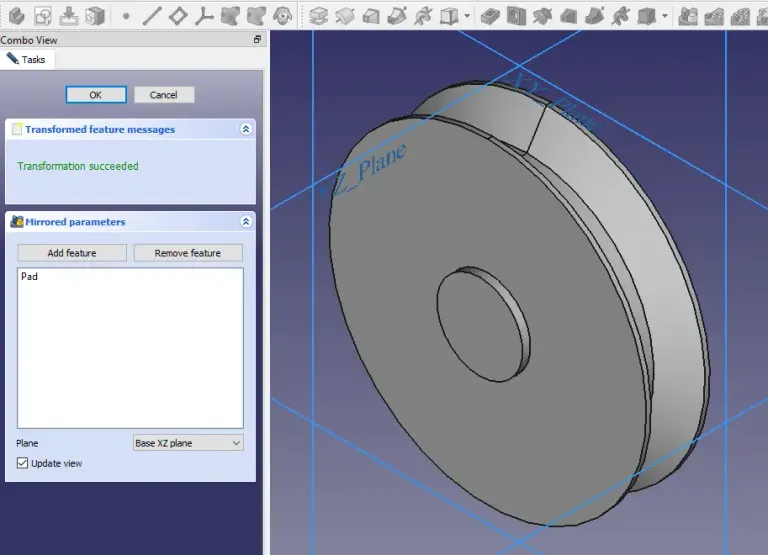
STEP 05-: Now use the mirror toll and mirror it with respect to XZ plane as shown in below image.
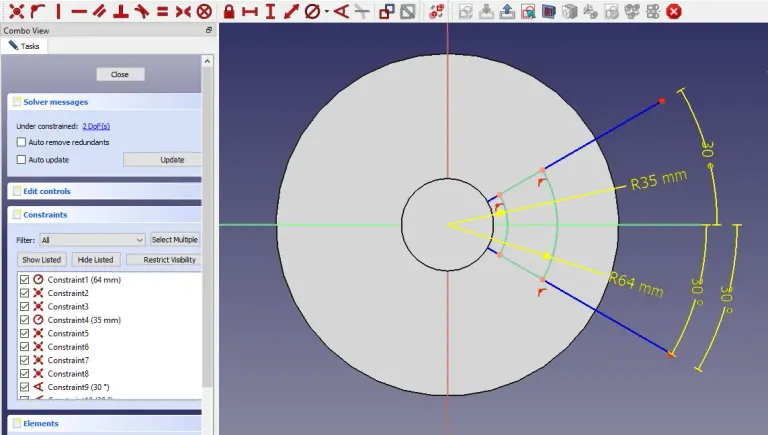
STEP 06-: Now select the face and create the sketch and use Pocket tool to remove the material.
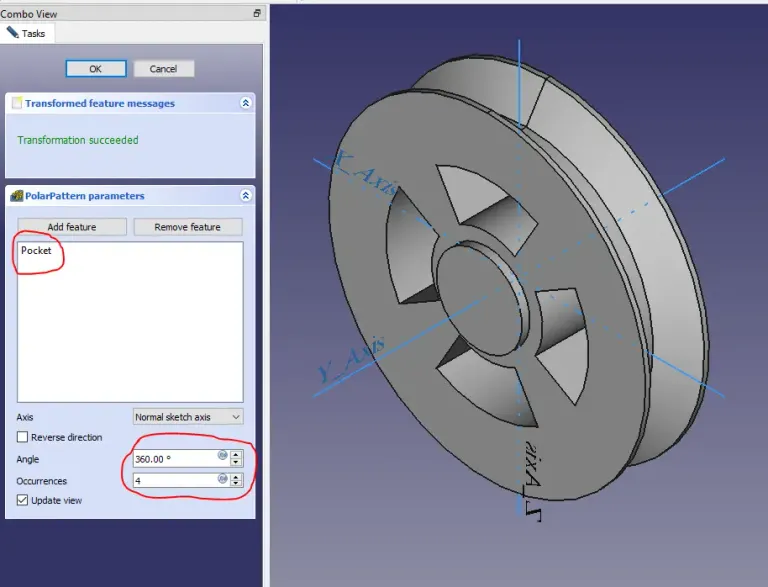
STEP 07-: Now use Polar pattern feature and pattern it.
STEP 08-: Select the face and create the sketch.
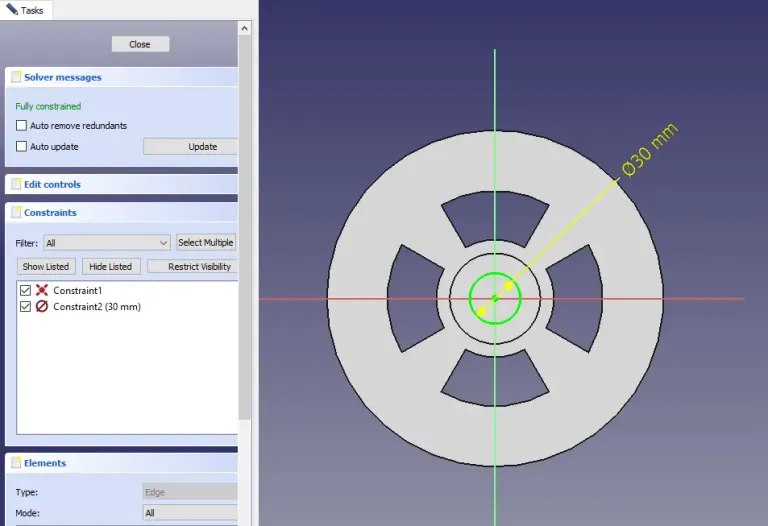
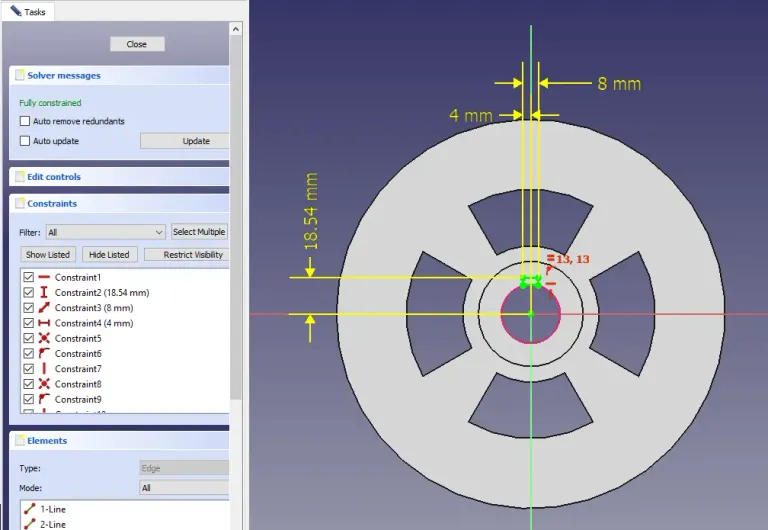
STEP 09-: Add Keyway dimension to the sketch and remove it.
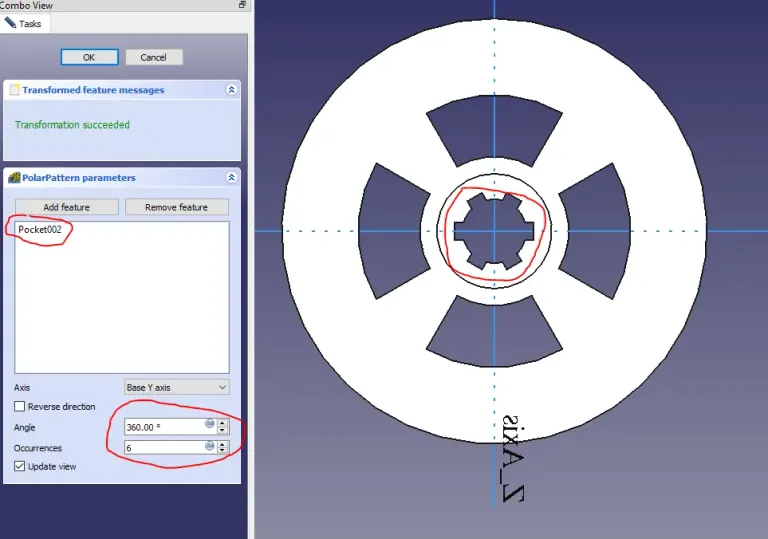
STEP 10-: Use polar pattern and pattern it along Y Axis and keep occurrences 6 as Shown in Below image .
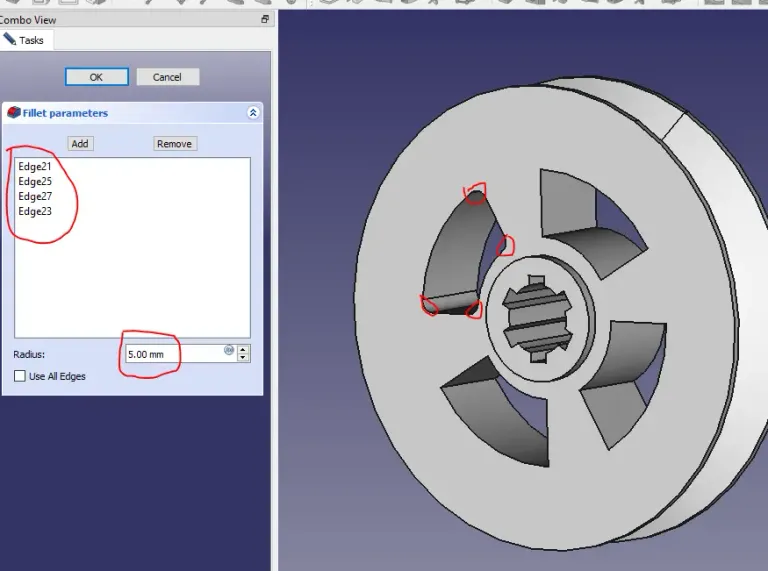
STEP 11-: Fillet the corner as shown in below image.
I hope yo have have enjoyed this tutorial if you have enjoyed it then please share it on social media and also give your valuable suggestion in the comment section of this tutorial. Your valuable comment will help me to improve quality of tutorial on this website.
Posted from my Blog https://mechnexus.com with Exxp: FreeCAD Part Modeling Tutorial 49
Watch Video Version of this Tutorial-:
Congratulations @mechnexus! You have completed the following achievement on the Hive blockchain And have been rewarded with New badge(s)
You can view your badges on your board and compare yourself to others in the Ranking
If you no longer want to receive notifications, reply to this comment with the word
STOPCheck out our last posts: