[Es/En]🎮 Remplacé los botones de mi Mando Verde PS3 🔩
Español
Hola Amigos de Geek Zone ¿Como están? Espero que estén super bien y sean bienvenidos una nueva publicación hecha por mí. Hoy les traigo un post diferente, no es de ningún videojuego, ni un Gameplay, es algo que tenía pensando hacer desde hace tiempo que tiene que ver con mi habilidad para reparar y destruir cosas jaja, en este caso se trata de reparar.
Como saben grabo muchos videojuegos de consola para el canal, estos videojuegos normalmente los juego con emuladores en la Pc, a pesar de que tengo las consolas disponibles, las grabaciones y la calidad salen mucho mejor cuando grabo con la emulación.
Para jugar de forma cómoda los emuladores necesito un mando que se pueda conectar al Windows de la Pc, ya que no me gusta jugar con teclado, al menos que sea un juego donde no necesite mucha habilidad con varios comandos y botones, para mí una de las mejores opciones que podemos usar como mando para jugar en PC son los mandos de PS3, aunque tengo que admitir que los de PS4 dan menos problemas que los de PS3.

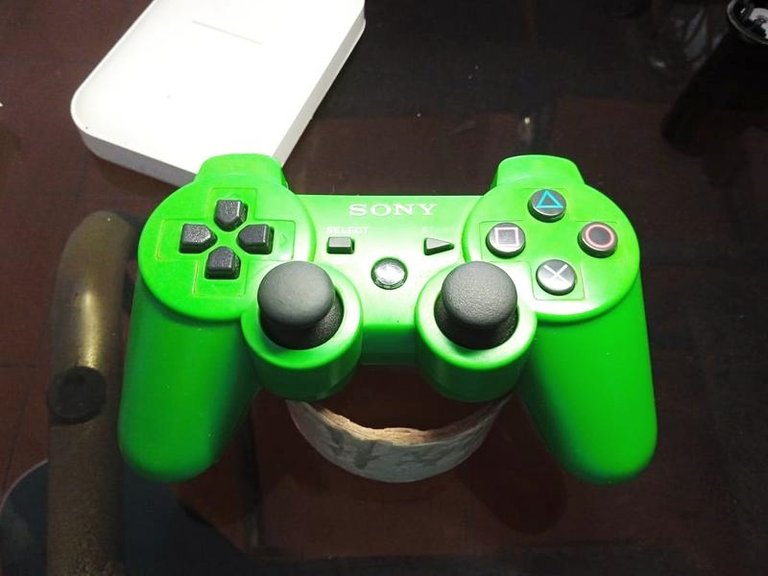
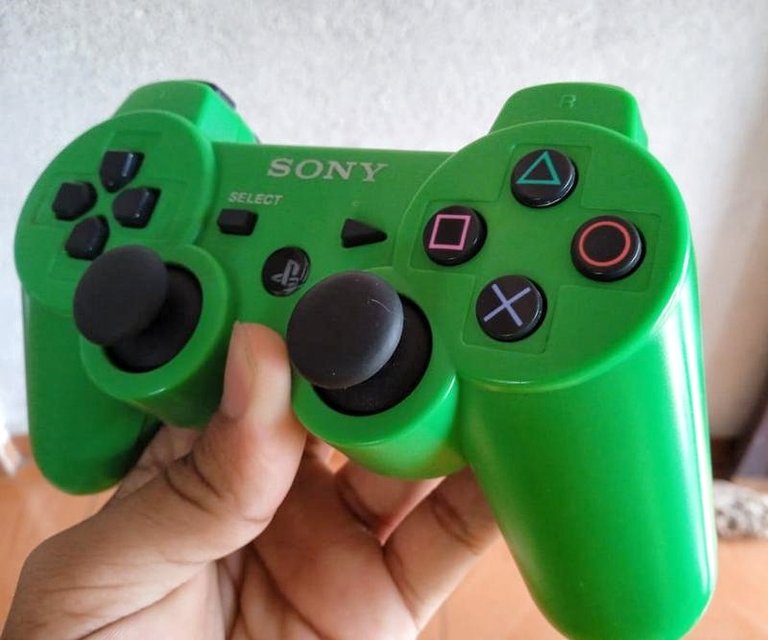
Esto se debe porque los mandos de PS3 necesitan de un software extra en la Pc para que puedan funcionar, cosa contraria con los mandos de PS4 que una vez que los conectas la computadora los reconoce y naturalmente funcionan bien, mi mando favorito para jugar videojuegos es ese que ven en pantalla, es de color verde y la neta me ha rendido mucho.
No obstante, como todo en la vida las cosas se van desgastando con el uso, el uso que le doy a este control es prácticamente intenso, no sólo lo uso para grabar si no también para jugar en consola, el mando término perdiendo algunas funciones esenciales, entonces en estos casos podemos hacer dos cosas, o comprar uno nuevo o tener la valentía de desarmarlo y averiguar qué es lo que sucede.
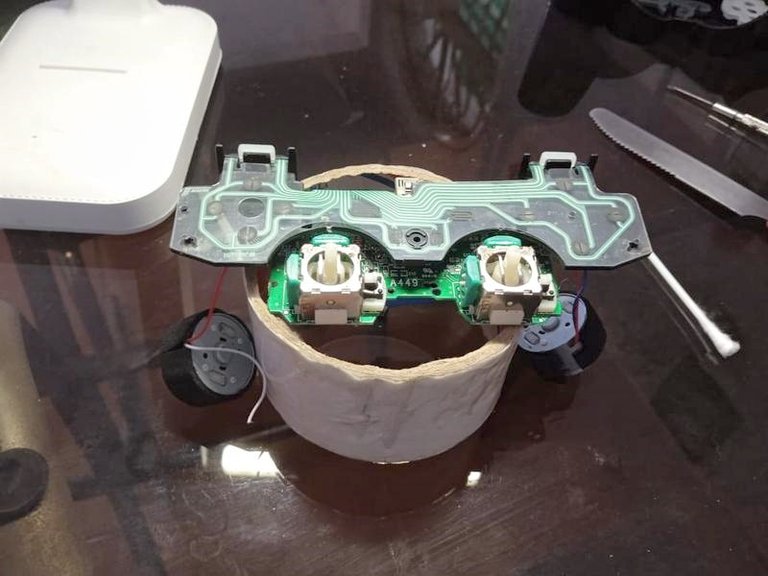
Yo en lo personal tomé la segunda opción y me salió muy bien, claro hoy en día los mandos de PS3 son muy baratos debido a su antigüedad, pero en este caso lo quise desarmar para ver sus circuitos internos, así que les contaré cómo me fue:
Resulta que el mando ya no estaba funcionando de la forma correcta porque las gomas de los botones que permiten el contacto con la placa ya estaban muy desgastadas, los botones “x” y “cuadrado” se hundían mucho y dificultaba su uso.

Esto se debe a que la mayoría de las veces me la paso jugando videojuegos como el Gran Turismo 4, que requieren de una buena presión en el manejo y para eso debo machacar los botones “x” y “cuadrado” para lograr ganar las carreras, fue en plena grabación de un gameplay con un juego de Nintendo 64 que me di cuenta que la “x” ya no estaba haciendo las funciones como debía, entonces me tocó hacer un corte para cambiar de mando.
Anteriormente ya había desarmado mandos de consolas antes, como mandos de Xbox, GameCube y los mismo de PS3, pero uno de los mayores problemas a la hora de desarmar un mando de PS3 son los benditos gatillos, tienes que tener mucha precisión a la hora de desarmar y armar los controles para que los gatillos no se salgan, si lo armas mal los gatillos no van a dar contacto con la goma y habrá que repetir el procedimiento.
También puede darse el caso de que se atoren en la carcasa del mando y no permita ni moverlo o peor, no dejar que los demás botones sean presionados. Este es uno de los detalles por los cuales no me gusta desarmar un mando de PS3 sólo ya que un error puede dañar un botón importante en el mando. Otra mala experiencia que tuve desarmando los mandos de PS3 fue cuando intenté limpiar la lámina de contacto del control, eso es algo que terminé pagando caro.
Pensé que lo estaba limpiando, que lo estaba haciendo bien, pero fue todo lo contrario, en realidad lo que hice fue estropear el contacto que la lámina tenía con los gatillos y ese mando no volvió a funcionar de la misma forma, entonces desde ese día no volví a tocar una lámina de esas ya que son muy delicadas y pueden dañar el control por completo jaja.
Por otro lado, busqué mis herramientas para desarma el mando verde, los tornillos se resistieron, pero gracias al cielo pude sacarlos con un poquito de presión extra, el problema era muy simple, cambiar la goma de los contactos de los botones por una nueva, por fortuna tenía una goma guardada en mis cajones y la use, también cambie la goma de la cruceta por las dudas.
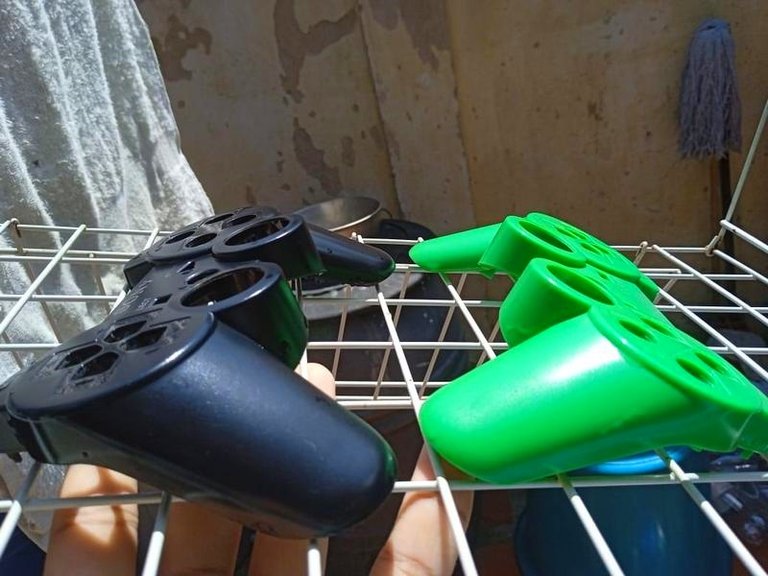
Antes de poner las nuevas gomas decidí lavar algunas cosas, como por ejemplo la carcasa del mando que estaba mugrienta, también decidí remojar los botones, los gatillos y las palancas que también tenían su mugre, esto lo hice para tener un mejor rendimiento a la hora de probarlo. Les metí jabón para limpiarlos bien y estuve una hora esperando a que las cosas se sequen para ponerlas en la carcasa.
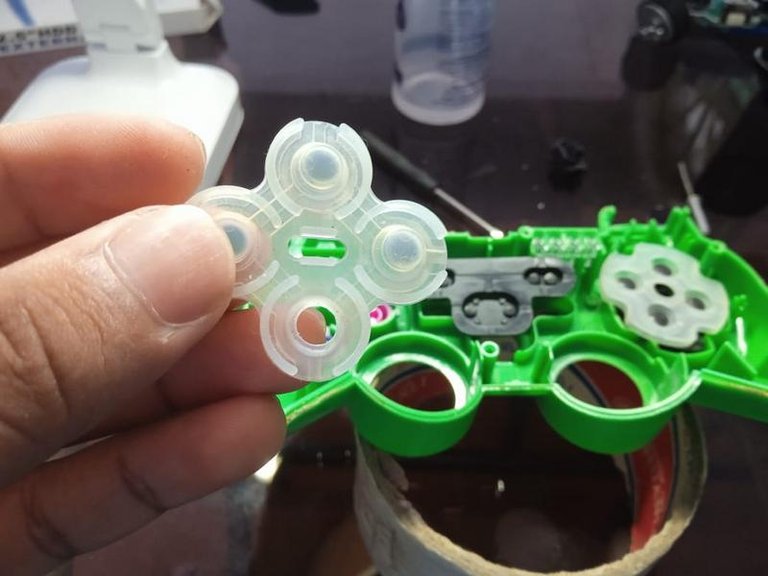
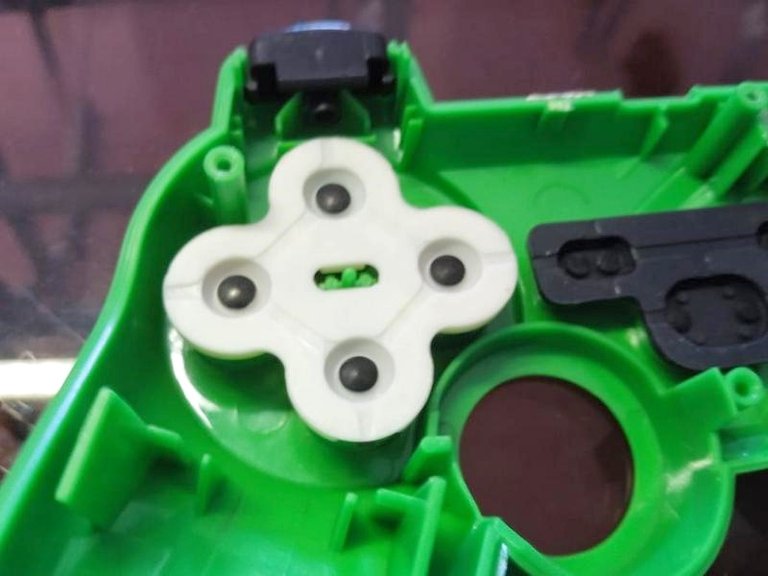
Como lo ven en las imágenes la goma que tenía antes el control se desgastó, justo en la parte donde va el Botón “x” el botón más importante para jugar la mayoría de los juegos, era bastante lógico que esta goma se partiera por esa parte, revisándola un poco me di cuenta que también se había caído la parte donde estaba el botón del cuadrado y con eso concluí que si era necesario desarmar el control para cambiar su goma.
Minutos después coloco la goma como es debido, me percato que todos los botones estén en su lugar, coloco las palancas donde van, sin tocar la lamina de contacto de los mandos y llega el momento de armar el control, efectivamente fue difícil por los gatillos, también se debe a que estos mandos no son originales, los controles originales de PS3 tiene un sistema para que puedas reamar los controles sin problemas con los gatillos, como especie de esqueleto, pero en este caso no lo tengo, así que me la tuve que jugar.
Después de estar varios intentos tratando de armar el control si perjudicar los gatillos, finalmente lo logré y que pude armar el control, lo probé en la PC y funcionó de maravilla la goma y nada de los botones se dañó, así que esta operación fue un éxito. Bueno Gamers, espero que les haya gustado el post de hoy, desarmar un mando de PS3 parece fácil pero realmente no lo es, menos mal que me tocó el problema más fácil de resolver, porque estos controles son difíciles de reparar.
Gracias por ver y por escuchar.
🔧¡Adiós!🔧
¡¡Muchas Gracias!!
Translated with www.DeepL.com/Translator

English
🎮I replaced the buttons on my PS3 Green Controller🔩
Hello, Friends of Geek Zone How are you? I hope you are doing great and welcome to a new post made by me. Today I bring you a different post, it's not about any video game, nor Gameplay, it's something I had been thinking about doing for a long time that has to do with my ability to repair and destroy things haha, in this case, it's about repairing.
As you know I record many console video games for the channel, these video games are usually played with emulators on the PC, and although I have the consoles available, the recordings and the quality are much better when I record with emulation.
To play the emulators I need a controller that can be connected to the Windows of the PC, since I do not like to play with a keyboard, unless it is a game where I do not need much skill with various commands and buttons, for me one of the best options that we can use as a controller to play on PC are the PS3 controllers, although I have to admit that the PS4 ones give fewer problems than the PS3 ones.
This is because the PS3 controllers need extra software on the PC to work, the opposite with the PS4 controllers that once you connect them the computer recognizes them and naturally works well, my favorite controller to play video games is the one you see on the screen, it is green and the truth is that it has worked very well for me.
However, like everything in life things wear out with use, the use I give to this controller is practically intense, not only use it to record but also to play on the console, the controller term losing some essential functions, in these cases, we can do two things, or buy a new one or have the courage to take it apart and find out what happens.
I took the second option and it worked out very well, of course nowadays PS3 controllers are very cheap due to their age, but in this case, I wanted to disassemble it to see its internal circuits, so I will tell you how it went:
It turns out that the controller was no longer working the right way because the rubbers of the buttons that allow contact with the board were already very worn, the "x" and "square" buttons were sinking a lot and made it difficult to use them.
This is because most of the time I spend playing video games like Gran Turismo 4, which require good pressure in the handling, and for that I must crush the "x" and "square" buttons to win the races, it was in the middle of recording gameplay with a Nintendo 64 game that I realized that the "x" was no longer doing the functions as it should, then I had to cut to change the controller.
I had already disassembled console controllers before, such as Xbox, GameCube, and PS3 controllers, but one of the biggest problems when disassembling a PS3 controller is the blessed triggers, you have to be very precise when disassembling and assembling the controls so that the triggers do not come out, if you arm it wrong the triggers will not contact the rubber and you will have to repeat the procedure.
It can also be the case that they get stuck in the controller's casing and don't even allow the controller to move or worse, don't allow the other buttons to be pressed. This is one of the details why I don't like to disassemble a PS3 controller just because a mistake can damage an important button on the controller. Another bad experience I had disassembling PS3 controllers was when I tried to clean the contact sheet of the controller, that is something I ended up paying dearly for.
I thought I was cleaning it, that I was doing it right, but it was the opposite, actually what I did was ruin the contact that the sheet had with the triggers and that controller did not work the same way again, then from that day I never touched a sheet of those because they are very delicate and can damage the controller completely haha.
On the other hand, I looked for my tools to disassemble the green controller, the screws resisted, but thanks to heaven I could take them out with a little extra pressure, the problem was very simple, change the rubber of the button contacts for a new one, fortunately, I had a rubber saved in my drawers and I used it, I also changed the rubber of the crosshead just in case.
Before putting the new rubbers I decided to wash some things, for example, the housing of the dirty controller, I also decided to soak the buttons, the triggers, and the levers that also had their dirt, I did this to have a better performance when testing it. I soaked them in soap to clean them well and I spent an hour waiting for things to dry to put them in the case.
As you can see in the pictures the rubber that the controller had before was worn out, just in the part where the "x" button goes, the most important button to play most of the games, it was quite logical that this rubber was split in that part, checking it a little I realized that the part where the square button was had also fallen and with that I concluded that it was necessary to disassemble the controller to change its rubber.
Minutes later I put the rubber as it should, I checked that all the buttons were in place, I put the levers where they go, without touching the contact sheet of the controllers and it was time to assemble the controller, indeed it was difficult because of the triggers, also because these controllers are not original, the original PS3 controls have a system so you can reassemble the controls without problems with the triggers, as a kind of skeleton, but in this case, I don't have it, so I had to play with it.
After several attempts trying to assemble the controller without damaging the triggers, I finally succeeded and I was able to assemble the controller, I tested it on the PC and it worked great with the rubber, and none of the buttons were damaged, so this operation was a success. Well, Gamers, I hope you liked today's post, disassemble a PS3 controller seems easy but it is not, thank goodness I had the easiest problem to solve, because these controls are difficult to repair.
Thanks for watching and for listening.
🔧Bye!🔧
Thank you very much!!
Translated with www.DeepL.com/Translator
Oh de verdad amigo, gracias por el hacer este tutorial me parece muy completo 👌😁🤩
Y eso que no mostré todo el proceso para no llenar el post de imágenes jaja. Recomiendo que tengan mucho cuidado, mucha luz y seguridad, ya que desarmar estos mandos no son cosa facíl.
Que chevere el mantenimiento! Que bueno que ya tenias conocimientos previos antes de lanzarte esa mision, ahora podras jugar como si fuera nuevo, fascinante. Saludos, me gusto mucho el paso a paso.
Y eso que no mostré todas las imágenes del proceso, en este caso el problema fue fácil porque fue una simple goma, pero créeme que hay casos peores jaja.
Gracias por comentar. Saludos!
Hey there!
All this technical stuff is over my head, but you seem to be meticulous in fixing all those small parts to get the remote working again.
Well done!
I'm really clumsy haha, but if I don't do it, who else is going to do it, so I decided to take it apart and fix the problems so I can keep playing and recording.
Thanks for your comment.
😁 You're right.
As long as doing it makes you happy:)
It's true! 👹
Muy bonita la carcasa de ese control felicitaciones excelente trabajo de limpieza cambio de gomitas.
Si Gracias al cielo logré cambiar la goma y que todo pasó bien, el mando funciona mucho mejor! Gracias por comentar y espero que te haya servido :)
te quedo espectacular. para mi la habilidad de poder hacer este tipo de cosas sin ayuda es unica, yo seguramente perdería una pieza y sería todo un problema JAJAJA. me encanta ese color verde, le da un toque unico
A mi también me gusta el verde es mi color característico. Realmente este proceso lo hice con ayuda de un familiar, como dije es bueno que alguien te esté vigilando por las dudas, las piezas y los gatillos son bastante delicados y se pueden dañar fácilmente. Me alegra que te haya servido. :D
chamo yo te le cambio la memoria interna de un ps3 fácilmente
Lo que necesito es un nuevo disco para guardar juegos :(
Este mando verde es bastante excelente me gusta mucho el color brillante si le hicieras unos especie de relieves en pintura con Hulk quedarían mucho mejor no lo has pensado?
La neta no lo he pensado jaja, estaría muy buena la idea, no obstante me gusta como se ve así ya que lo diferencio de los demás mandos que tengo. Gracias por comentar pana!