Coding Tutorial 3: Building a Real-Time Chat App with Socket.io and ReactJS : Part 2

Good day, friends, this post is a continuation of Part 1 of building our chat application. In the previous tutorial, I was able to start the backend and frontend of the chat application with Node.js and React.js, respectively. I further connected the backend to the frontend, and when a user is connected, it will print to the console, User Connected: UserID.

The current state of our app
In this part of making the chat application, I will focus on the front-end part of it. At the end of the day, a user can enter his name and chat room ID and then click on join chat. Other user(s) who also join the same room will be able to share messages in one window.
This is basically how most real-time chat applications work. For example, when you login or visit some websites, sometimes, you will see a chat icon where you can click to have a chat with the website's customer care. Here, clicking on the chat icon indicates that you have joined the chat room, making way for you to start a conversation with customer care. Same way when you join a Messenger or WhatsApp chat. Enough of the talks; let's get started.
In the previous post, this was the state of the App.js file. We only connected the frontend to the location (address) of the backend, which is http://localhost:3001. This means there is now a connection between the frontend and the backend. Now we can make a frontend that users can interact with.
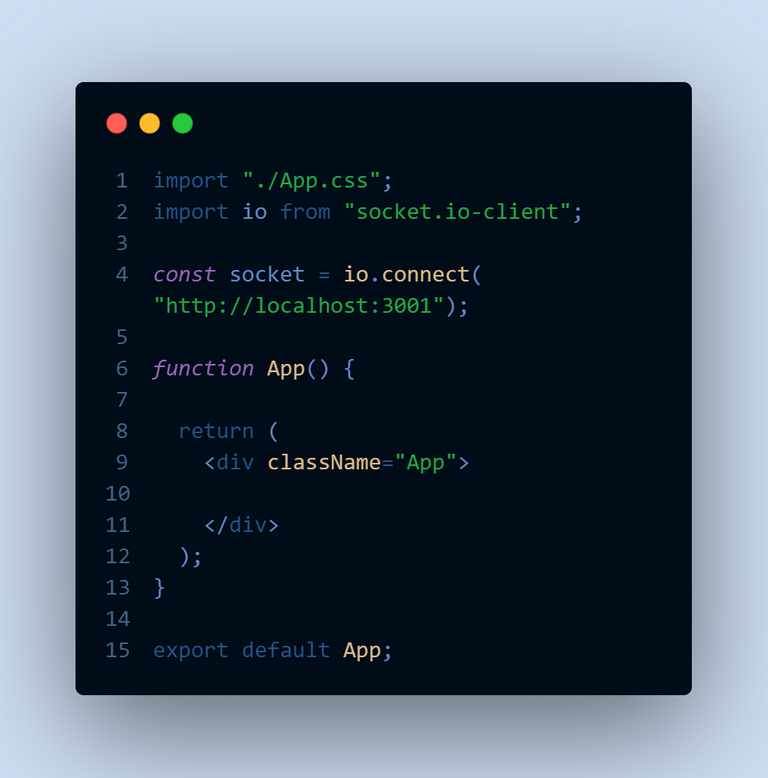
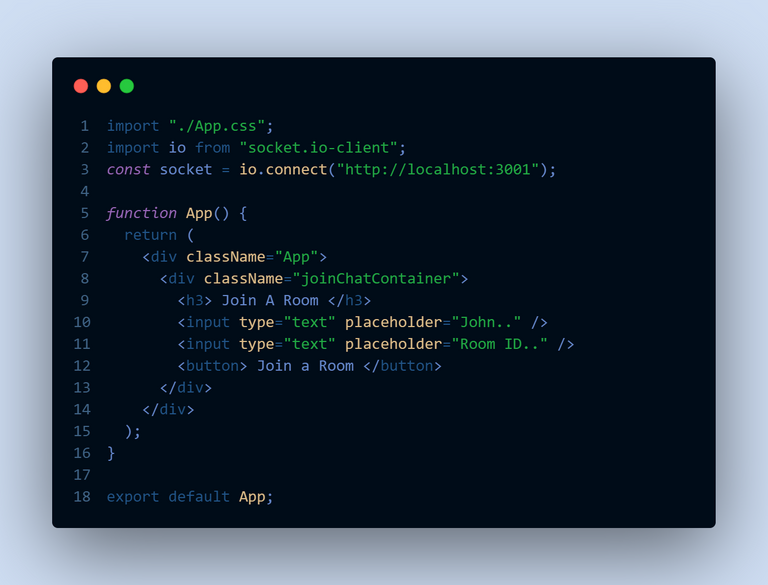
App.js
Here, we will be writing some codes in the App.js file. Because the conversation is between two people, the opening interface will have four elements. A heading tag like JOIN CHAT ROOM, two input fields for the username and the room ID, and then a button to join the chat room. The chat room is basically where you broadcast the messages, and it's only accessible to users connected to that room. The four elements are added below in the "App" component in App.js.
Now this is how the interface will look. I will add some CSS styling to make it look more appealing than this.
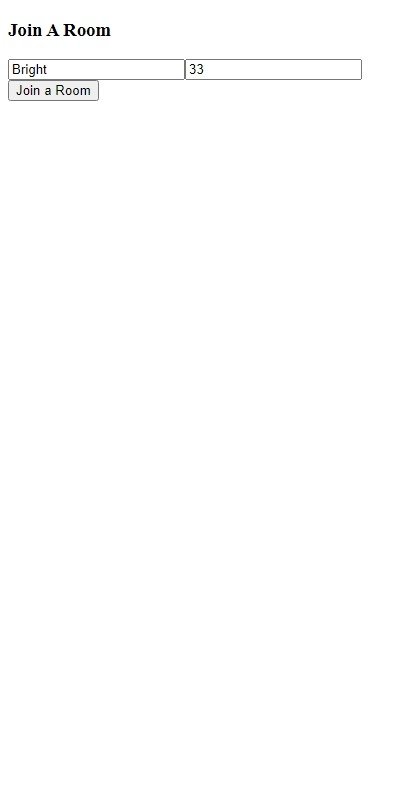
The app now without styling
In reactJS, values are stored as states by the useState hook. In the code below, we store the user's name and ID as stated by the Usestate Hook.The first thing to do is to import useState from the "react" librarybefore we can use it. In our input fields, we add theOnchangeevent listener so that when a user enters a name and ID, it will store them as states (values). Another state calledshowChat` is also added; this will hold true or false values to be able to toggle between the chat window and the login window.
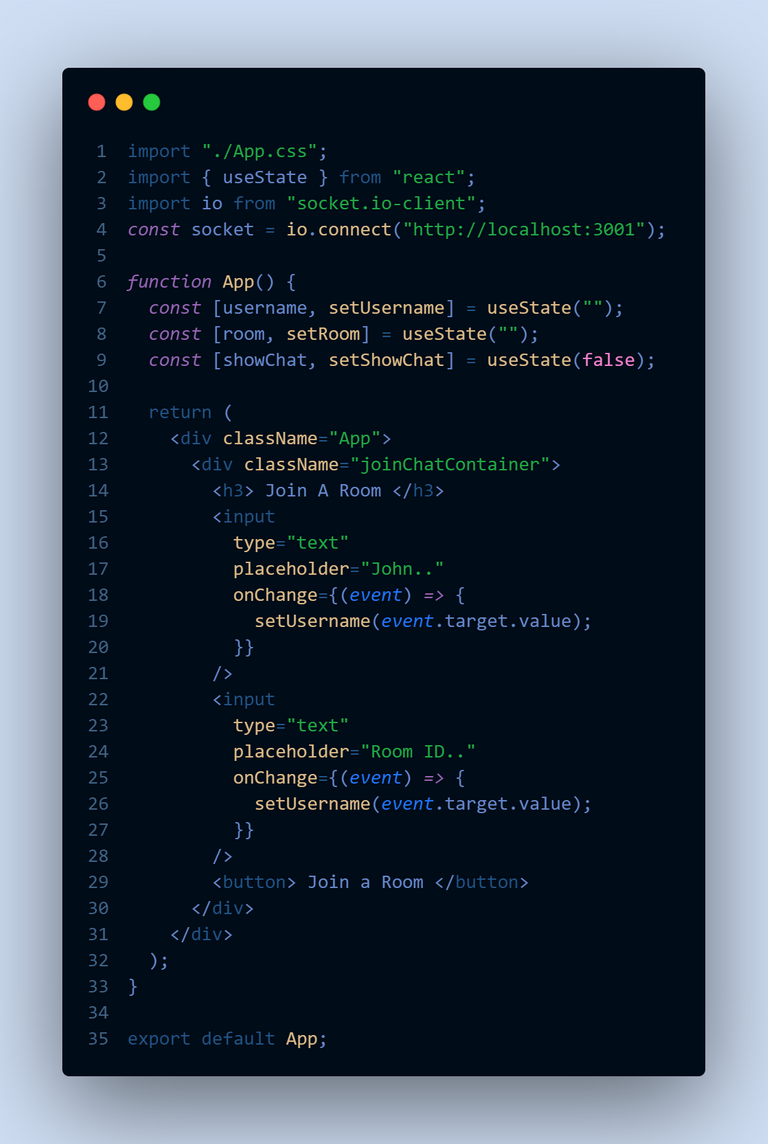
Inside App.js
Next, we add the joinRoom function to show what happens when a user clicks on the button to join a room after entering his or her username and ID. In the joinRoom function, we first of all use an if conditional statement to check whether a user has entered both a username and a room ID. We then emit the join-room event to make the room open for the user and set show-room to true, indicating that the user has successfully signed in for a chat. We have to trigger the join-room event in the backend before it will successfully work in the front end. The codes are shown below.
| In client/App.js | In server/index.js |
|---|---|
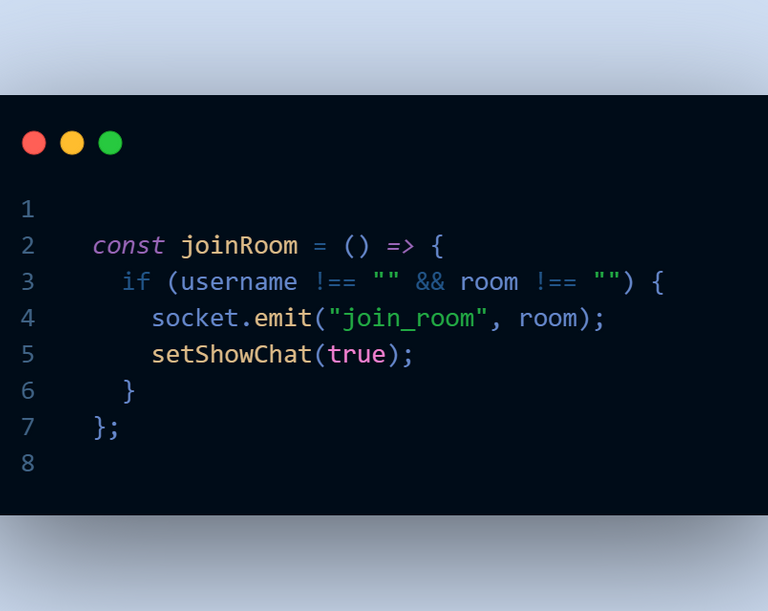 | 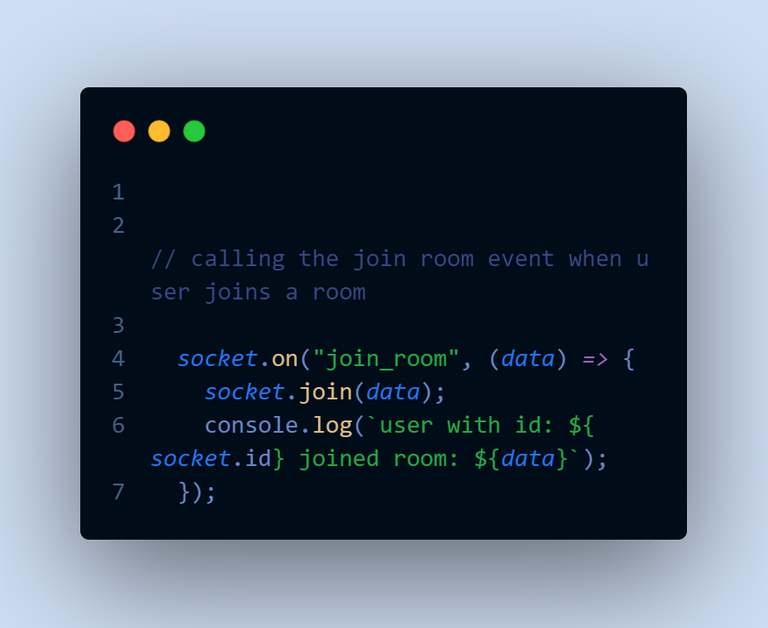 |
After defining the joinRoom function, we can add it as a click event in the button so that when a user clicks on that, it will automatically mean that he or she has joined the chat room with its ID.

Adding joinRoom click event
For now, we have not created a window to show the chat between users. We are only printing it on the console that a user has joined the room with the user ID in the console, as shown below. Note that the change in the interface is because I added some CSS styling in App.css.
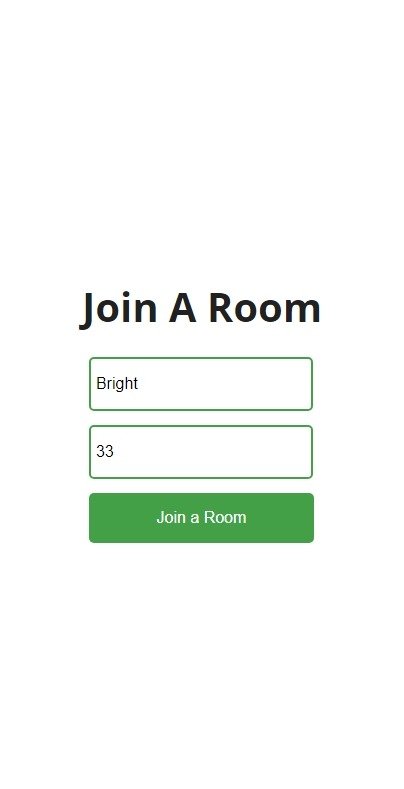
Entering username and Room ID

The results on the console
In summary, this section of our building of simple chat app with socket.io and ReactJs was focused on creating a user interface where users can enter their names and Room ID to join a chat room. My next post about this project will involve creating an interface that will show when a user joins a room, thus, the chat window. I believe you followed the process through out. Thank you for your time. See you in my next post.
The cover image was made with canva
All screenshots in this post are from my computer

I hope you found this useful. I am Abdul-Salam Issahaku, from Ghana. I am a student web developer and a blockchain enthusiast. I blog about technology, life and investments. You can follow me to be part of my Hive family. Thank you for your time.
Thanks for your contribution to the STEMsocial community. Feel free to join us on discord to get to know the rest of us!
Please consider delegating to the @stemsocial account (85% of the curation rewards are returned).
You may also include @stemsocial as a beneficiary of the rewards of this post to get a stronger support.
Thank you for the support @stemsocial