Coding tutorial - login page with HTML and CSS
I have been coding for a while now and it has been a very interesting journey because I have learned how a lot of things on the internet work. HTML and CSS are the basic structure of any website you find on the internet and it is fun to see how both work to create beautiful websites. so, today, I will show how a simple login page is built using HTML and CSS.
Prerequisite
- Basic understanding of HTML and CSS
Tools
- Visual studio code (VS code)
- live server (VS code extension)
- chrome browser (or any browser of your choice but Chrome is preferable)
Section 1 - Building the page
First, create a folder on your Desktop or anywhere you like, where you will keep the webpage files. I named mine “tutorial” but you can name it anything.
Right-click on the folder and select “open with vscode” to open the folder directly in vscode.
Click on the “New File” icon to create two files. Name the first one “index.html” and the second one “style.css”
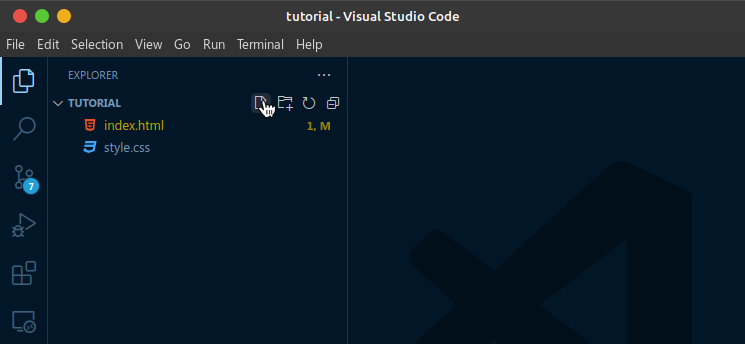
These files are the HTML and CSS files respectively. We will start with the HTML file. click on it to open the file.
The file is currently empty but in vscode, you can type the exclamation mark “!” and the HTML boilerplate will be suggested. Press the tab key to add the boilerplate to the page.
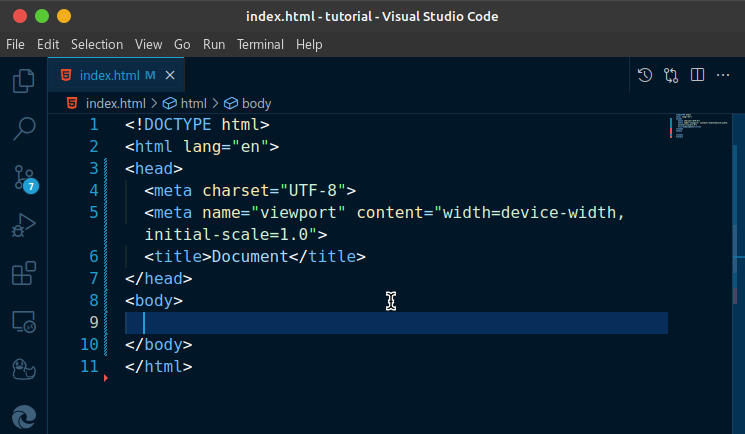
The
<title></title>represents the title of that page and for now, it’s “document”, so we should change it to “Login page”.Just below the
<title></title>, add a link to the CSS file we created earlier.<link rel="stylesheet" href="style.css">Within the
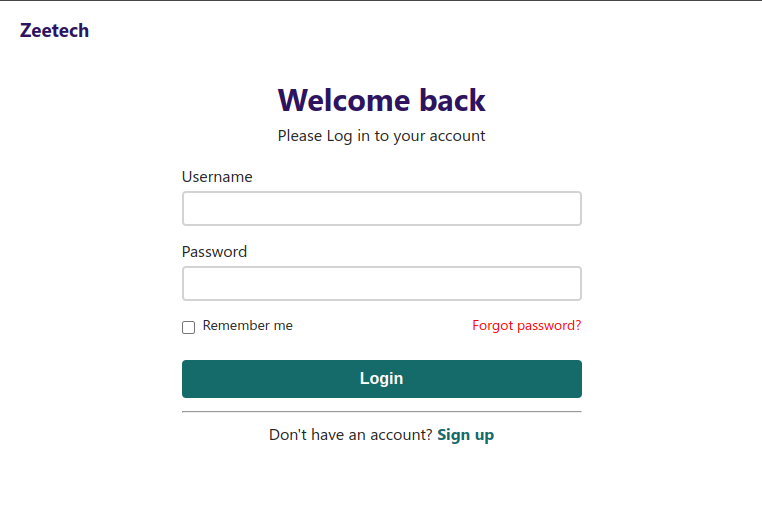
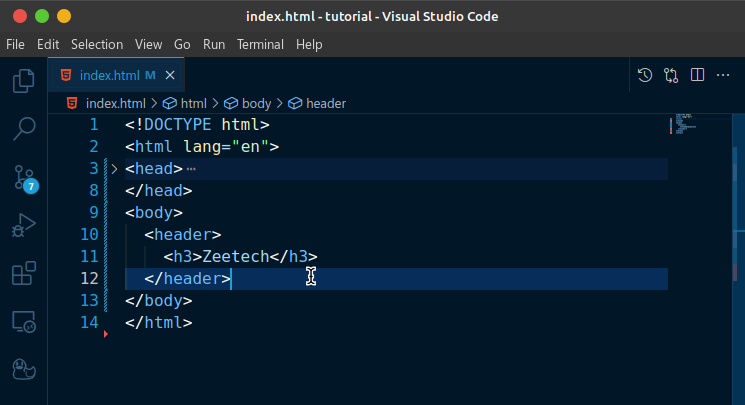
<body></body>tag, add a<header></header>tag. Within that header, add a<h3></h3>tag with the word “Zeetech” in it (you can use any other word if you want). This will act as our logo for the page.
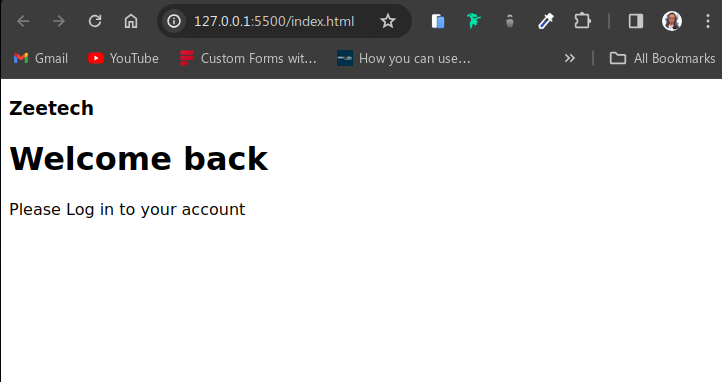
Next, create a div and add a class of “main-container” to it. within the div, add a
<h1>tag with the text “Welcome back”. Below that, add a<p>tag with the text “Please Log in to your account”Now let’s look at the live preview of the webpage. If you already have Live Server extension installed in your VScode, simply right-click and select “Open with Live Server”
If you don’t have Live Server installed, head over to the extensions page on the left panel of VS code and search for it. After installing, go back to the index.html file and follow step 10 to preview the page.
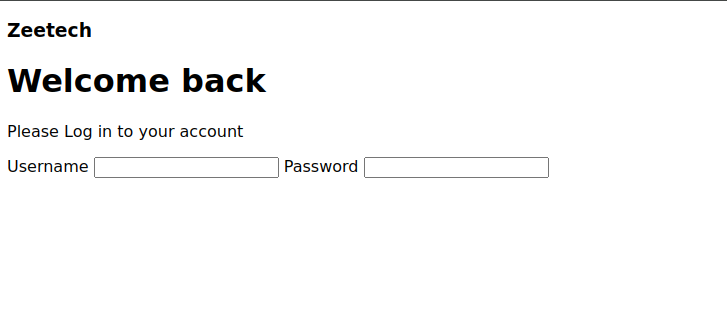
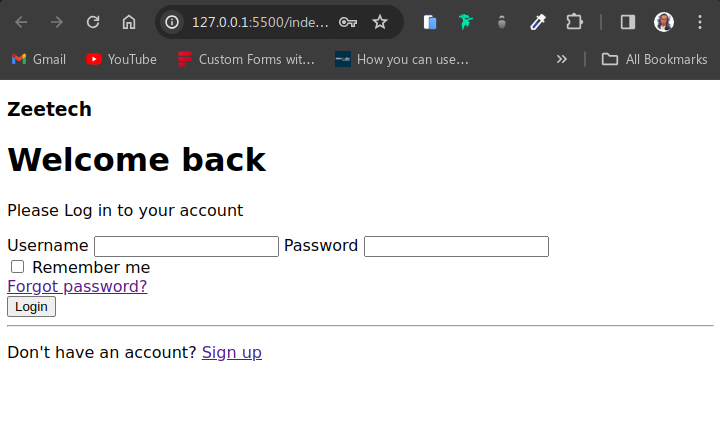
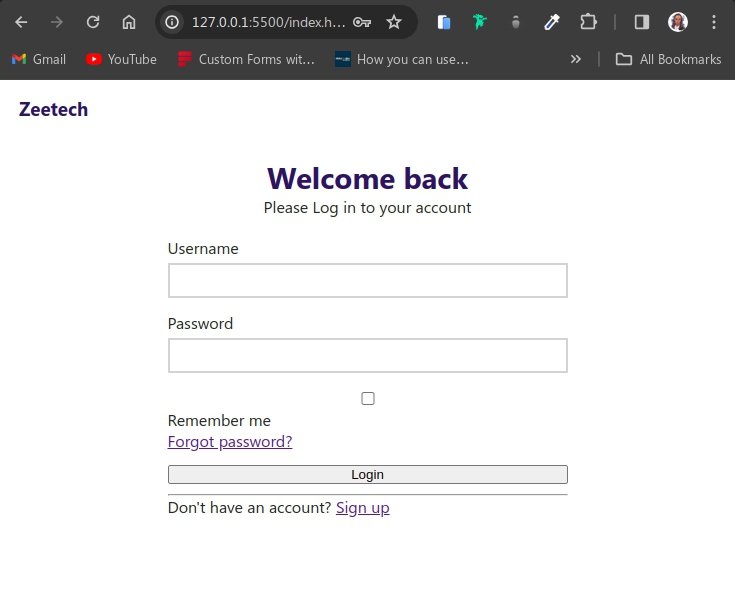
Add a
formtag with an id of “sign-in” just below the<p>tag. within theformtag, add alabeltag which should have aforattribute = “login-username”. Add the text “Username” to the label.Within the label, add an
inputtag withtype="text",name="username",id="login-username",requiredautocomplete="nickname”. You should now have something like the below picture.Do the same for the password input and it should use the below codes:
<label for="login-password">Password
  <input type="password" name="password" id="login-password" required autocomplete="current-password">
</label>
Your page preview should now look like the below:
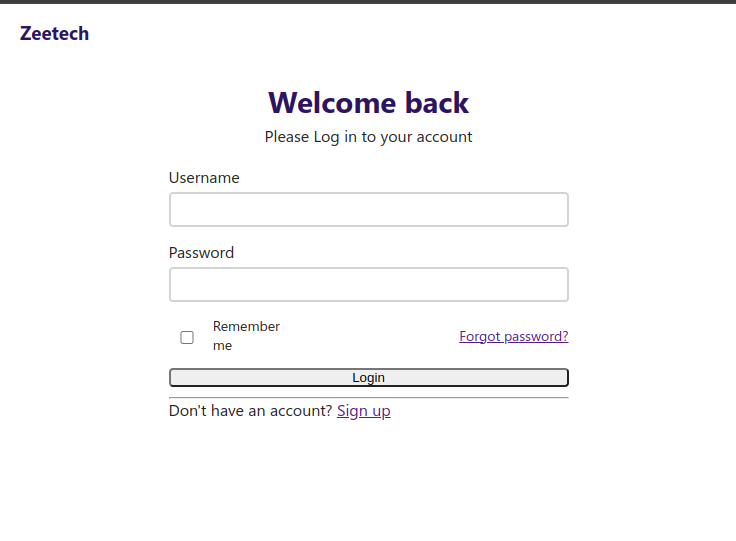
Next, we are going to add the “Remember me” checkbox and the “Forgot password?” link, which can be achieved with the below code:
  <div class="container">
    <div class="remember-wrapper">
      <input type="checkbox" name="checkbox" id="remember" />
      <label for="remember">Remember me</label>
    </div>
    <a href="#">Forgot password?</a>
  </div>
Now for the button, just add a
buttontag withtype="submit"and the text “Login” within it
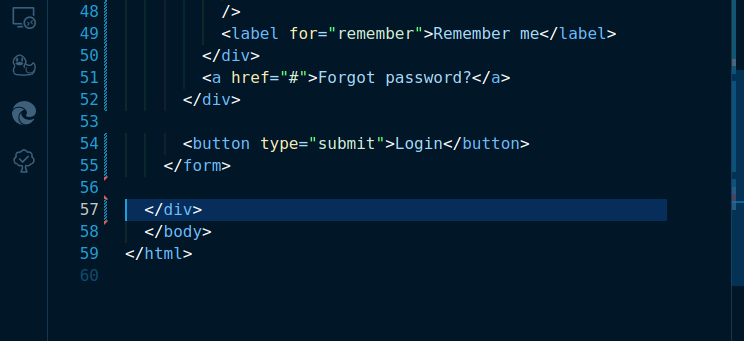
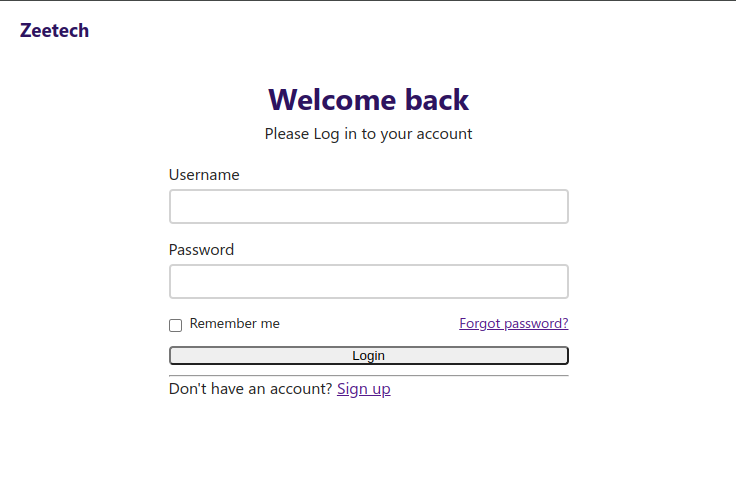
Remember we have been working within the
formtag all this while? Now go below it and add<hr/>to create a horizontal lineBelow the
<hr/>tag, add a<p>tag with a class of “sign-in” and the text “Don't have an account?” Immediately after that, add a<a>tag with the text “Sign up”.We are done with the HTML for now and can now move on to styling the page. Here is what the page looks like right now, which is still a bit far from the intended result.
Section 2 - Adding styles
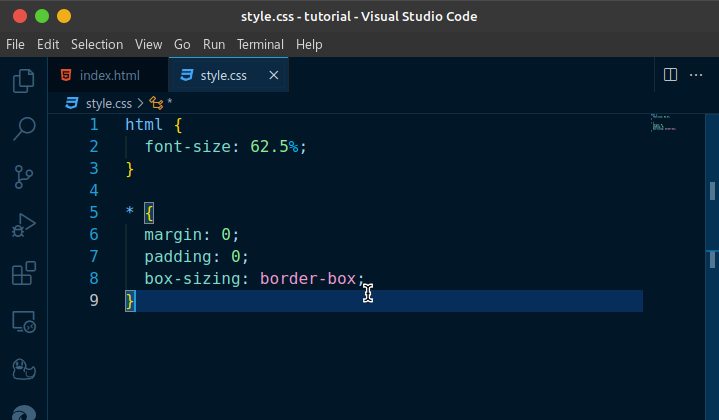
- Open the style.css file we created earlier.
- Add an html selector and give it a font-size of 62.5% or 10px. This makes it easier to calculate rem units later as 1 rem is now equal to 10px (instead of 1rem being equal to the default font size which is 16px)
- Add a universal selector (*) which selects all elements on the page. give it a margin and padding of 0, and box-sizing of border-box. This is the usual CSS reset I do for all my projects.
- Select the html body element using the
bodyselector and add a min-height of 100vh, font-size of 1.6rem (which is the browser’s default), font-family ofsystem-ui, sans-serif, padding of1.6rem 2rem(representing the top and bottom, left and right padding) and color of#252525 - Next is to select the .main-container class and give it a max-width of 400px and margin-inline of auto. This makes sure that the width of the main-container doesn’t exceed 400px and is always centered.
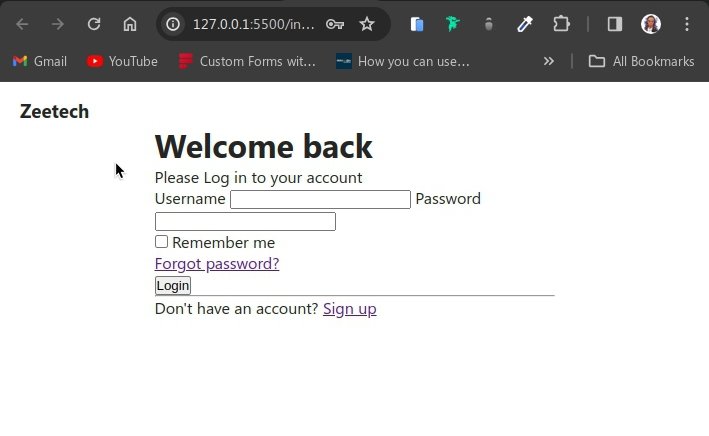
- Below that, add the h1 selector with the following;
the first value of clamp (2.6rem) represents the minimum font-size for the h1 element, 4vw means the ideal font-size which is 4% of the viewport width, and 3.4rem means the maximum font-sizeh1 { margin-top: 3.6rem; font-size: clamp(2.6rem, 4vw, 3.4rem); text-align: center } - Select the first
<p>element with this:p:first-of-typeand give it a text-align of center and margin-top of 0.5rem - After that, select the h1 and h3 elements (separate them with a comma ,) and give them a dark-purple color of
#2e1360. Remember that the h3 element is our logo.
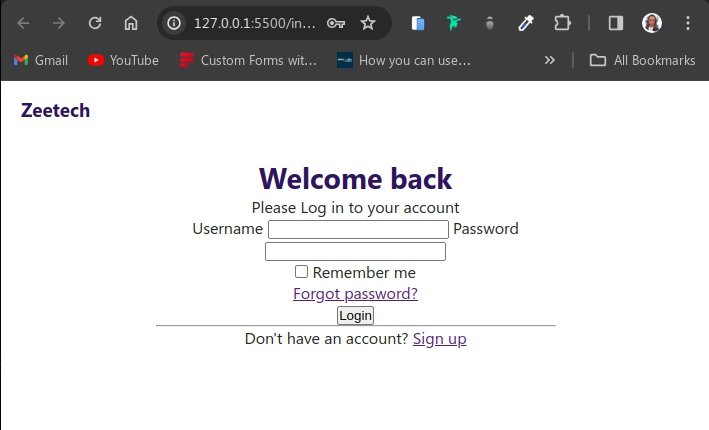
- Select the form element and give it the following:
The display flex is just there so I can make use of the gap property to properly space the elements in the form. margin-block is a shorthand property representing the top (2rem) and bottom (1rem) margins.form { display: flex; flex-direction: column; gap: 1.4rem; margin-block: 2rem 1rem; } - Select the input element and give it the following:
Now we are getting somewhere and the page is now closer to our intended resultinput { width: 100%; margin-top: 0.5rem; padding: 0.8rem; border-style: solid; border-color: lightgrey; }
- Select both the input and button (separated by a comma) and give them a border-radius of 4px
- Target the
.containerclass and give it a display of flex, justify-content of space-between and align-items of center. Remember that this container wraps the “Remember me” checkbox and the “Forgot password?” link - Also target the .remember-wrapper class and give it a display of flex, align-items of center and a gap of 0.8rem. Now we will have this result:
- You will notice that the “Remember me” text isn’t looking good and that can easily be fixed by selecting it with its id
#rememberand giving it a width of auto.
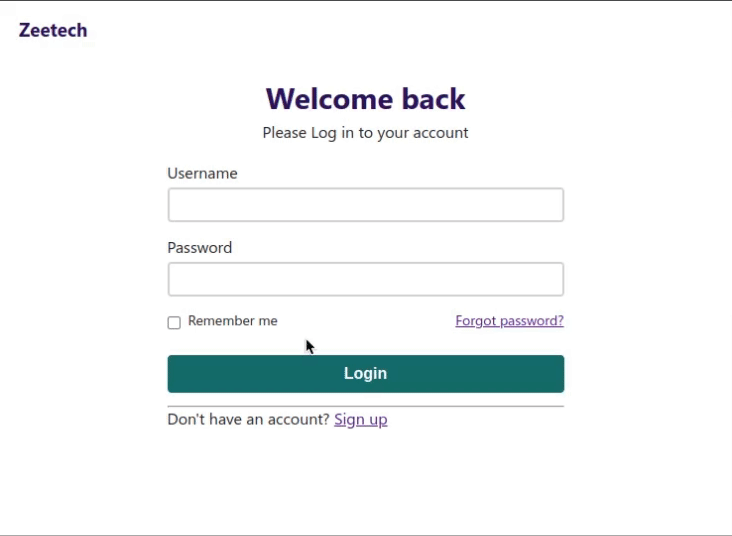
- We are almost done and for now we should style the button next which can easily be achieved with this:
The only new thing here I haven’t talked about before is the transition property. This is just to provide a smooth animation to the background-color when a person hovers over the button with a mouse. We are going to style the hover state next.button { padding-block: 1rem; margin-block: 1.2rem 0.3rem; font-weight: 600; font-size: 1.6rem; background: #156b6a; color: #ffffff; border: none; transition: background-color .2s linear; } - Use the hover pseudo class to style the hover state of the button like so:
button:hover. Give it a background-color of#0a3534which is a deeper shade of the button. Now when you hover over the button with a mouse, the color changes.

- Next, we are going to add a hover state to the button and “Remember me” checkbox using this code:
button, .remember-wrapper > * {
  cursor: pointer;
}
.remember-wrapper > *simply means we are targeting everything within the.remember-wrapperwhich are the “Remember me” label and input elements. So now, when you hover over any of these elements with a mouse, the cursor changes to a pointer
- Now to style all links on the page, select them with the
aselector and give it a text-decoration of none to remove the underline. - Target the “Forgot password?” link using
.container aand give it a color of red - Now, target the
.sign-inclass which is the last text on the page (Don't have an account?). give it a text-align of center and margin-top of 1rem. - Finally, target the link in the
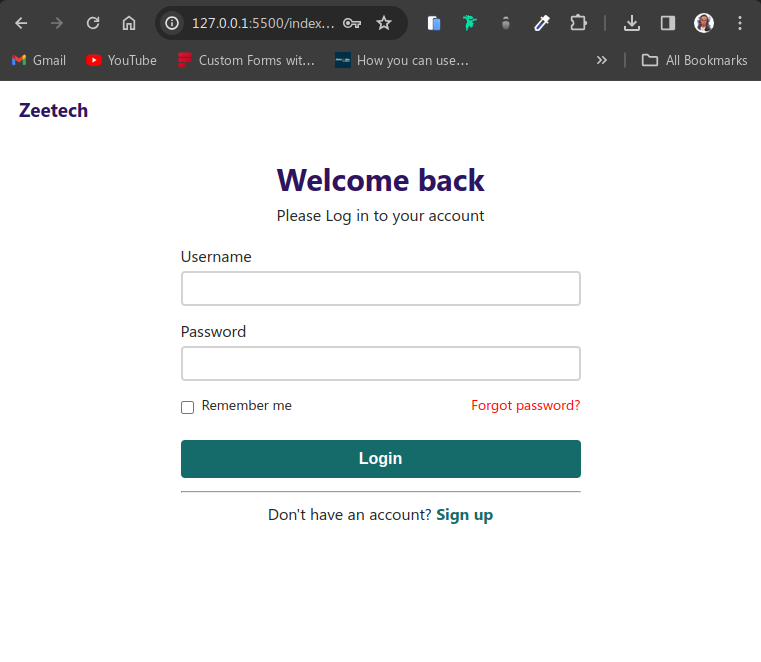
.sign-inclass by using.sign-in aand give it a color of#156b6aand font-weight of 600. And that is it! We are done with styling the login webpage
Conclusion
This project is very beginner friendly and teaches a lot of basic HTML and CSS syntax. You can check out the live preview of the page and you can also go through the source code if you want (right here).
Thanks for reading
Connect with me on:
Twitter: @kushyzeena
Edited with Canva
All images used are mine
The moment I opened the post I had headache 😂😂😂
This is really an in-depth tutorial and I’m sure it’ll be useful for the technological gurus
As for now let me concentrate on my crochet o with my dead brain😂😂😂
😂😂😂 it's just the same way I get headaches when I look at people doing crocheting, it's an unfamiliar territory but we humans can learn anything if we put our minds to it 😁 thanks for stopping by
🤣🤣🤣you do ?
You’re welcome
Coding is so exciting and thrilling and the outcome is always wowww and this your post is wowwwww. I can't wait to see more tutorial so I can practice it 😁😁😁😁😜
Better focus on fashion design o, coding isn't for the weak 😅
Thanks for your contribution to the STEMsocial community. Feel free to join us on discord to get to know the rest of us!
Please consider delegating to the @stemsocial account (85% of the curation rewards are returned).
You may also include @stemsocial as a beneficiary of the rewards of this post to get a stronger support.