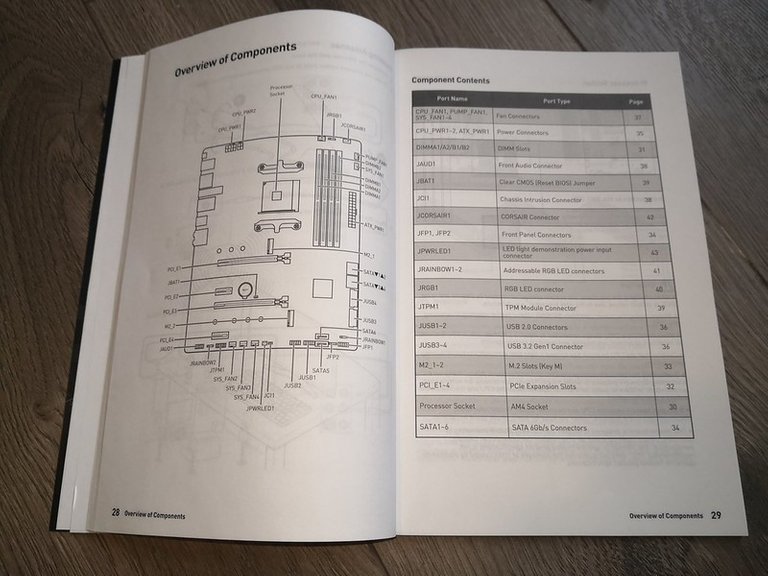
Building A New Workstation PC Part 4 | Motherboard
After researching several potential motherboard solutions, I chose the MSI MPG X570 Gaming Pro Carbon WIFI. And again, almost any computer components for the DIY folks are marketed towards gamers. I can't really complain, because without PC gamers, I think the market for upgradable PCs would wither away. That being said, I don't really care how many snazzy LED lights or how many carbon fiber accents my motherboard has. After reading several decent reviews, I thought this particular motherboard was a good value

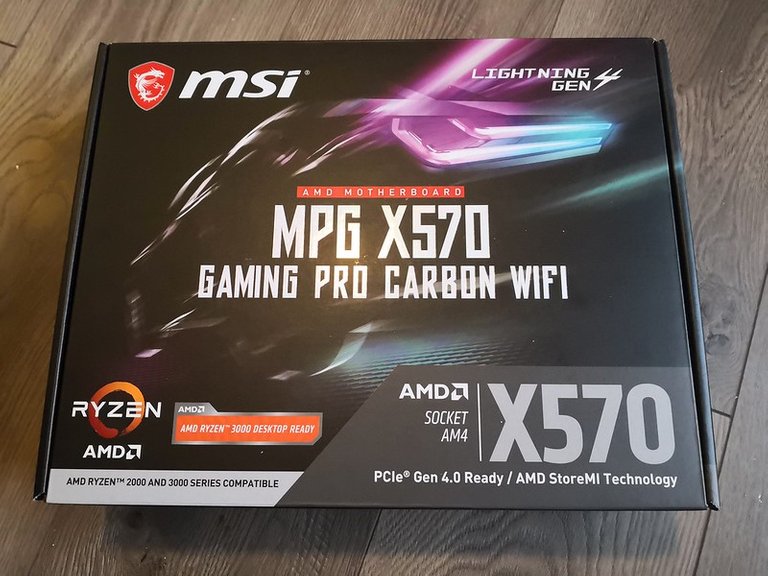
The motherboard I chose, the MSI MPG X570 Gaming Pro Carbon WIFI, while being a mouthful, it had all of the features I was looking for, but didn't break the bank. You can take a look at the specs here.
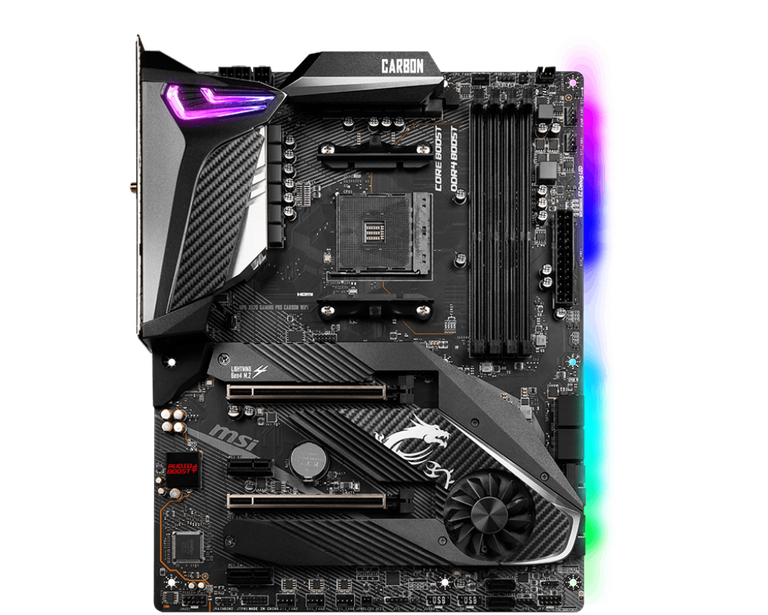
Image Source
This MSI motherboard doesn't have excessive disco lighting, and hopefully what it does have I'll be able to disable. It's a decent looking board, but I really don't care because it will be behind the dark smokey glass of my Corsair 500D side doors. One major concern, is that there is plenty of clearance between the PCIe slots, to accommodate whatever video cards I throw at it.
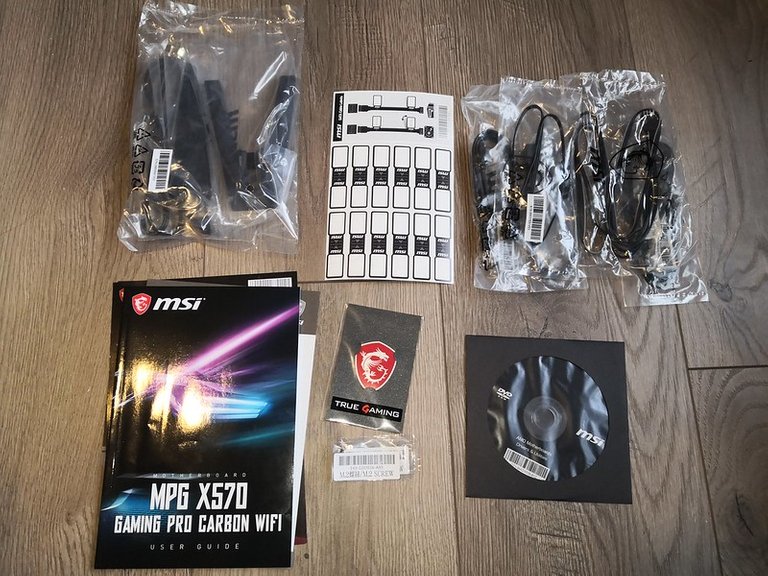
Besides the motherboard, we get the typical array necessary manuals, cables, drivers and BIOS software. In addition they include an external antenna for the integrated Wi-Fi, and some handy labels for labeling SATA connections. Like most other computer components, you also get a fancy manufacturers logo decal, which I usually slap on a toolbox or something. With my case being so stealthy, the last thing I want are garish stickers on it.

Here you can see a clean view of the inside of the case, taken from my initial post. From here you can get a clear view of all the pre-installed motherboard standoffs. The motherboard is full ATX form factor, but the case will also accommodate mATX or mini-ITX.
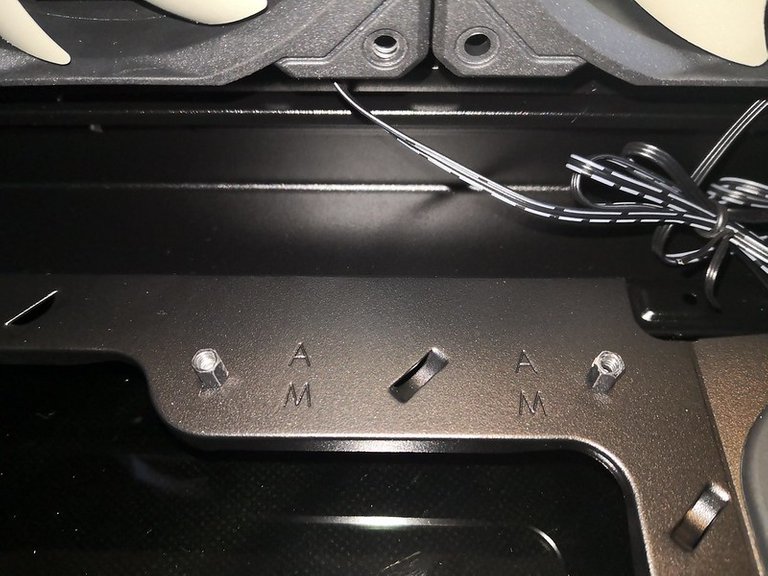
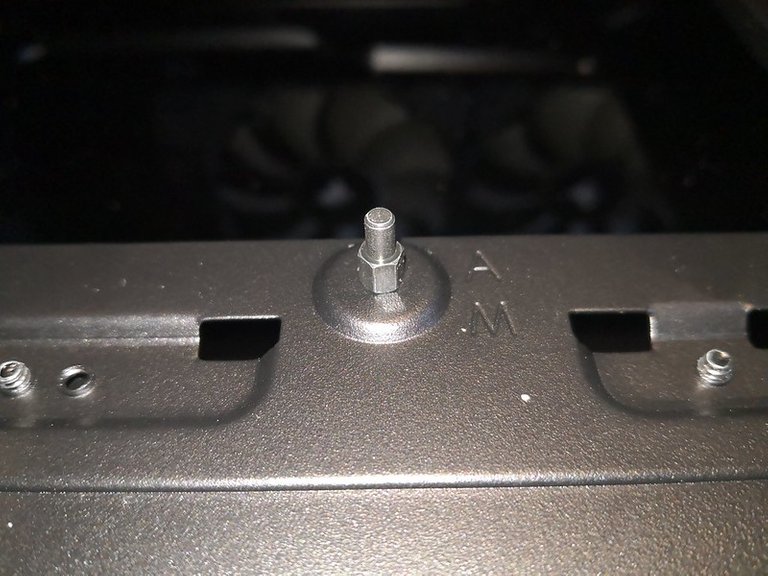
Here is a closer look at the motherboard standoffs. These keep the motherboard itself at a safe distance from the chassis, and they also sometimes serve as points to ground the motherboard electrically. The standoff in the lower photo is just a post, and helps you align the motherboard for install. The other 8 standoffs you actually use to attach the motherboard to the case using screws.
When mounting an ATX motherboard, it's a good idea to make sure the rear panel is properly aligned before screwing down the motherboard.

After the motherboard is mounted, it's safe to attach the ATX power cable from the power supply, that we had previously routed from the power supply compartment. From here you can also see the four memory slots, which can each hold up to a 32 GB DDR4 memory stick. My plan is to start out with 2 x 32 GB sticks, and eventually max it out.
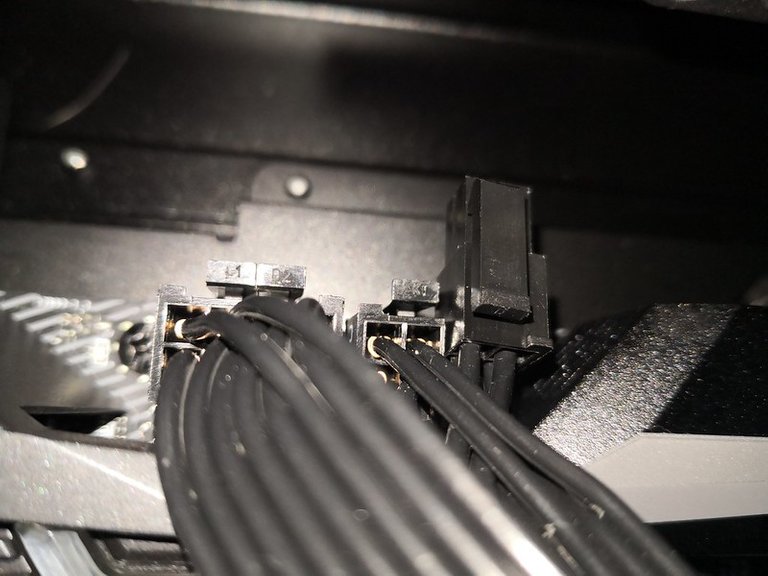
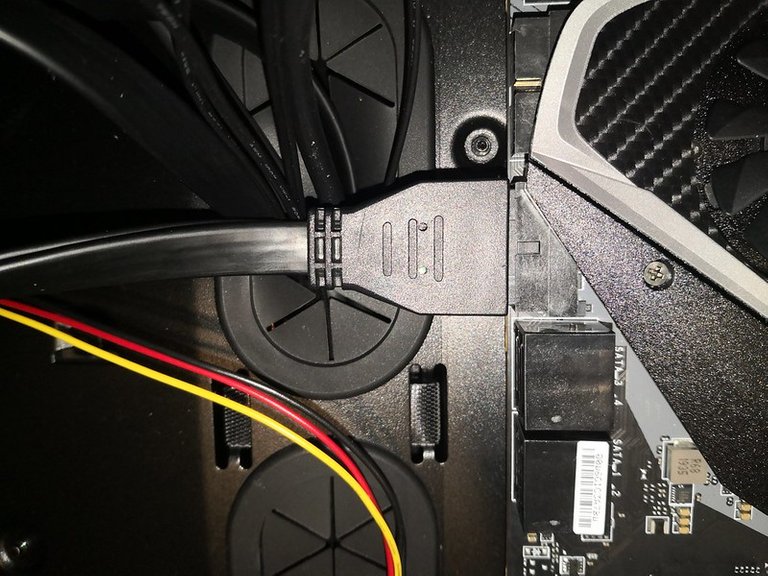
Since ATX motherboard power is no longer enough to power higher end CPUs, additional power connections must be made to the motherboard. In the past I have used a 4 + 4 connector, but now there are connections for 4 + 4 + 4. This requires me to run two CPU power cables from the power supply, and leave the last 4-pin connector dangling.
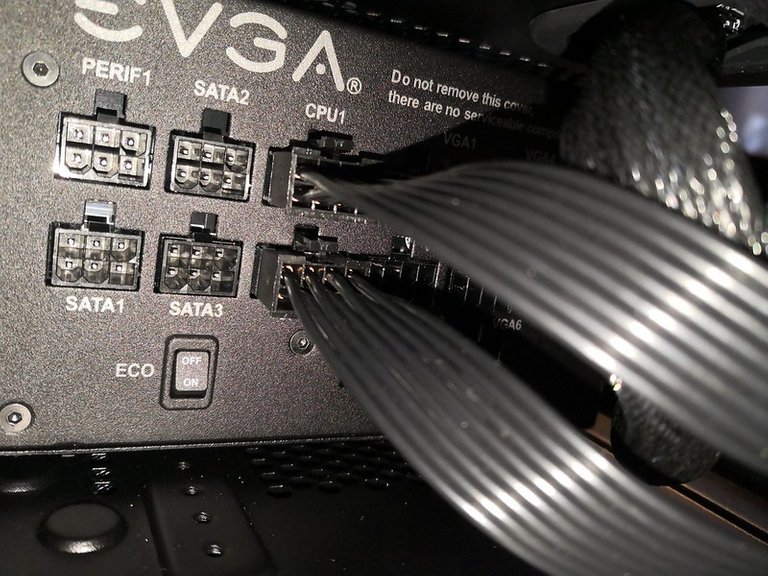
Here you can see where the CPU power attaches into the modular power supply.

There are many different types of connectors on modern motherboards. Some of them you will use, most of them will you will not. It's important that you use the manual to make the proper connections.
In the old days, motherboards also had several jumper connections and/or switches. If these weren't properly configured for the installed hardware, things would fail. In the worse case, if the jumper was controlling voltage, you could fry something. Thankfully modern motherboards are able to automatically detect supported hardware.
The USB 3.0 cable from the case connects right up to the motherboard. You've got to love standardization (It wasn't always this way)!

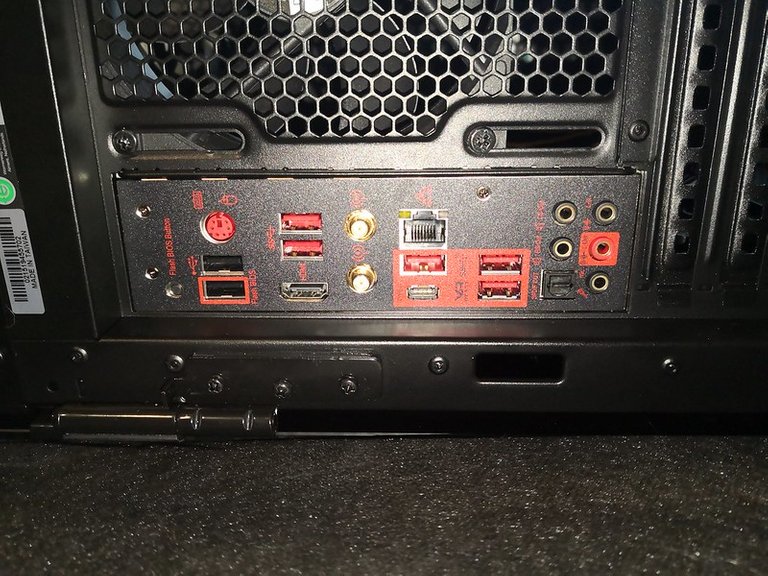
Now it's time for the bummer. This particular motherboard doesn't have a USB 3.1 Type C internal connection, even though it does have external Type C ports. For me to utilize the case Type C connector, I will have to purchase either an adapter, or a PCIe add-in card. It's not a huge deal, but there's no way my OCD would let me have a non-operational usb port on the front of my case!
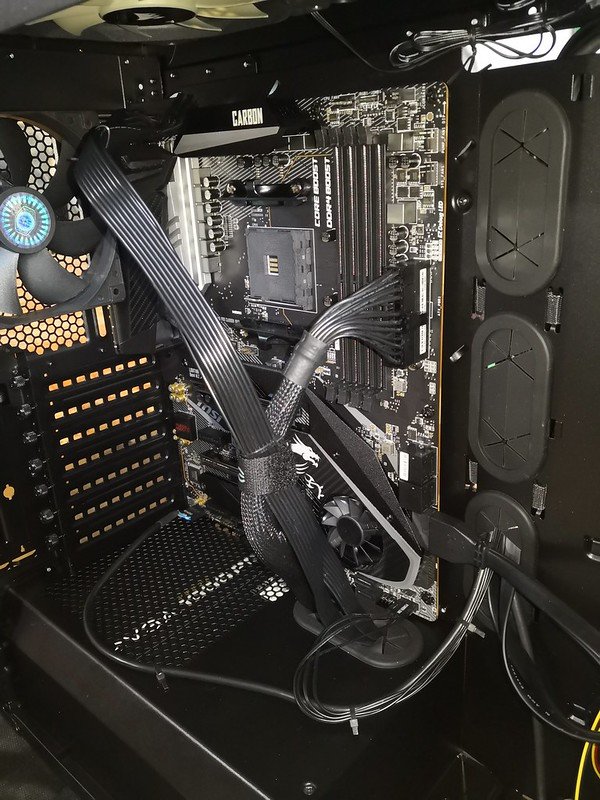
Finally we have the finished motherboard install. Depending on how long my video cards are, I might have to reroute the CPU cables, or even find longer ones. The important thing is to make your cables look pretty with velcro straps and zip ties. Having a rats nest of cables in your case is not only difficult to work with, it also can restrict air flow.
Thanks for reading! The next step will be to obtain the CPU and memory. This will allow us to verify the system passes its Power On Self Test (POST), and will boot from a USB drive. From there I can run some basic diagnostics to ensure there are no issues.
Posted from my blog with SteemPress : https://joshman.com/building-a-new-workstation-pc-part-4-motherboard
Thank you for sharing this. Hey @insmartcodee check this account. It might help you
Looks like he has amazings stuff to learn about it
Ok thank you
You're welcome! Thanks for dropping by!
Sweet! You can’t beat that built it yourself feel on putting together a rig, loving your choices so far. I built my boy a gaming pc back in late 2017, thanks to the awesome Steem SEO if you google c0ff33a gaming PC you will get all the posts I did on it. Even two years later it plays all the top titles and VR games super smooth - and whisper silent.
Posted using Partiko iOS
Nice, thanks for the comment!
I'll check them out.
This post has been voted on by the SteemSTEM curation team and voting trail. It is elligible for support from @curie and @minnowbooster.
If you appreciate the work we are doing, then consider supporting our witness @stem.witness. Additional witness support to the curie witness would be appreciated as well.
For additional information please join us on the SteemSTEM discord and to get to know the rest of the community!
Please consider using the steemstem.io app and/or including @steemstem in the list of beneficiaries of this post. This could yield a stronger support from SteemSTEM.
This post was shared in the Curation Collective Discord community for curators, and upvoted and resteemed by the @c-squared community account after manual review.
@c-squared runs a community witness. Please consider using one of your witness votes on us here
!BEER
for you
View or trade
BEER.Hey @joshman, here is a little bit of
BEERfrom @eii for you. Enjoy it!Learn how to earn FREE BEER each day by staking.
Hi @joshman!
Your post was upvoted by @steem-ua, new Steem dApp, using UserAuthority for algorithmic post curation!
Your UA account score is currently 3.728 which ranks you at #5509 across all Steem accounts.
Your rank has not changed in the last three days.
In our last Algorithmic Curation Round, consisting of 81 contributions, your post is ranked at #6.
Evaluation of your UA score:
Feel free to join our @steem-ua Discord server
Congratulations @joshman! You have completed the following achievement on the Steem blockchain and have been rewarded with new badge(s) :
You can view your badges on your Steem Board and compare to others on the Steem Ranking
If you no longer want to receive notifications, reply to this comment with the word
STOP