Handling PDF Files with PyPDF2 / Manejando Archivos PDF con PyPDF2 - Coding Basics #29
PdfFileRead('NewPost.pdf')
Shoutout to Learn-automation

In this article you will find
- Introduction
- What is PyPDF2?
- Read, Copy and Write PDF Files with PyPDF2
- Join and Separate PDF Files
- Encrypt and Decrypt PDF with PyPDF2

In the previous post, we took a tour of the csv module, which allows us to read and write information within csv files, which are frequently used for data analysis and artificial intelligence.
However, getting a little closer to everyday life, where handling PDF type files is much more frequent, we have a package created by the Python community: PyPDF2
With PyPDF2 we can control the pages of our PDF files with great precision, being able to separate them, join them, crop them and modify them in different ways, and we can even add passwords to PDF files.
If you want to learn how to handle PDF files like a pro using Python, keep reading.

What is PyPDF2?
Shoutout to Narongsak Keawmanee in Medium
PyPDF2 is an open source Python library whose existence can be traced back to 2011, where it was created as a fork of PyPDF for the company Phaseit, adding a broader range of operations with PDF files compared to its predecessor.
In essence, PyPDF2 adds a large amount of functionality that allows us to control PDF files however we like. Whether to take text from these, copy it and write it in other PDFs, add images, etc... PyPDF2 is a very complete package for this.
Being an external package, this means that PyPDF2 is not integrated into Python, so if we tried to import it, we would get an error message telling us:
ImportError: No module named PyPDF2
In order to install it, we must go to our command line if pip is installed on our system. If you don't have pip and want to know how to install it, you just have to read this article
Once here, we write the following command:
>>> pip install PyPDF2
And after finishing the installation, we will have PyPDF2, which we import into our programs with:
import PyPDF2
Now, we will have access to the wide range of PyPDF2 functionalities. Here we will see some of the most important ones:

Read, Copy and Write PDF Files with PyPDF2
Shoutout to Studytonight
The first litmus test for any file management module will be being able to read and write to files with this type of extension.
If we wanted to read a PDF file with PyPDF2, we would do it in a way quite similar to that done with the csv module. Here, we use the PdfFileReader function, taking the file name as a parameter. With this, we will create a file of type PdfFileReader, which contains very useful methods.
However, the main difference with the csv module is that if we want to read with PyPDF2, we must do it page by page. This means that we must first extract a page from the PDF and then read the text on it. Looking at the following example:
import PyPDF2

with open('TestPDF.pdf', 'rb') as pdf:
     pdf_reader = PyPDF2.PdfFileReader(pdf)

     page = pdf_reader.getPage(0)

     text = page.extractText()

     print(text)
Here, in addition to the creation of the PdfFileReader Object with the function of the same name, we can notice that to extract a page from the PDF before reading it, we must use the getPage method, where we indicate the page number starting from zero as parameter to take the information from that page within the PDF.
Thus, after opening the file, converting it into PDFFileReader, extracting the page and the text from it, we have to print the result and we will have:
This is a test PDF (
Page 1
)
Which is precisely the content of our first page.
Now, if we want to write to a PDF from scratch (That is, write strings or numbers within the IDE to the PDF), this will be a complex task to carry out in PyPDF2. However, if you want to do this, there are other great packages that can give you just what you need like FPDF and pdfkit.
Something we can do is copy the text from a PDF and write it to another PDF, where we create an instance of the PdfFileWriter class. In addition to this, in order for it to work when writing we must use the addPage method to add the exact page of the read file.
Finally, we will only have to open or create the file where we are going to write using open and setting the 'wb' mode for writing in binary, where finally we use the PdfFileWriter method.
import PyPDF2

file_to_read = open('TestPDF.pdf', 'rb')
pdf_reader = PyPDF2.PdfFileReader(file_to_read)
pdf_writer = PyPDF2.PdfFileWriter()

for numpage in range(pdf_reader.numPages):
     obj = pdf_reader.getPage(numpage)
     pdf_writer.addPage(obj)

file_to_write = open('newPDF.pdf','wb')
pdf_writer.write(file_to_write)

file_to_read.close()
file_to_write.close()
We can see that we first create the PdfFileWriter type object and then assign the values to it with addPage. Finally we use open and write to the new file with it.
Thus, if we look at our folder, we will see a new PDF file and if we enter it, we will see the same content as TestPDF.


Join and Separate PDF Files
Shoutout to Fedingo
Another feature of PyPDF2 is that it allows us to join a large number of PDF files into one, taking their content and adding them to the destination PDF.
To do this, we must open the files from which we are going to take the information in reading mode ('rb'). Then, we will create an object of type PdfFileMerger, through which we can join all the open PDFs using its append method.
Finally, we just have to write what we collected to the new file. Here we use the write method of the Merger, placing the name of the destination file as a parameter and finally, we will have our PDF with a total number of pages equal to the sum of the pages in the two files.
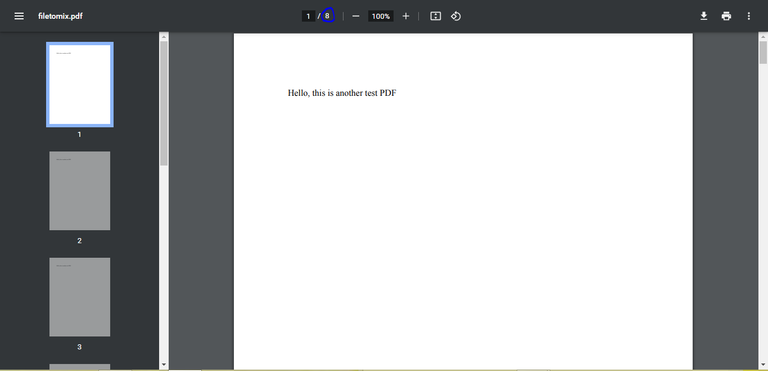
Looking at this example, we have the files PDFtoMerge1 and PDFtoMerge2, which we want to combine and introduce into the filetomix.pdf file. Running this code:
import PyPDF2

file1 = open('PDFToMerge1.pdf', 'rb')
file2 = open('PDFToMerge2.pdf', 'rb')

pdf_merger = PyPDF2.PdfFileMerger()

pdf_merger.append(file1)

pdf_merger.append(file2)

pdf_merger.write('filetomix.pdf')

file1.close()
file2.close()
We open the two files with open, we create the PDFFileMerger object and with the append method, we add the content of these two to the merger. Finally, we write it to filetomix and remember to close to allow future operations to be executed.
Thus, if we execute and enter the new file, we will see a PDF with twice as many pages as each of the documents and with their content.
If we want to do the opposite, that is, separate a file with a large number of pages into several files, we will have to use the help of the PdfFileReader and the PdfFileWriter as well as a for loop.
You will see, if we look at the following example:
import PyPDF2

file_to_split = open('PDFToSplit.pdf', 'rb')

pdf_reader = PyPDF2.PdfFileReader(file_to_split)

numpage = pdf_reader.numPages

for num in range(numpage):

     pdf_writer = PyPDF2.PdfFileWriter()

     page = pdf_reader.getPage(num)

     pdf_writer.addPage(page)

     filename = 'splitfile' + str(num) + '.pdf'
     writing_file = open(filename, 'wb')

     pdf_writer.write(writing_file)
First, we open the file we want to separate, then we create a Reader for it, from which we will take the number of pages to create a number of files equivalent to these.
Within the for loop we create an object of type PdfFileWriter to add the content of the pages that we obtain with getPage. After completing the addpage, what we will do is assign the name to the new files. In order to make the task easier, we only change the number according to the page number of the original file.
And finally, we start creating new files with open in 'wb' mode and the names we generate. Using write, we will already have the content of each page distributed between each file and observing the folder again:

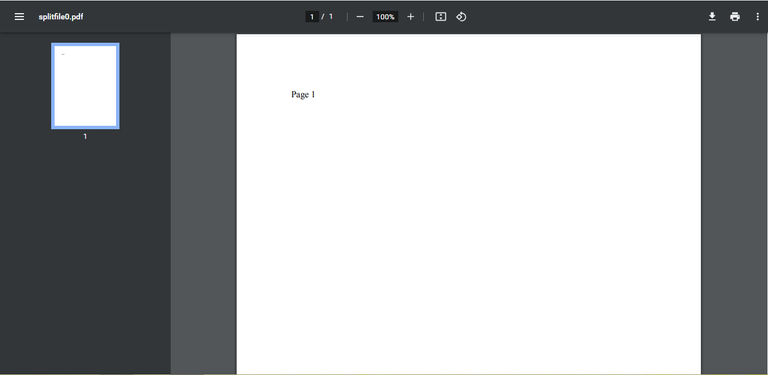
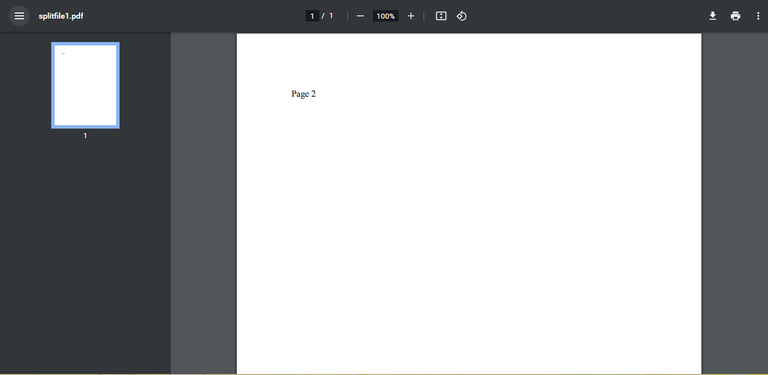
We can notice that we have new files created, which will have the content of the pages isolated from the individual file.

Encrypt and Decrypt PDF with PyPDF2
Shoutout to GeeksforGeeks
Another of the excellent features that we can use with PyPDF2 is the fact that we can add passwords to our PDF files as well as decrypt them in case we don't know them.
In order to carry out the encryption, we use the PDFFileWriter class's own method called encrypt, to which we insert the password we want to enter as a parameter.
The first thing we must do is open the PDF file from which we want to take the information, we read it and obtain the data from its pages to later use the encrypt. If we want to use this, we will have to use read and write modes. Looking at this example:
import PyPDF2

pdf_file = open('FiletoEncrypt.pdf', 'rb')
pdf_reader = PyPDF2.PdfFileReader(pdf_file)
num_pages = pdf_reader.numPages

pdf_writer = PyPDF2.PdfFileWriter()

for page in range(num_pages):
     pdf_writer.addPage(pdf_reader.getPage(page))

     pdf_writer.encrypt('user_password', 'owner_password')

     result_pdf = open('encrypted.pdf', 'wb')
     pdf_writer.write(result_pdf)

result_pdf.close()
pdf_file.close()
We create a PDFFileReader object to obtain the number of pages, then we create a PDFFileWriter and with a for loop, we write the content of each page of the Read PDF in the Writer. In addition to this, we notice how we use encrypt to add two passwords (user_password or owner_password).
Then, within the same for loop, we open or create the encrypted.pdf file and with the Writer's write method we write the information inside it.
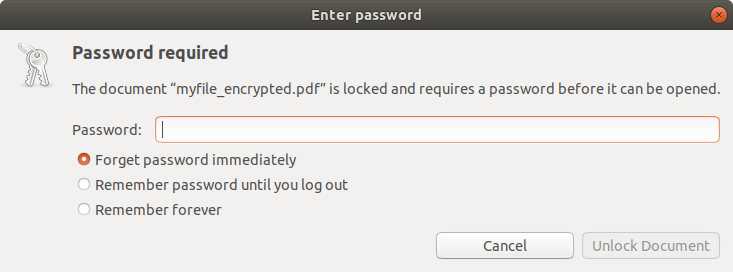
Then, if we want to see the PDF, we will have the following image:
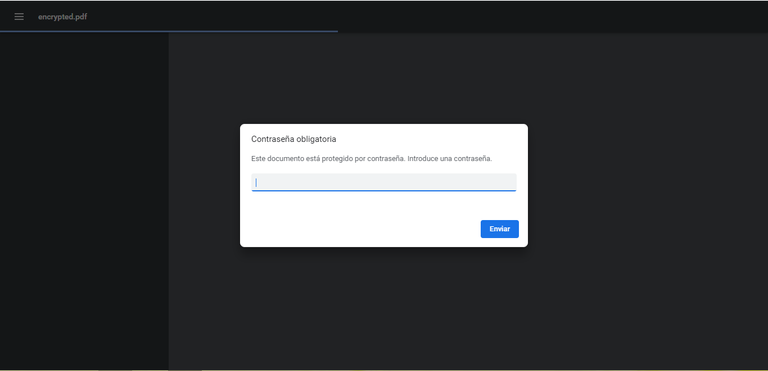
Where if we enter either of the two passwords, we can see the PDF without problem.
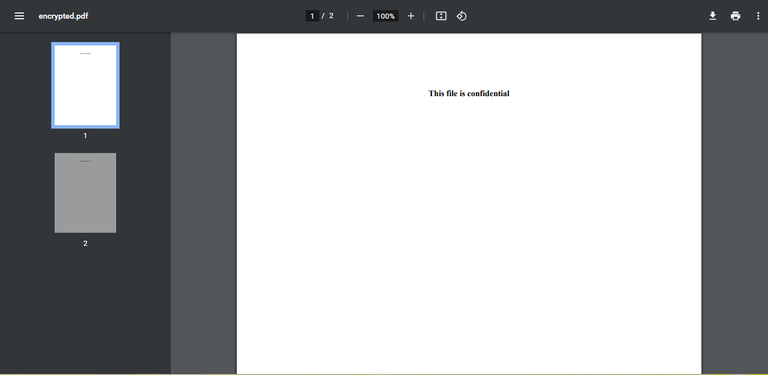
Now, if we want to perform an operation with an encrypted PDF such as extracting the text from a page, we will have to resort to decrypt, a method of the PdfFileReader class in which we will use the file's password as a parameter. If it is correct, the file will be read without problem and we can use it.
However, if we use it wrong, we will have the following error:
raise utils.PdfReadError("file has not been decrypted")
PyPDF2.utils.PdfReadError: file has not been decrypted
Now, if we want the decryption to only be carried out if our file has a password, we can use the IsEncrypted method, which will return True if the PDF has a password and False if it does not have any encryption method. Thus, with the following example:
import PyPDF2

pdf_file = open('encrypted.pdf', 'rb')
pdf_reader = PyPDF2.PdfFileReader(pdf_file)

if pdf_reader.isEncrypted:
     pdf_reader.decrypt('user_password')

page = pdf_reader.getPage(0)
text = page.extractText()

print(text)

pdf_file.close()
We can see that we open the encrypted file, and add it to an object of type PDFFileReader. Then, we verify using a conditional that will be executed when isEncrypted returns True.
Then, we use decrypt with one of the passwords as a parameter, and once this is done, we are free to perform the operations, such as in this case the extractText with the information on the first page. If we execute:
>>>This file is confidential

Managing PDF files is something we use in our daily lives, whether we want to or not. This is why for those occasions where we do not have a graphical operating system interface as is the case on some servers, the use of PyPDF2 can be of great help.
After seeing this post, you will already be a master in mastering PDFs with this library. Now you won't have to worry about knowing how to obtain and write information within them.
For the next post we will see some practical examples in which you can test your skills in handling files, whether of the CSV or PDF type.


PdfFileRead('NewPost.pdf')

Shoutout to Learn-automation

En este artículo encontrarás
- Introducción
- ¿Qué es PyPDF2?
- Leer, Copiar y Escribir Archivos PDF con PyPDF2
- Unir y Separar Archivos PDF
- Encriptar y Desencriptar PDF con PyPDF2

En el post anterior, dimos un paseo por el módulo csv, el cual nos permite leer y escribir información dentro de archivos csv, los cuales son usados con gran frecuencia para el análisis de datos y la inteligencia artificial.
Sin embargo, acercándonos un poco más a la vida cotidiana, donde el manejo de archivos de tipo PDF es mucho más frecuente, tenemos un paquete creado por la comunidad de Python: PyPDF2
Con PyPDF2 podremos controlar las páginas de nuestros archivos PDF con gran precisión, pudiendo separarlas, unirlas, recortarlas y modificarlas de distintas formas, pudiendo incluso añadir contraseñas a archivos PDF.
Si quieres aprender como manejar archivos PDF como un profesional con el uso de Python, sigue leyendo.

¿Qué es PyPDF2?

Shoutout to Narongsak Keawmanee in Medium
PyPDF2 es una librería open source de Python cuya existencia se puede remontar a 2011, donde se creó como un fork de PyPDF para la compañía Phaseit, añadiendo un rango de operaciones con archivos PDF más amplio comparado con su predecesor.
En esencia, PyPDF2 añade una gran cantidad de funcionalidades que nos permiten controlar archivos PDF como gustemos. Ya sea para tomar texto de estos, copiarlo y escribirlo en otros PDF, añadir imágenes, etc... PyPDF2 es un paquete muy completo para esto.
Al ser un paquete externo, esto significa que PyPDF2 no se encuentra integrado en Python, por lo que si intentaramos importarlo, nos saltaría un mensaje de error diciéndonos:
ImportError: No module named PyPDF2
En orden de instalarlo, debemos recurrir a nuestra línea de comandos si pip se encuentra instalado en nuestro sistema. Si no tienes pip y quieres saber como instalarlo, solo tienes que leer este artículo
Una vez aquí, escribimos el siguiente comando:
>>> pip install PyPDF2
Y tras terminar la instalación, ya tendremos a PyPDF2, el cual importamos a nuestros programas con:
import PyPDF2
Ahora, tendremos acceso al amplio rango de funcionalidades de PyPDF2. Aquí veremos algunas de las más importantes:

Leer, Copiar y Escribir Archivos PDF con PyPDF2

Shoutout to Studytonight
La primera prueba de fuego para todo módulo de manejo de archivos será el poder leer y escribir en archivos con este tipo de extensión.
Si quisieramos leer un archivo PDF con PyPDF2, lo haríamos de una forma bastante similar a la realizada con el módulo csv. Aquí, usamos la función PdfFileReader, tomando el nombre del archivo como parámetro. Con esto, crearemos un archivo de tipo PdfFileReader, el cual contiene métodos de gran utilidad.
Sin embargo, la principal diferencia con el módulo csv, es que si queremos leer con PyPDF2, debemos de hacerlo página por página. Esto significa que primero debemos de extraer una página del PDF y luego leer el texto en esta. Observando el siguiente ejemplo:
import PyPDF2

with open('TestPDF.pdf', 'rb') as pdf:
    pdf_reader = PyPDF2.PdfFileReader(pdf)

    page = pdf_reader.getPage(0)

    text = page.extractText()

    print(text)
Aquí, además de la creación del Objeto PdfFileReader con la función del mismo nombre, podemos notar que para extraer una página del PDF antes de leerla, se debe de usar el método getPage, donde indicamos el número de la página empezando a contar de cero como parámetro para tomar la información dé esa página dentro del PDF.
Así, tras abrir el archivo, convertirlo en PDFFileReader, extraer la página y el texto de esta, nos queda imprimir el resultado y tendremos:
This is a test PDF (
Page 1
)
Lo cual es justamente el contenido de nuestra primera página.
Ahora, si queremos escribir en un PDF desde cero (Es decir, escribir strings o números dentro del IDE al PDF), esto será una tarea compleja para llevar a cabo en PyPDF2. Sin embargo, si quieres hacer esto, existen otros excelentes paquetes que te pueden brindar justo lo que necesitas como FPDF y pdfkit.
Algo que si podemos hacer es copiar el texto de un PDF y escribirlo en otro PDF, donde creamos una instancia de la clase PdfFileWriter. Además de esto, en orden de que funcione a la hora de escribir debemos de usar el método addPage para añadir la página exacta del archivo leido.
Finalmente, solo tendremos que abrir o crear el archivo donde vamos a escribir usando open y colocando el modo 'wb' para escritura en binario, donde finalmente usamos el método del PdfFileWriter.
import PyPDF2

file_to_read = open('TestPDF.pdf', 'rb')
pdf_reader = PyPDF2.PdfFileReader(file_to_read)
pdf_writer = PyPDF2.PdfFileWriter()

for numpage in range(pdf_reader.numPages):
    obj = pdf_reader.getPage(numpage)
    pdf_writer.addPage(obj)

file_to_write = open('newPDF.pdf','wb')
pdf_writer.write(file_to_write)

file_to_read.close()
file_to_write.close()
Podemos ver que primero creamos el objeto tipo PdfFileWriter y luego le asignamos los valores con addPage. Finalmente usamos open y escribimos en el nuevo archivo con este.
Así, si observamos nuestra carpeta, veremos un nuevo archivo PDF y si entramos en este, veremos el mismo contenido que TestPDF.


Unir y Separar Archivos PDF

Shoutout to Fedingo
Otra de las funcionalidades de PyPDF2 es que nos permite unir gran cantidad de archivos PDF en uno solo, tomando el contenido de estos y añadiéndolos al PDF de destino.
Para realizar esto, debemos de abrir los archivos de los cuales vamos a tomar la informacion en modo lectura ('rb'). Luego, crearemos un objeto de tipo PdfFileMerger, por medio del cual podremos unir todos los PDF abiertos usando su método append.
Finalmente, solo tenemos que escribir lo recopilado en el nuevo archivo. Aquí usamos el método write del Merger, colocando el nombre del archivo de destino como parámetro y finalmente, tendremos nuestro PDF con un número de páginas total a la suma de las páginas en los dos archivos.
Observando este ejemplo, tenemos los archivos PDFtoMerge1 y PDFtoMerge2, los cuales queremos combinar e introducir en el archivo filetomix.pdf. Ejecutando este código:
import PyPDF2

file1 = open('PDFToMerge1.pdf', 'rb')
file2 = open('PDFToMerge2.pdf', 'rb')

pdf_merger = PyPDF2.PdfFileMerger()

pdf_merger.append(file1)

pdf_merger.append(file2)

pdf_merger.write('filetomix.pdf')

file1.close()
file2.close()
Abrimos los dos archivos con open, creamos el objeto PDFFileMerger y con el método append, le agregamos el contenido de estos dos al merger. Finalmente, lo escribimos en filetomix y recordamos cerrar para permitir la ejecución de futuras operaciones.
Así, si ejecutamos y entramos en el nuevo archivo, veremos un PDF con el doble de páginas que cada uno de los documentos y con el contenido de estos.

Si queremos realizar lo contrario, es decir, separar un archivo con una gran cantidad de páginas en varios archivos, tendremos que usar la ayuda del PdfFileReader y el PdfFileWriter así como un ciclo for.
Verás, si observamos el siguiente ejemplo:
import PyPDF2

file_to_split = open('PDFToSplit.pdf', 'rb')

pdf_reader = PyPDF2.PdfFileReader(file_to_split)

numpage = pdf_reader.numPages

for num in range(numpage):

    pdf_writer = PyPDF2.PdfFileWriter()

    page = pdf_reader.getPage(num)

    pdf_writer.addPage(page)

    filename = 'splitfile' + str(num) + '.pdf'
    writing_file = open(filename, 'wb')

    pdf_writer.write(writing_file)
Primero, abrimos el archivo que queremos separar, luego creamos un Reader para este, de donde tomaremos el número de páginas para crear una cantidad de archivos equivalentes a estas.
Dentro del ciclo for creamos un objeto de tipo PdfFileWriter para añadirle el contenido de las páginas que obtenemos con getPage. Tras realizar el addpage, lo que haremos será asignar el nombre a los nuevos archivos. En orden de facilitar la tarea, solo cambiamos el número de acuerdo al de la página del archivo original.
Y finalmente, comenzamos a crear nuevos archivos con open en modo 'wb' y los nombres que generamos. Usando write, ya tendremos el contenido de cada página distribuido entre cada archivo y observando la carpeta de nuevo:


Podemos notar que tenemos nuevos archivos creados, los cuales tendrán el contenido de las páginas aisladas del archivo individual.

Encriptar y Desencriptar PDF con PyPDF2

Shoutout to GeeksforGeeks
Otra de las excelentes funcionalidades que podemos usar con PyPDF2 es el hecho de que podemos agregar contraseñas a nuestros archivos PDF así como desencriptarlas en caso de que no las conozcamos.
En orden de llevar la encriptación a cabo, usamos el método propio de la clase PDFFileWriter llamado encrypt, al cual insertamos como parámetro la contraseña que queramos colocar.
Lo primero que debemos hacer es abrir el archivo PDF del que queremos tomar la información, lo leemos y obtenemos los datos de sus páginas para posteriormente usar el encrypt. Si queremos usar esto, tendremos que usar los modos de lectura y escritura. Observando en este ejemplo:
import PyPDF2

pdf_file = open('FiletoEncrypt.pdf', 'rb')
pdf_reader = PyPDF2.PdfFileReader(pdf_file)
num_pages = pdf_reader.numPages

pdf_writer = PyPDF2.PdfFileWriter()

for page in range(num_pages):
    pdf_writer.addPage(pdf_reader.getPage(page))

    pdf_writer.encrypt('user_password', 'owner_password')

    result_pdf = open('encrypted.pdf', 'wb')
    pdf_writer.write(result_pdf)

result_pdf.close()
pdf_file.close()
Creamos un objeto tipo PDFFileReader para obtener el número de páginas, entonces creamos un PDFFileWriter y con un ciclo for, escribimos el contenido de cada página del PDF Leido en el Writer. Además de esto, notamos como usamos el encrypt para añadir dos contraseñas (user_password u owner_password).
Después, dentro del mismo ciclo for, abrimos o creamos el archivo encrypted.pdf y con el método write del Writer escribimos la información dentro de este.
Luego, si queremos ver el PDF, tendremos la siguiente imagen:

Donde si introducimos alguna de las dos contraseñas, podremos ver el PDF sin problema.

Ahora, si queremos realizar una operación con un PDF encriptado como extraer el texto de una página, tendremos que recurrir a decrypt, un método de la clase PdfFileReader en el que usaremos como parámetro la contraseña del archivo. En caso de ser correcta, se leera el archivo sin problema y lo podremos usar.
Sin embargo, si lo usamos mal, tendremos el siguiente error:
raise utils.PdfReadError("file has not been decrypted")
PyPDF2.utils.PdfReadError: file has not been decrypted
Ahora bien, si queremos que la desencripción solo se lleve a cabo si nuestro archivo tiene una contraseña, podemos usar el método IsEncrypted, que nos devolverá True si el PDF tiene una contraseña y False si no tiene algún método de encripción. Así, con el siguiente ejemplo:
import PyPDF2

pdf_file = open('encrypted.pdf', 'rb')
pdf_reader = PyPDF2.PdfFileReader(pdf_file)

if pdf_reader.isEncrypted:
    pdf_reader.decrypt('user_password')

page = pdf_reader.getPage(0)
text = page.extractText()

print(text)

pdf_file.close()
Podemos observar que abrimos el archivo encriptado, y lo añadimos a un objeto de tipo PDFFileReader. Luego, verificamos usando un condicional que se ejecutará cuando isEncrypted nos retorne un True.
Luego, usamos decrypt con una de las contraseñas como parámetro, y una vez realizado esto, ya somos libres de realizar las operaciones, como es en este caso el extractText con la información de la primera página. Si ejecutamos:
>>> This file is confidential

El manejo de archivos PDF es algo que usamos en nuestro día a día, queramos o no. Es por esto que para esas ocasiones donde no tengamos una interfaz gráfica de sistema operativo como lo es en algunos servidores, el uso de PyPDF2 puede ser de gran ayuda.
Tras ver este post, ya serás un maestro en el dominio de PDFs con esta librería. Ahora no tendrás que preocuparte por saber como obtener y escribir información dentro de estos.
Para el siguiente post veremos algunos ejemplos prácticos en los que podrás poner a prueba tus habilidades en el manejo de archivos, ya sea tanto de tipo csv como PDF.


Thanks for your contribution to the STEMsocial community. Feel free to join us on discord to get to know the rest of us!
Please consider delegating to the @stemsocial account (85% of the curation rewards are returned).
You may also include @stemsocial as a beneficiary of the rewards of this post to get a stronger support.