csv File Handling: Examples in Practice / Manejo de archivos csv: Ejemplos en Práctica - Coding Basics #30
CSV to the rescue
Shoutout to LearnPython

In this article you will find:
- Introduction
- Example 1
- Example 2
- Example 3
- Example 4
Taking into account the previous articles, we have learned about the use of different libraries for file management. From txt to pdf files, we already have a complete understanding of how we can alter these.
However, until now we have only focused on theory, knowing what these packages do. This is why today we will see some examples of the use of csv and how it can be applied to different types of programs.
If you want to seal that gap in knowledge you may have regarding how to use csv, you just have to keep reading.
Example 1

Shoutout to The Lantern
The first example will be something simple, where we will use reading csv files to display information about different songs. Knowing that the file looks like this:
Song,Artist,Album,Year
Purple Rain, Prince, Purple Rain, 1984
November Rain, Guns N Roses, Use your Illusion I, 1991
Layla, Derek and the Dominos, Layla and Other Assorted Love Songs, 1970
Paid In Full, Eric B & Rakim, Paid in Full, 1987
King Kunta, Kendrick Lamar, To Pimp a Butterfly, 2015
Through the Wire, Kanye West, The College Dropout, 2004
When It Rain, Danny Brown, Atrocity Exhibition, 2016
Crime Pays, Freddie Gibbs, Bandana, 2019
We have to display this information in order so that someone understands it. An example of this:
The song [title_of_the_song] was recorded by [artist] in [year] for the album [album_name]
Once we know this, we just have to apply it in code. We remember that to read csv files we have to create an object of the csv.reader class.
Then, through a for loop for each row in the csv.reader we will go through each row of the csv file and extract the information to display it. This would look like this:
import csv

with open('csvforexample.csv') as csv_file:
     csv_reader = csv.reader(csv_file, delimiter=',')
     count = 0
     for row in csv_reader:
         if count == 0:
             print(f'The songs are sorted by {",".join(row)}')
             count += 1
         else:
             print(f"The song {row[0]} was recorded by {row[1]} in {row[3]} for the album {row[2]}")
             count += 1
Note: We use delimiter to know what the separator is between one column and another, that's why the,.
We notice that we created a variable called count, so that if we are in the first line, we display the labels of each column. Once this number is exceeded, we will show the rest of the rows, which will be the information for each album.
Note: join is a string method that is used to take the content of an iterable (list, tuple or set) and display each element in a string, using the first character as a separator (In this case ',').
Now when you run:
The songs are sorted by Song,Artist,Album,Year
The song Purple Rain was recorded by Prince in 1984 for the album Purple Rain
The song November Rain was recorded by Guns N Roses in 1991 for the album Use your Illusion I
The song Layla was recorded by Derek and the Dominos in 1970 for the album Layla and Other Assorted Love Songs
The song Paid In Full was recorded by Eric B & Rakim in 1987 for the album Paid in Full
The song King Kunta was recorded by Kendrick Lamar in 2015 for the album To Pimp a Butterfly
The song Through the Wire was recorded by Kanye West in 2004 for the album The College Dropout
The song When It Rain was recorded by Danny Brown in 2016 for the album Atrocity Exhibition
The song Crime Pays was recorded by Freddie Gibbs in 2019 for the album Bandana
Example 2
Shoutout to Javatpoint
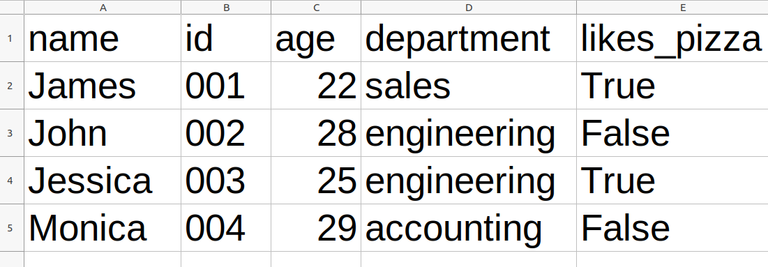
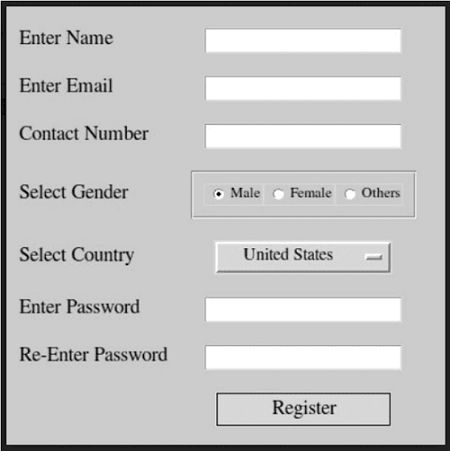
Now, we will carry out a simulation and a registration program, where we ask the user to enter the following data:
- Username
- Password
- Age
For this we create an instance of csv.writer and we will write the information provided by the user
We know that some of the csvwriter methods are writerow, which allows us to write a single line, and writerows, with which we can write a large number of lines as long as they are in the following format:
[[list1],[list2],[list3],[list4]]
Knowing this, we can use writerow to write the first line of the file, dedicated to denoting the name of the columns, and writerows to write the rest of the data.
However, we must ask the user about their data. For that we use the input statement, which requests information, this within a for loop to go through each field. Seeing this in the example:
import csv
fields = ['Username', 'Password', 'Age', 'Email']
row_list = []
writer_list = []


def register(fields, row_list, writer_list):
     for item in fields:
         element = str(input(f'Write your {item} here: '))
         row_list.append(element)

     writer_list.append(row_list)
     row_list = []

     repeatagain = str(input('Do you want to register another user?'))

     if repeatagain == 'Yes' or repeatagain == 'yes':
         register(fields, row_list, writer_list)

register(fields, row_list, writer_list)

with open('register.csv', 'w') as register_file:
     csvwriter = csv.writer(register_file)
     csvwriter.writerow(fields)
     csvwriter.writerows(writer_list)


print(writer_list)
We see that we create two lists, one for the rows of the csv and another for the writer, which correspond to the lists that we will use as elements (row_list) of the larger list and another to create the larger list where they will be nested (writer_list).
Then, within the for loop with the number of items that the list of fields has, we request the information and introduce it to row_list, and then add these to the larger list. Then, with a conditional, we ask the user if he wants to continue adding users. If they say yes, the process is repeated. If not, we proceed to open the file outside of the function.
Because we are going to write information inside the csv, we use open in 'w' mode. Then, we create the writer and with writerow we write the name of the fields. Finally with writerows, we write every piece of data that the user types without having to do this line by line.
If we execute:
Write your Username here: Mikr
Write your Password here: 123456
Write your Age here: 2
Write your Email here: [email protected]
['Mikr', '123456', '2', '[email protected]']
Do you want to register another user?Yes
Write your Username here: Lily
Write your Password here: 12345
Write your Age here: 24
Write your Email here: [email protected]
['Lily', '12345', '24', '[email protected]']
Do you want to register another user?No
[['Mikr', '123456', '2', '[email protected]'], ['Lily', '12345', '24', '[email protected]']]
And if we see the csv file:
Username,Password,Age,Email

Mikr,123456,2,[email protected]

Lily,12345,24,[email protected]
With which we have a functional registration system
Example 3
Shoutout to Sourcecodester
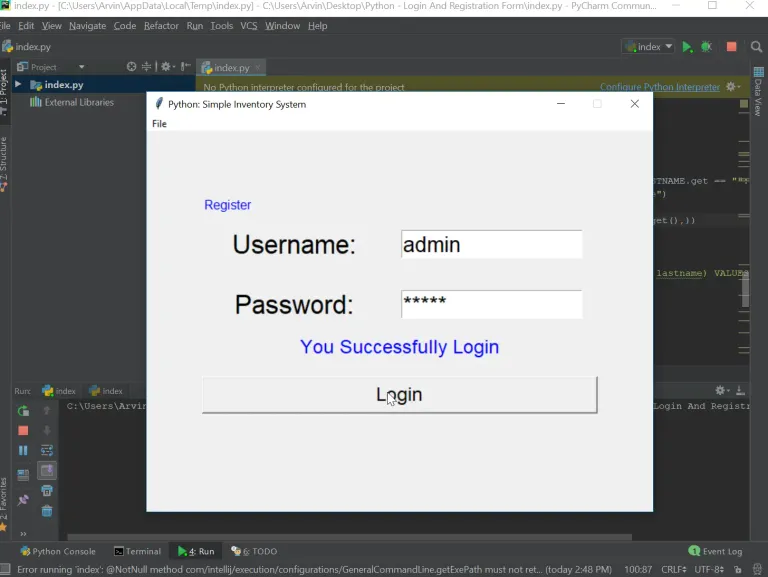
This example is a continuation of the previous one, where now instead of registering users in our csv file, we will see if the data we entered matches with some of the data we entered.
In essence, what we will do will be a login program, where the username and password match those of some of the rows. For this we will use DictReader, in order to read the csv as a dictionary and be much more efficient when working.
So, what we will do will be something simple:
- We will use inputs to ask the operator for username and password information.
- Create the reader and take the information from the csv file.
- Use a for loop to loop through each line of the csv.
- Through a conditional check if the username and password fields are the same as those entered.
- Show a 'Welcome' if the condition is met or prevent passage if it is not met.
import csv

username = str(input('Enter your username here: '))
password = str(input('Enter your password here: '))

with open('register.csv', 'r') as csv_file:
     csvdict = csv.DictReader(csv_file)

     for row in csvdict:
         if row['Username'] == username and row['Password'] == password:
             print(f'Welcome again {row["Username"]}')
             break
         else:
             print('Wrong password or username')
break
We notice that we now read with the DictReader instead of reader. What will change is that now we can use the fields in the first row (Username, Password, Age, Email) as keys, while the value of these will be the data corresponding to the columns in each row.
In this way, we facilitate the process, where in the conditional we simply use the keys 'Username' and 'Password' of the corresponding row. If we find a value that matches this, it will tell us "Welcome." Thus, executing:
Enter your username here: Mike
Enter your password here: 123456
Welcome back Mike
And if we place one that does not exist
Enter your username here: Check
Enter your password here: Mart
Wrong password or username
Example 4

Shoutout to Pensacola News Journal
Finally, we take into account the following:
We want to create a simulation of a system to enter the grades of different students in different classes. The requirements are:
- Allow the user of the program to enter the names of the classes and the corresponding notes.
- Once the names of the subjects have been entered, they cannot be changed in the program.
- Use dictionaries to enter information.
Taking these parameters into account, if you want to do this program on your own, feel free to do so and post it in the comments.
If you want to know how it's done or see a way to implement the code, keep reading:
If we are asked to enter the information in the form of dictionaries, then we must resort to the DictWriter class, whose methods allow us to extract information from dictionaries and add it to the file.
If we remember the coding basics chapter dedicated to csv module, we know that To perform the write operation with DictWriter, we have to write a line with the name of the fields, which we declare as parameters, which is why we have to create a separate list for the name of the columns.
In addition to this, we not only have to create dictionaries with the data, but also a place to store it, which is why we create a list of the dictionaries. If we add this to the fact that we must also create a list with the values that we will assign to the keys, we will have 3 lists and a dictionary to create.
Now we will see the example in concrete code, which we will analyze section by section to understand it better:
import csv

fieldnames = []
grades = []
dictionary = {}
dict_list = []

def add_fields(fieldnames):
     field = str(input('Insert a class'))
     fieldnames.append(field)

     yesno = str(input('Do you want to add another class?'))

     if yesno == 'Yes' or yesno == 'yes':
         add_fields(fieldnames)

def add_grades(grades, fieldnames, dictionary, dict_list):
     for field in fieldnames:
         grade = str(input('Insert a grade'))
         grades.append(grade)
         dictionary.update({field : grade})

     dict_list.append(dictionary)

     yesno = str(input('Do you want to add another student\'s grades?'))

     if yesno == 'Yes' or yesno == 'yes':
         grades = []
         dictionary = {}
         add_grades(grades,fieldnames, dictionary, dict_list)

add_fields(fieldnames)
add_grades(grades, fieldnames, dictionary, dict_list)

with open('gradecsv.csv', 'w') as file:
     writer = csv.DictWriter(file, fieldnames = fieldnames)
     writer.writeheader()
     for item in dict_list:
         writer.writerow(item)
After creating the four iterable elements, the first thing we will have to do is ask for the name of each field. This is why the add_field function starts with an input, whose value will be added to the fieldnames list with append. Then, through a conditional we ask whether or not the user wants to add a new class. If you want, the function is repeated. If not, it's over.
The procedure for adding notes will be similar, only now we will not only handle the list of fieldnames, since we will take the notes and add them to their corresponding list. Not only this, we will also join the notes with their corresponding fields in a dictionary and add as many as necessary to the list of dictionaries through a for loop.
Then, using a conditional, we ask if we want to add more notes, which would repeat the function and empty grades and dictionary to allow new values to be added to the list of dictionaries.
Finally, after executing our functions and allowing our dictionary list to have as many topics and notes as we have assigned. We will have to open the file in writing mode and then create the DictWriter with the file and fieldname parameters.
So, with writeheader we designate the first row for the column names and with a for loop, we write each line of our list.
If we execute, we will have the following:
Insert a classMath
Do you want to add another class?Yes
Insert a classEnglish
Do you want to add another class?No
Insert to grade20
Insert to grade20
Do you want to add another student's grades?Yes
Insert to grade13
Insert to grade15
Do you want to add another student's grades?yes
Insert to grade18
Insert to grade17
Do you want to add another student's grades?No
And looking at the file:
Math,English

20.20

13.15

18.17
And we'll have our grade recording system.
Now we can now feel like experts in handling csv. We note that using these files and modifying them using Python is not difficult. We just have to have a goal in mind and know the types of data we want to enter.
Feel free to use the csv for whatever you want. Whether it's for a dataset, a database, or many other things, sooner or later you will see these in your journey as a programmer and data analyst.
See you in the next Coding Basics, where we will see some examples of using PyPDF2.

CSV al rescate
Shoutout to LearnPython
En este artículo encontrarás:
- Introducción
- Ejemplo 1
- Ejemplo 2
- Ejemplo 3
- Ejemplo 4
Tomando en cuenta los artículos previos, hemos aprendido sobre el uso de distintas librerías para el manejo de archivos. Desde archivos txt hasta pdf, ya tenemos un entendimiento completo de como podemos alterar estos.
Sin embargo, hasta ahora solo nos hemos enfocado en teoría, conociendo que es lo que hacen estos paquetes. Es por esto que hoy veremos algunos ejemplos del uso de csv y como puede ser aplicado a distintos tipos de programas.
Si quieres sellar esa fisura de conocimiento que puedas tener respecto a como usar csv, solo tienes que seguir leyendo.
Ejemplo 1
Shoutout to The Lantern
El primer ejemplo será algo sencillo, donde usaremos la lectura de archivos csv para mostrar información sobre distintas canciones. Sabiendo que el archivo se ve así:
Song,Artist,Album,Year
Purple Rain, Prince, Purple Rain, 1984
November Rain, Guns N Roses, Use your Illusion I, 1991
Layla, Derek and the Dominos, Layla and Other Assorted Love Songs, 1970
Paid In Full, Eric B & Rakim, Paid in Full, 1987
King Kunta, Kendrick Lamar, To Pimp a Butterfly, 2015
Through the Wire, Kanye West, The College Dropuout, 2004
When It Rain, Danny Brown, Atrocity Exhibition, 2016
Crime Pays, Freddie Gibbs, Bandana, 2019
Tenemos que mostrar esta información ordenada de manera que alguien lo entienda. Un ejemplo de esto:
The song [title_of_the_song] was recorded by [artist] in [year] for the album [album_name]
Una vez sabido esto, solo debemos de aplicarlo en código. Recordamos que para leer archivos csv tenemos que crear un objeto de la clase csv.reader.
Luego, por medio de un ciclo for para cada fila en el csv.reader iremos por cada fila del archivo csv y extraemos la información para mostrarla. Esto quedaría de la siguiente forma:
import csv

with open('csvforexample.csv') as csv_file:
    csv_reader = csv.reader(csv_file, delimiter=',')
    count = 0
    for row in csv_reader:
        if count == 0:
            print(f'The songs are sorted by {",".join(row)}')
            count += 1
        else:
            print(f"The song {row[0]} was recorded by {row[1]} in {row[3]} for the album {row[2]}")
            count += 1
Nota: Usamos delimiter para saber cual es el separador entre una columna y otra, por eso la ,.
Notamos que creamos una variable llamada count, esto con la finalidad de que si estamos en la primera línea, exhibamos las etiquetas de cada columna. Una vez superado este número, mostraremos el resto de las filas, que será la información de cada album.
Nota: join es un método de las string que se usa para tomar el contenido de un iterable (lista, tupla o set) y mostrar cada elemento en una string, usando el primer caracter como separador (En este caso ',').
Ahora, al ejecutar:
The songs are sorted by Song,Artist,Album,Year
The song Purple Rain was recorded by  Prince in  1984 for the album  Purple Rain
The song November Rain was recorded by  Guns N Roses in  1991 for the album  Use your Illusion I
The song Layla was recorded by  Derek and the Dominos in  1970 for the album  Layla and Other Assorted Love Songs
The song Paid In Full was recorded by  Eric B & Rakim in  1987 for the album  Paid in Full
The song King Kunta was recorded by  Kendrick Lamar in  2015 for the album  To Pimp a Butterfly
The song Through the Wire was recorded by  Kanye West in  2004 for the album  The College Dropuout
The song When It Rain was recorded by  Danny Brown in  2016 for the album  Atrocity Exhibition
The song Crime Pays was recorded by  Freddie Gibbs in  2019 for the album  Bandana
Ejemplo 2
Shoutout to Javatpoint
Ahora, realizaremos una simulación e un programa de registro, donde le pedimos al usuario introducir los siguientes datos:
- Nombre de Usuario
- Contraseña
- Edad
Para esto creamos una instancia de csv.writer y escribiremos la información que nos proporcione el usuario
Sabemos que algunos de los métodos de csvwriter son writerow, que nos permite escribir una línea individual y writerows, con la que podemos escribir gran cantidad de líneas siempre que se encuentren en el siguiente formato:
[[list1],[list2],[list3],[list4]]
Sabiendo esto, podemos usar el writerow para escribir la primera línea del archivo, dedicada a denotar el nombre de las columnas y writerows para escribir el resto de datos.
Sin embargo, debemos de preguntarle al usuario sobre sus datos. Para eso usamos la instrucción input, que solicita información, esto dentro de un ciclo for para pasar por cada campo. Viendo esto en el ejemplo:
import csv
fields = ['Username', 'Password', 'Age', 'Email']
row_list = []
writer_list = []


def register(fields, row_list, writer_list):
    for item in fields:
        element  = str(input(f'Write your {item} here: '))
        row_list.append(element)

    writer_list.append(row_list)
    row_list = []

    repeatagain = str(input('Do you want to register another user?'))

    if repeatagain == 'Yes' or repeatagain == 'yes':
        register(fields, row_list, writer_list)

register(fields, row_list, writer_list)

with open('register.csv', 'w') as register_file:
    csvwriter = csv.writer(register_file)
    csvwriter.writerow(fields)
    csvwriter.writerows(writer_list)


print(writer_list)
Vemos que creamos dos listas, una para las filas del csv y otro para el writer, que corresponden a las listas que usaremos como elementos (row_list) de la lista mayor y otra para crear la lista mayor donde se anidarán (writer_list).
Luego, dentro del ciclo for con la cantidad de items que tiene la lista de los campos, pedimos la información y la introducimos a row_list, para luego añadir estas a la lista mayor. Luego, con un condicional, preguntamos al usuario si quiere seguir agregando usuarios. En caso de que diga que si, se repite el proceso. En caso de que no, procedemos a abrir el archivo fuera de la función.
Debido a que vamos a escribir información dentro del csv, usamos open en modo 'w'. Luego, creamos el writer y con writerow escribimos el nombre de los campos. Finalmente con writerows, escribimos cada dato que escribe el usuario sin tener que hacer esto línea por línea.
Si ejecutamos:
Write your Username here: Mikr
Write your Password here: 123456
Write your Age here: 2
Write your Email here: [email protected]
['Mikr', '123456', '2', '[email protected]']
Do you want to register another user?Yes
Write your Username here: Lily
Write your Password here: 12345
Write your Age here: 24
Write your Email here: [email protected]
['Lily', '12345', '24', '[email protected]']
Do you want to register another user?No
[['Mikr', '123456', '2', '[email protected]'], ['Lily', '12345', '24', '[email protected]']]
Y si vemos el archivo csv:
Username,Password,Age,Email

Mikr,123456,2,[email protected]

Lily,12345,24,[email protected]
Con lo que tenemos un sistema de registro funcional
Ejemplo 3
Shoutout to Sourcecodester
Este ejemplo es una continuación del anterior, donde ahora en vez de registrar usuarios en nuestro archivo csv, veremos si coinciden los datos que introducidos con algunos de los que introducimos.
En esencia, lo que haremos será un programa de login, donde si el usuario y la contraseña coinciden con los de algunas de las filas. Para esto usaremos DictReader, en orden de leer el csv como diccionario y ser mucho más eficientes a la hora de trabajar.
Entonces, lo que haremos será algo sencillo:
- Usaremos inputs para pedirle al operario la información de usuario y contraseña.
- Crear el reader y tomar la información del archivo csv.
- Usar un ciclo for para recorrer cada línea del csv.
- Por medio de un condicional verificar si los campos de usuario y contraseña son iguales a los introducidos.
- Mostrar un 'Bienvenido' si se cumple la condición o impedir el paso si no se cumple.
import csv

username = str(input('Enter your username here: '))
password = str(input('Enter your password here: '))

with open('register.csv', 'r') as csv_file:
    csvdict = csv.DictReader(csv_file)

    for row in csvdict:
        if row['Username'] == username and row['Password'] == password:
            print(f'Welcome again {row["Username"]}')
            break
        else:
            print('Wrong password or username')
            break
Notamos que ahora leemos con el DictReader en vez reader. Lo que cambiará es que ahora podremos usar los campos de la primera fila (Username, Password, Age, Email) como claves, mientras que el valor de estas será el dato correspondiente a las columnas en cada fila.
De esta forma, facilitamos el proceso, donde en el condicional simplemente usamos las clave 'Username' y 'Password' de la fila correspondiente. Si encontramos un valor que coincida con esta, nos dirá "Bienvenido". Así, ejecutando:
Enter your username here: Mike
Enter your password here: 123456
Welcome again Mike
Y si colocamos una que no existe
Enter your username here: Check
Enter your password here: Mart
Wrong password or username
Ejemplo 4
Shoutout to Pensacola News Journal
Para finalizar, tenemos en cuenta lo siguiente:
Queremos crear una simulación de un sistema para ingresar las calificaciones de distintos alumnos en distintas clases. Se tiene como requerimientos:
- Permitir a quien usa el programa introducir los nombres de las clases y las notas correspondientes.
- Una vez introducidos los nombres de las asignaturas no se pueden cambiar en el programa.
- Usar diccionarios para introducir la informacion.
Tomando en cuenta estos parámetros, si quieres realizar este programa por tu cuenta, siéntete libre de hacerlo y publicarlo en los comentarios.
Si quieres saber como se hace o ver una forma de implementar el código, sigue leyendo:
Si nos piden introducir la información en forma de diccionarios, entonces debemos de recurrir a la clase DictWriter, cuyos métodos nos permiten extraer información de diccionarios y agregarla al archivo.
Si recordamos el capítulo de coding basics dedicado al módulo csv, sabemos que para realizar la operación de write con DictWriter, tenemos que escribir una línea con el nombre de los campos, que declaramos como parámetro, razón por la que hay que crear una lista aparte para el nombre de las columnas.
Además de esto, no solo tenemos que crear diccionarios con los datos, sino también un lugar donde almacenarlos, razón por la que creamos una lista de los diccionarios. Si sumamos esto a que también debemos crear una lista con los valores que asignaremos a las claves, tendremos 3 listas y un diccionario a crear.
Ahora veremos el ejemplo en código concretado, el cual analizaremos sección por sección para entenderlo mejor:
import csv

fieldnames = []
grades = []
dictionary = {}
dict_list = []

def add_fields(fieldnames):
    field = str(input('Insert a class'))
    fieldnames.append(field)

    yesno = str(input('Do you want to add another class?'))

    if yesno == 'Yes' or yesno == 'yes':
        add_fields(fieldnames)

def add_grades(grades, fieldnames, dictionary, dict_list):
    for field in fieldnames:
        grade = str(input('Insert a grade'))
        grades.append(grade)
        dictionary.update({field : grade})

    dict_list.append(dictionary)

    yesno = str(input('Do you want to add another student\'s grades?'))

    if yesno == 'Yes' or yesno == 'yes':
        grades = []
        dictionary = {}
        add_grades(grades,fieldnames, dictionary, dict_list)

add_fields(fieldnames)
add_grades(grades, fieldnames, dictionary, dict_list)

with open('gradecsv.csv', 'w') as file:
    writer = csv.DictWriter(file, fieldnames = fieldnames)
    writer.writeheader()
    for item in dict_list:
        writer.writerow(item)
Tras crear los cuatro elementos iterables, lo primero que tendremos que hacer es preguntar por el nombre de cada campo. Es por esto que la función add_field comienza con un input, cuyo valor será agregado a la lista fieldnames con append. Luego, por medio de un condicional preguntamos si el usuario quiere o no agregar una nueva clase. En caso de que quiera, se repite la función. En caso de que no, se termina.
El procedimiento para agregar notas será similar, solo que ahora no solo manejaremos la lista de fieldnames, ya que tomaremos las notas y la agregaremos a su lista correspondiente. No solo esto, también juntaremos las notas con sus campos correspondientes en un diccionario y agregaremos cuantos hagan falta a la lista de diccionarios por medio de un ciclo for.
Luego, por medio de un condicional, preguntamos si queremos añadir más notas, con lo que se repetiría la función y se vaciarían grades y dictionary para permitir agregar nuevos valores a la lista de diccionarios.
Finalmente, tras ejecutar nuestras funciones y permitir que nuestra lista de diccionarios tenga cuantos temas y notas hayamos asignado. Tendremos que abrir el archivo en modo escritura para luego crear el DictWriter con los parámetros de archivo y fieldname.
Entonces, con writeheader designamos la primera fila para los nombres de las columnas y con un ciclo for, escribimos cada línea de nuestra lista.
Si ejecutamos, tendremos lo siguiente:
Insert a classMath
Do you want to add another class?Yes
Insert a classEnglish
Do you want to add another class?No
Insert a grade20
Insert a grade20
Do you want to add another student's grades?Yes
Insert a grade13
Insert a grade15
Do you want to add another student's grades?yes
Insert a grade18
Insert a grade17
Do you want to add another student's grades?No
Y al observar el archivo:
Math,English

20,20

13,15

18,17
Con lo que ya tendremos nuestro sistema de registro de calificaciones.
De esta forma, ya podemos sentirnos unos expertos en el manejo de csv. Notamos que el uso de estos archivos y la modificación de estos por medio de Python no es algo difícil. Solo tenemos que tener una meta en mente y conocer los tipos de datos que queremos introducir.
Siéntete libre de usar los csv para lo que quieras. Ya sea para un dataset, una base de datos o muchas otras cosas, tarde o temprano verás estos en tu viaje como programador y analista de datos.
Nos vemos en el siguiente Coding Basics, donde veremos algunos ejemplos del uso de PyPDF2.
Thanks for your contribution to the STEMsocial community. Feel free to join us on discord to get to know the rest of us!
Please consider delegating to the @stemsocial account (85% of the curation rewards are returned).
You may also include @stemsocial as a beneficiary of the rewards of this post to get a stronger support.