Repairing Light Ring / Reparando Aro De Luz
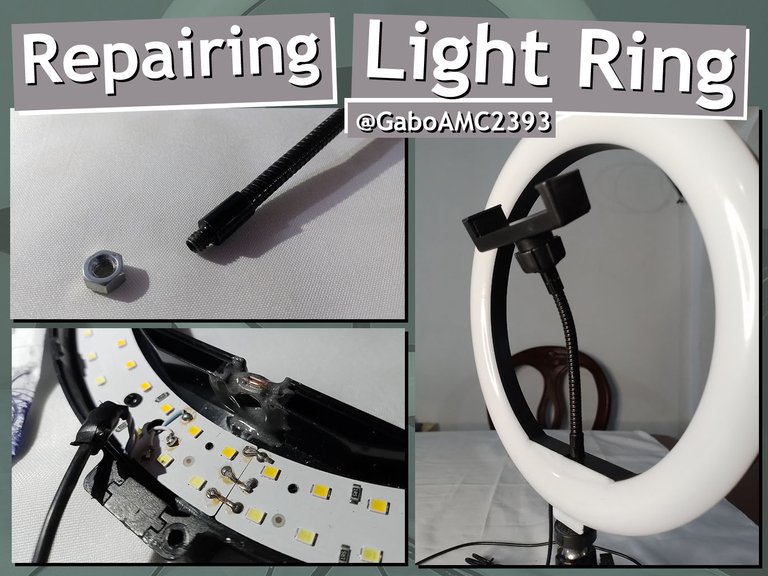

The other day my light ring was damaged. I had to put it aside and look for a part to repair it with and today I would like to show you how I did it.
These devices are very common and I think you will find it useful to know how to repair them if you have the same problem.

El otro día mi aro de luz se dañó. Tuve que dejarlo de lado y buscar una pieza con la cual repararlo y hoy me gustaría mostrarles cómo lo hice.
Estos dispositivos son muy comunes y creo que les resultará útil saber cómo repararlos si llegan a tener el mismo problema.
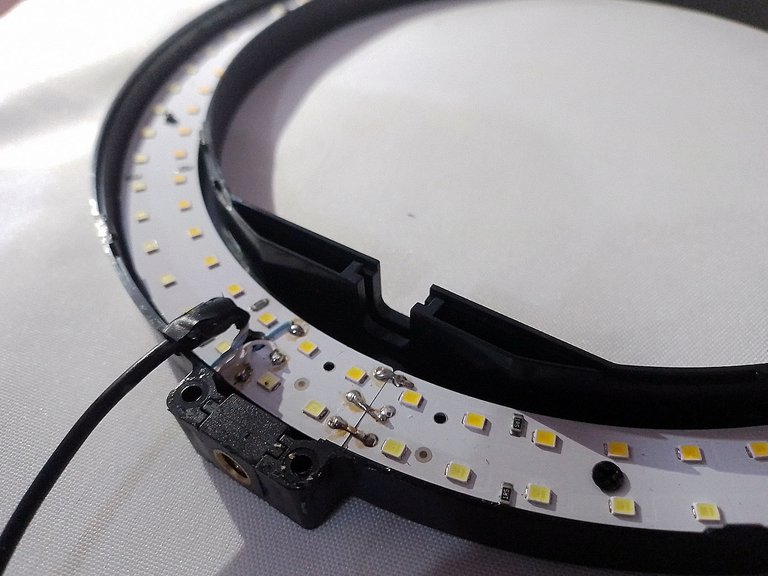
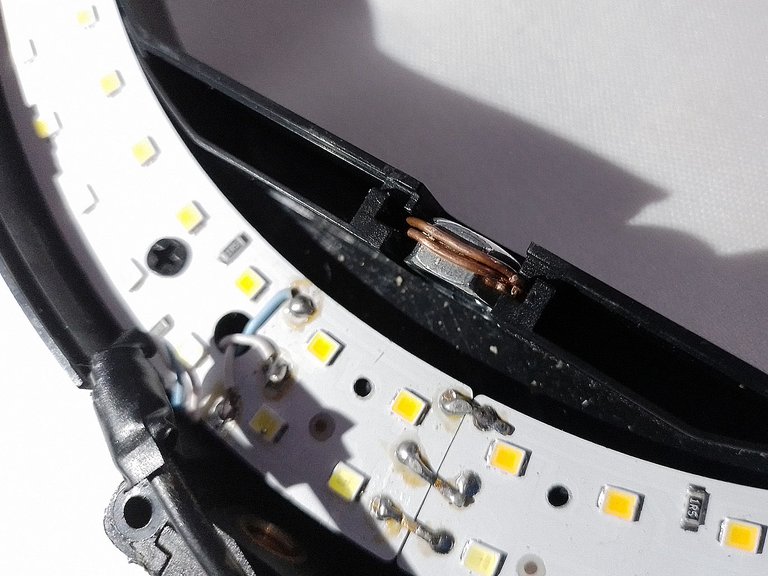
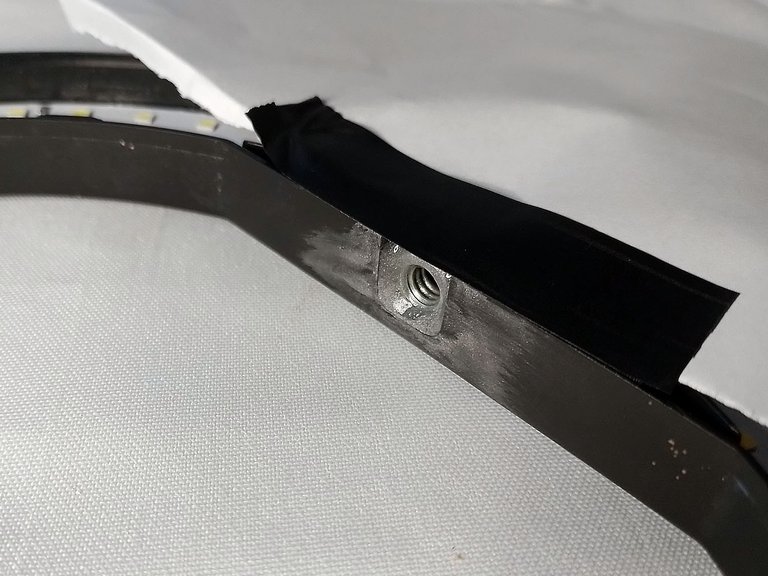
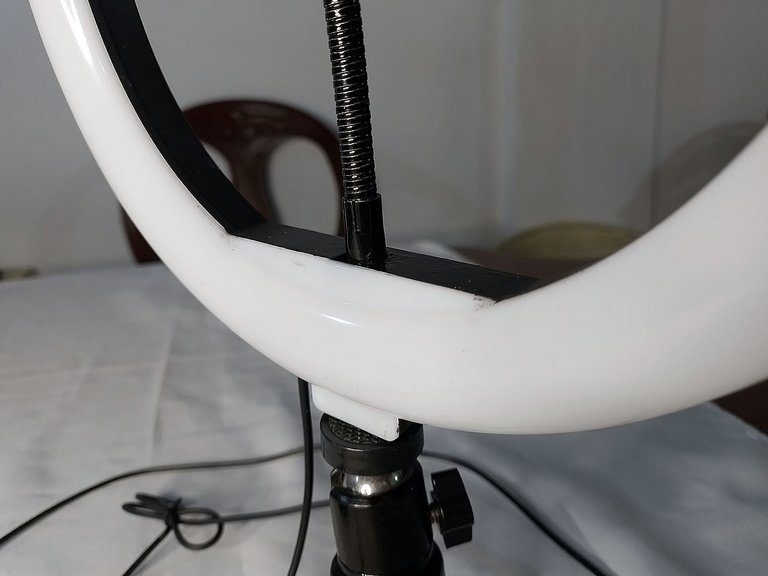
The damage that my light ring suffered was precisely in the ring, specifically in the area where the arm that holds the phone is screwed.
You can't see it here, but behind this white protective cover there is a small piece where the arm that I already mentioned is screwed. It is a piece that can be removed and therefore can be replaced.
El daño que sufrió mi aro de luz fue precisamente en el aro, específicamente en el área donde va enroscado el brazo que sostiene el teléfono.
Aquí no se ve, pero detrás de esta cubierta protectora blanca hay una pequeña pieza en donde va enroscado el brazo que ya les mencioné. Es una pieza que se puede sacar y por lo tanto, se puede reemplazar.
First we have to remove the cover in question, this is embedded in the light ring to pressure, so with a knife we can make pressure upwards to remove it.
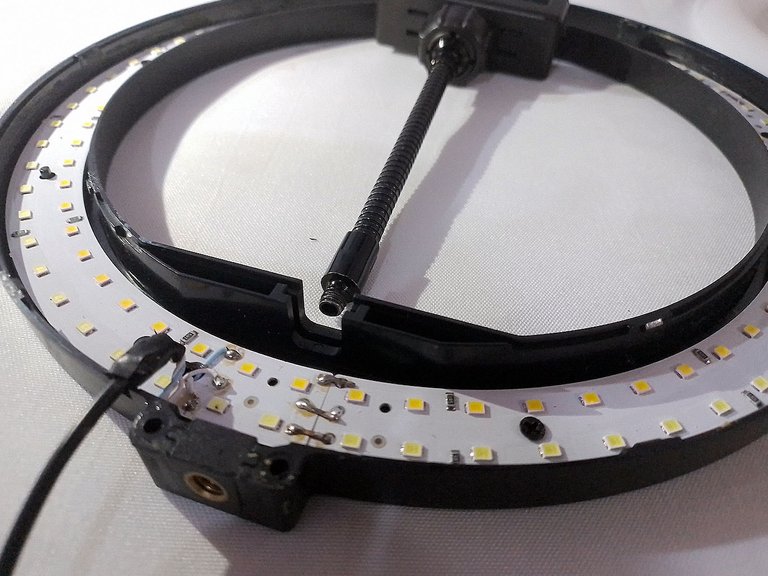
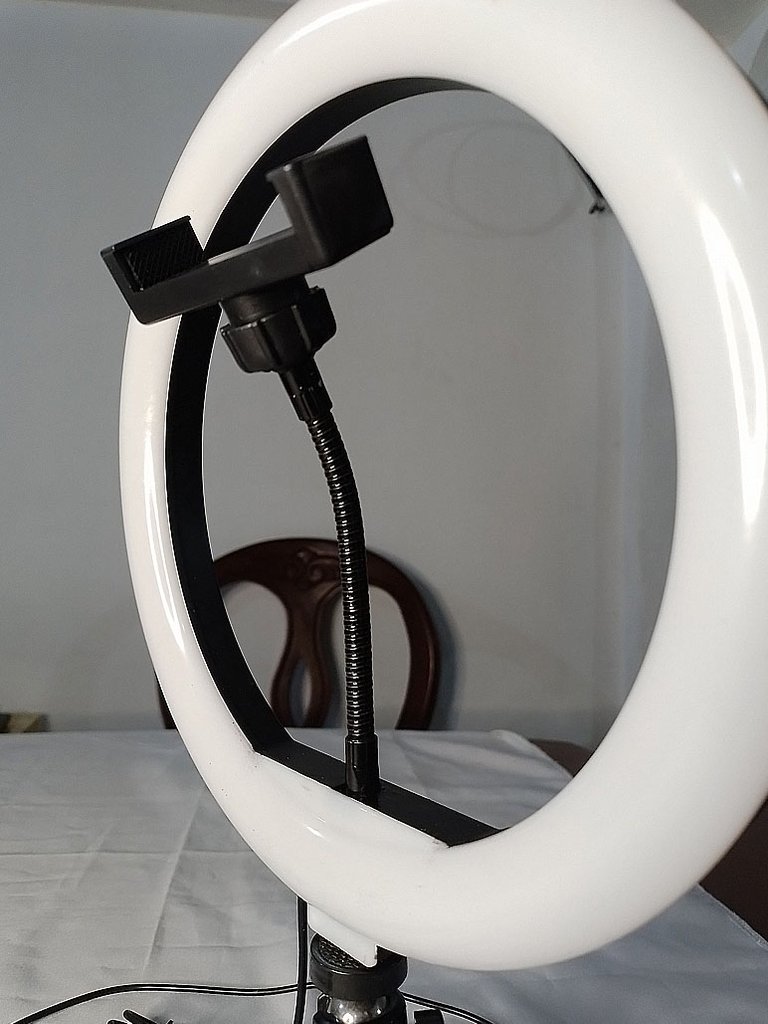
Once uncovered, there will be the small piece I told you about. It is similar to the one in the image below, only this is the piece that screws into the tripod. The piece that screws on the other arm simply blew out and got lost, I don't know where it is.
Primero hay que quitar la cubierta en cuestión, esta va incrustada en el aro de luz a presión, así que con un cuchillo podemos hacer presión hacia arriba para retirarla.
Una vez descubierta, allí estará la pequeña pieza de la que les hablé. Es similar a la que está en la imagen de abajo, solo que esta es la pieza que enrosca al trípode. La pieza que enrosca el otro brazo simplemente se reventó y se me perdió, no sé en donde está.
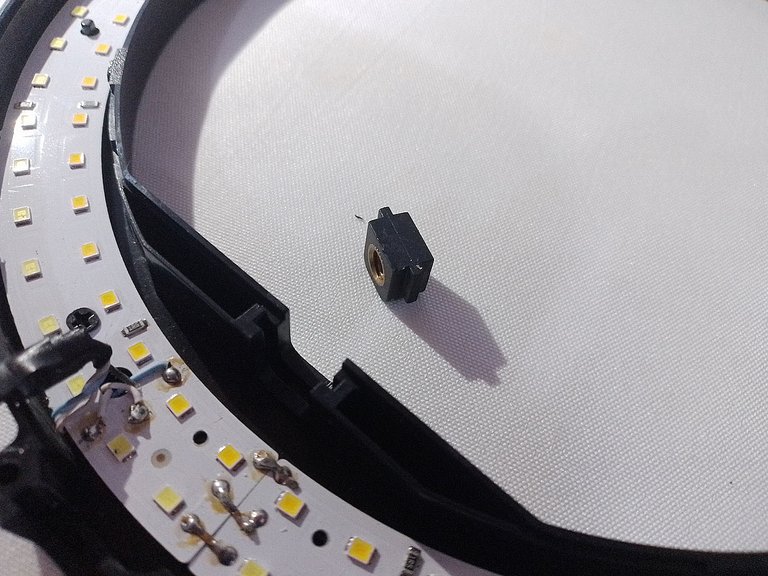
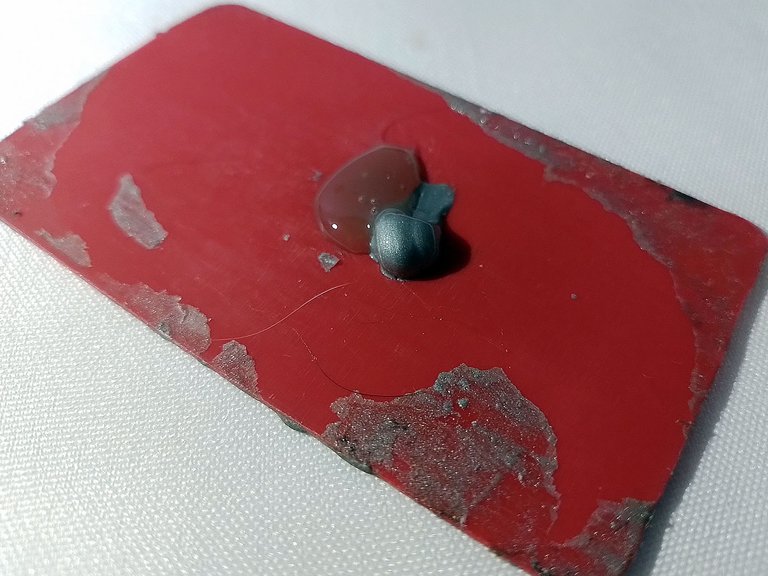
However, the image below can serve as an example of how the missing piece that goes on top of the light ring should look like.
On the other hand, you can also see the thread that has the arm that holds the phone and how it should be screwed into the piece.
Sin embargo, la imagen de abajo puede servirles de ejemplo de cómo debería estar la pieza faltante que va en la parte de arriba del aro de luz.
Por otra parte, también pueden ver la rosca que tiene el brazo que sostiene el teléfono y cómo debería ir enroscada en la pieza.
 |  |
|---|
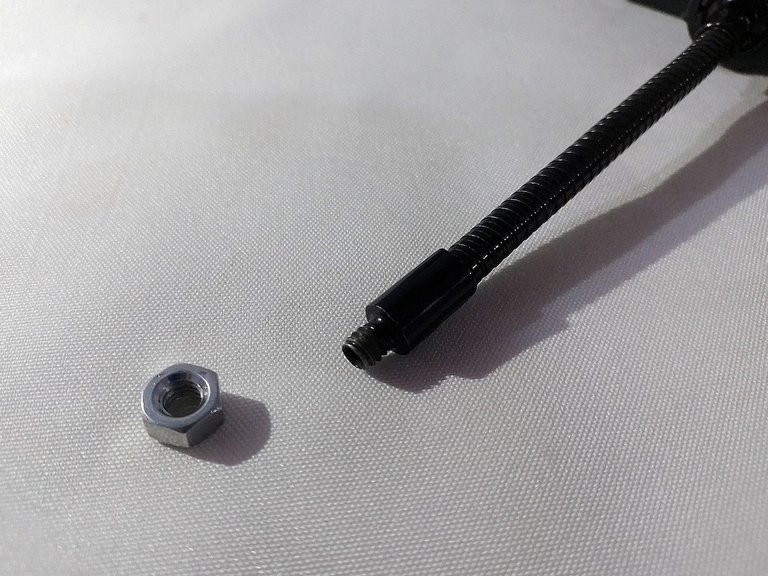
Well, to replace this small part that blew out, I bought a small nut to match the thread on the arm.
Both can be screwed together and it even fits perfectly where the part that was damaged should be.
Bien, para reemplazar esta pequeña pieza que se reventó, compré una pequeña tuerca que coincidiese con la rosca del brazo.
Ambos se pueden enroscar e incluso calza perfectamente en el lugar donde debería estar la pieza que se me dañó.
 |  |
|---|
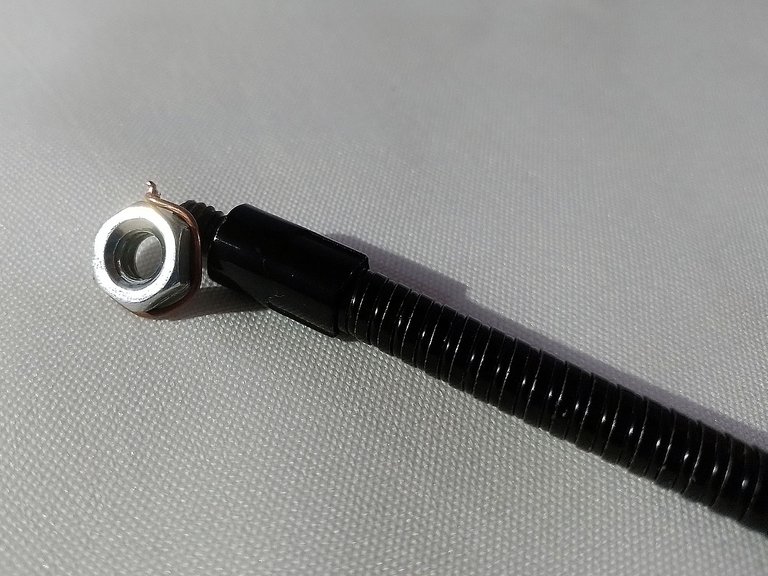
To this piece I made some slots horizontally along the entire length and fastened it with a wire in those slots, so that they are well fastened there.
As I said, it fits perfectly, below you can see some pictures of this process.
A esta pieza le hice unas ranuras de manera horizontal en todo el largo y la sujeté con un alambre en esas ranuras, para que queden bien sujetas allí.
Como les dije, calza perfectamente, abajo pueden ver unas fotografías de este proceso.
 |  |
|---|
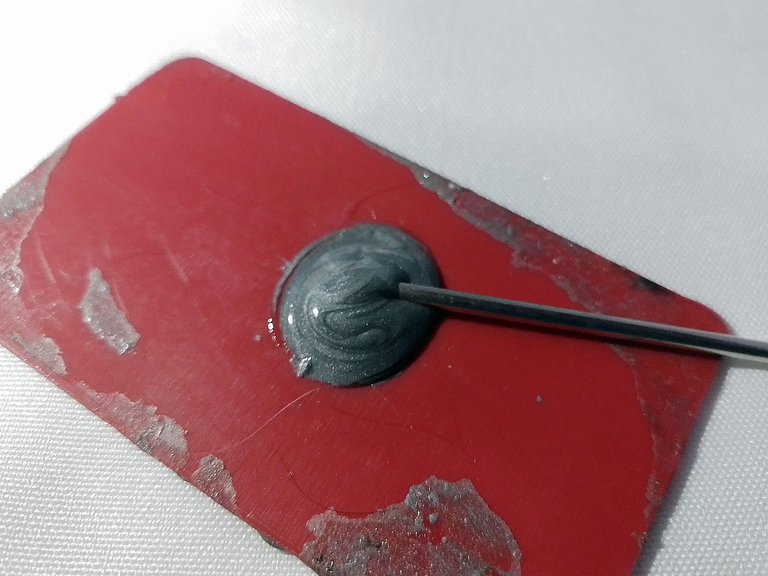
To hold this piece in place I used a fairly strong glue, known as plastic steel.
This is prepared by joining liquid steel with a catalyst that hardens the mixture. It comes in two separate tubes and is then mixed together.
Para mantener fija esta pieza en su lugar usé un pegamento bastante resistente, que se conoce como acero plástico.
Este se prepara uniendo el acero líquido con un catalizador que endurece la mezcla. Viene en dos tubos por separado y luego se mezclan.
 |  |
|---|
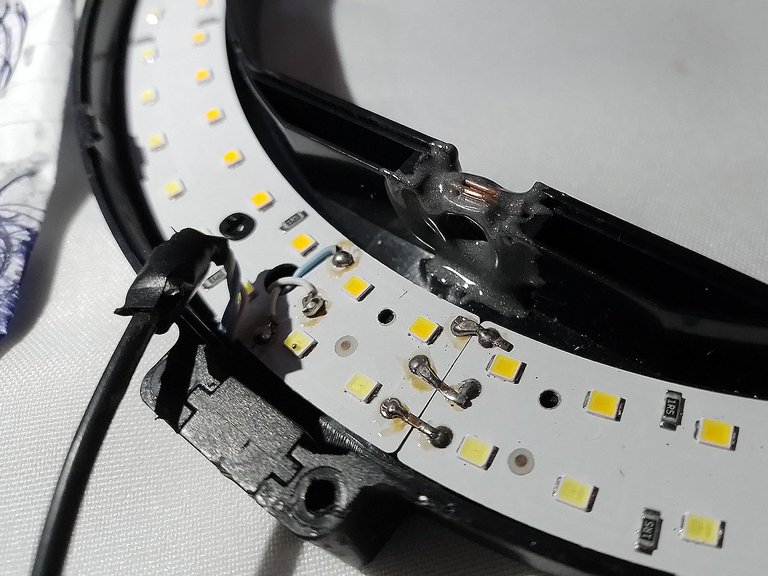
Below you can see how the piece looked with the glue all over the area, to keep it well fixed in place.
After adding this glue I simply let it dry overnight until the next morning.
Abajo pueden ver cómo quedó la pieza con el pegamento en toda el área, para mantenerlo bien fijo en su lugar.
Después de agregar este pegamento simplemente lo dejé secar por toda la noche, hasta la mañana siguiente.
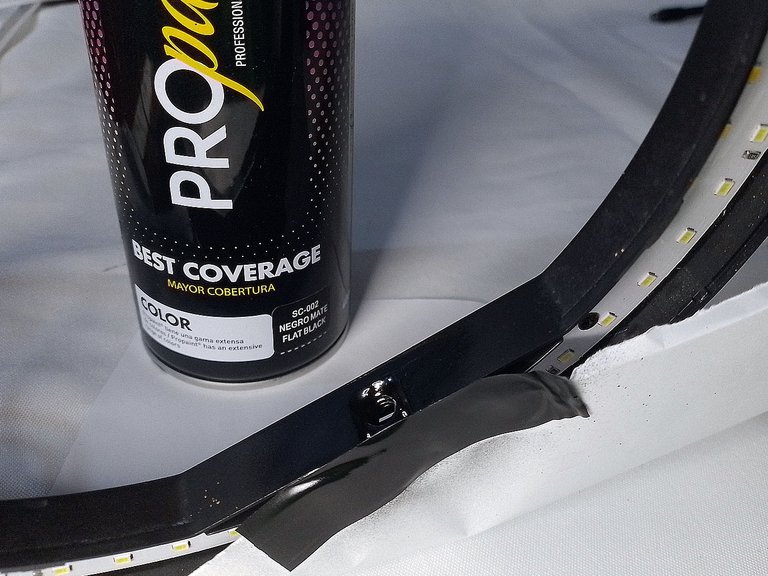
That morning I took a piece of masking tape and paper to cover the exposed led areas and the inside circuit of the light ring, then with some spray paint I painted the outside of the piece, which looked gray.
Esa mañana tomé un trozo de cinta adhesiva y papel para cubrir las áreas expuestas de led y el circuito interior del aro de luz, entonces con un poco de pintura en aerosol pinté la parte exterior de la pieza, que se veía de color gris.
 |  |
|---|
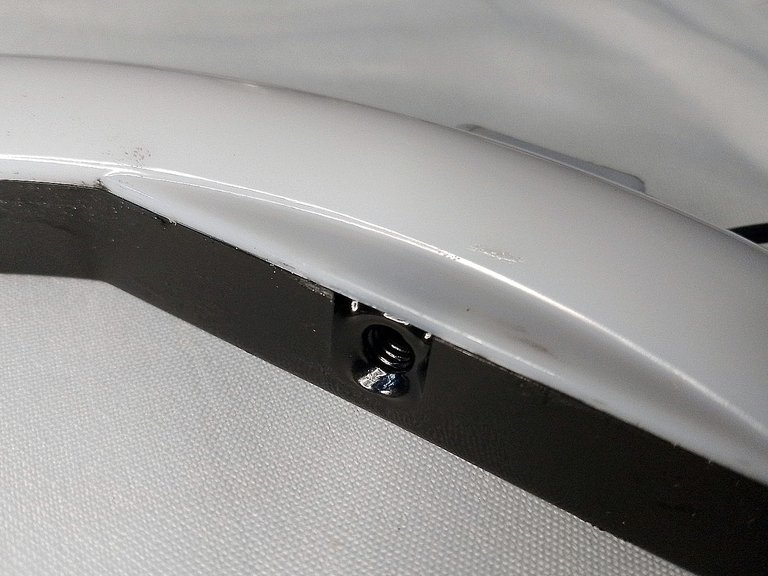
This is what the part looked like after replacing the white cover, which protects the inner circuits of the light ring.
Así quedó la pieza después de volver a colocar la cubierta blanca, la que protege los circuitos interiores del aro de luz.
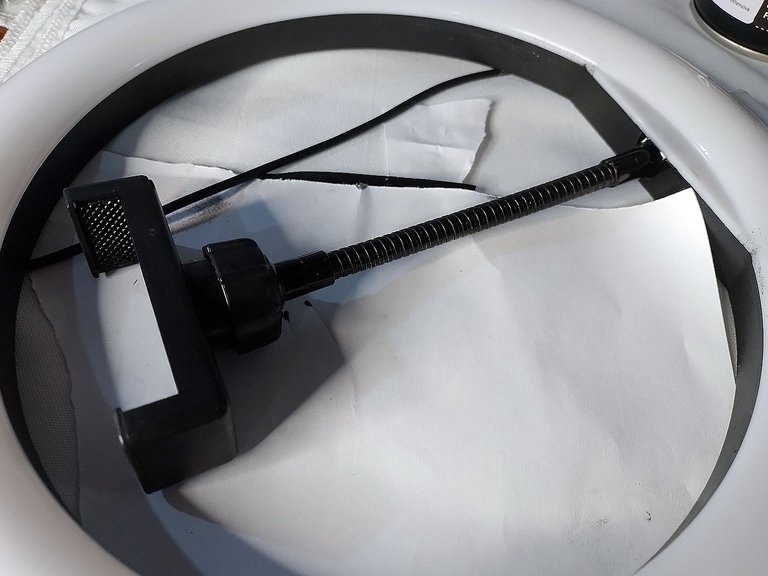
After allowing the material and glue to dry sufficiently, I screwed on the phone arm and surprise surprise, the repair worked.
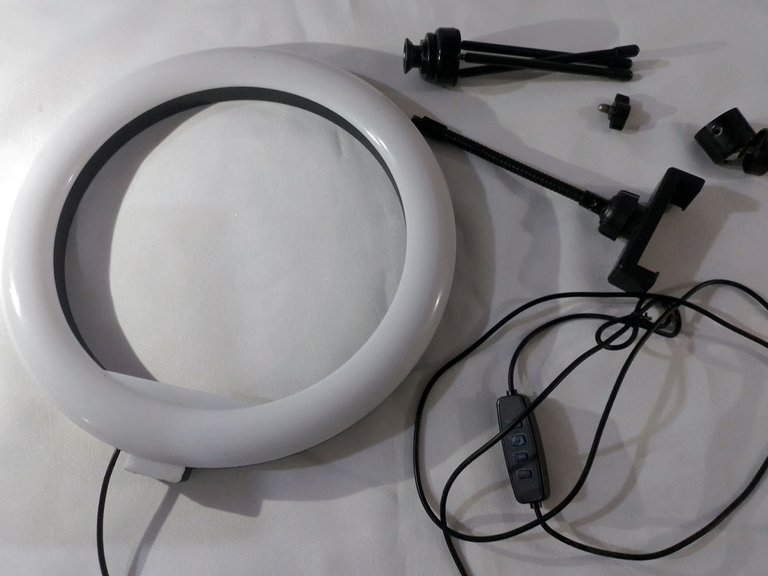
On the other hand, I also reassembled the rest of the fixture, attaching the tripod pieces to screw it to the light ring.
Después de haber dejado secar lo suficiente el material, el pegamento, enrosqué el brazo para el teléfono y sorpresa sorpresa, funcionó la reparación.
Por otra parte, volví a armar también el resto del artefacto, uniendo las piezas del trípode para enroscarla al aro de luz.
 |  |
|---|
This is how the repair was finished, here are a couple of pictures of how it looked.
Así quedó terminada la reparación, aquí un par de fotos de cómo quedó.
 |  |
|---|
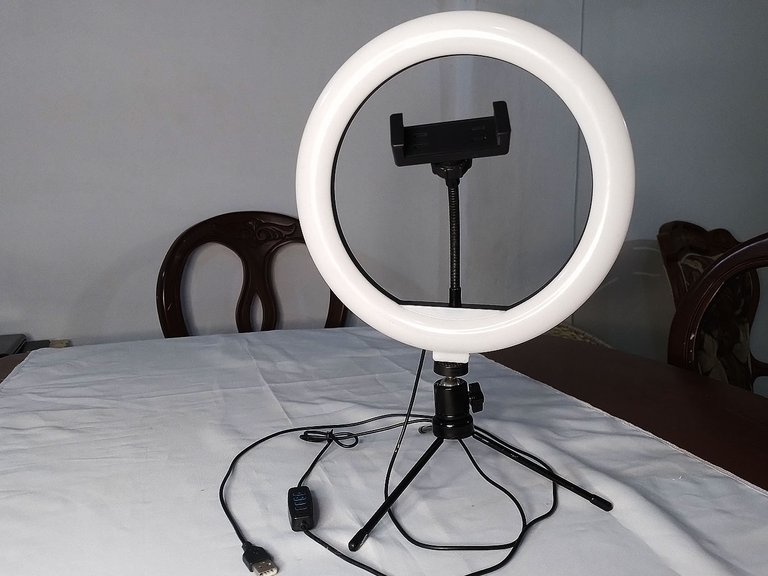
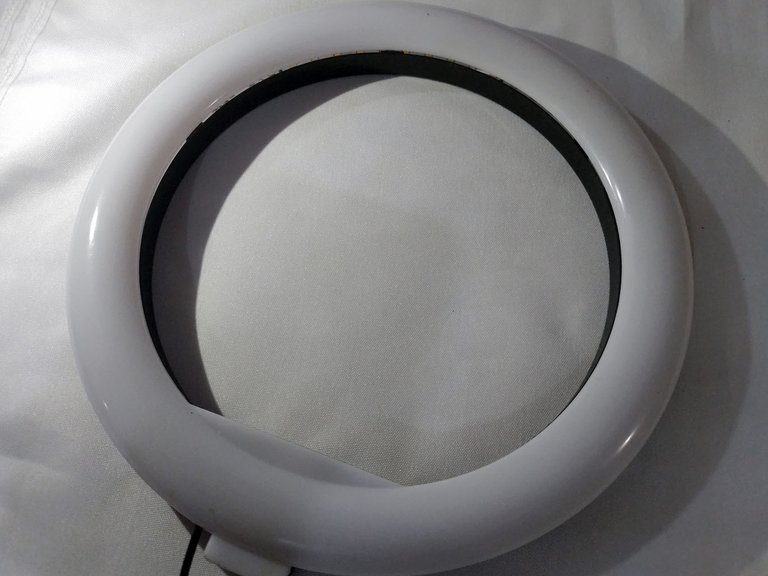
As you can see, the equipment was left as it was before, it does not look like it has been repaired, in fact it works as if it had never been damaged.
Here you have an idea of how you can repair this type of light rings if one day they are damaged or suffer a malfunction like the one I tell you in the publication.
What do you think? I invite you to leave your opinions below in the comments, as always I will be happy to read them. I appreciate that you took the time to visit my publication, without more to add I say goodbye then...
See you next time!
Como pueden ver, el equipo quedó tal como estaba antes, no se ve que haya sido reparado, de hecho funciona como si nunca se hubiese dañado.
Aquí tienen pues, una idea de cómo pueden reparar este tipo de aros de luz si algún día se les daña o sufre un desperfecto como el que les comento en la publicación.
¿Qué les pareció? Los invito a dejar sus opiniones abajo en los comentarios, como siempre estaré encantado de leerlos. Agradezco que se tomaran el tiempo de visitar mi publicación, sin más que agregar me despido entonces...
¡Hasta la próxima!


Its not something that anyone can do but you did it, well done.
Well, I always try to do the best I can, things can't always be repaired but if this can be done, I'll try.
Necesito un técnico urgente, creo que te contratare para que me pongas a valer el cementerio que tengo en casa de artículos electrónicos jajaja. Genial todo lo que sabes hacer. Te felicito...
!DIY
Bueno si me pagan el pasaje yo le remiendo ese montón de cosas jajaja a ver cómo quedan.
You can query your personal balance by
!DIYSTATSQué chévere que lo pudiste reparar tú mismo y no te tocó comprar otro. Lo mejor es que quedó como si nada, yo probablemente hubiera hecho un desastre y lo hubiera remendado jajaja, cosa que a largo plazo no funciona y me hubiera tenido que comprar otro 😢
Ya sé ya si me llega a pasar, gracias por compartir cómo lo hiciste 🌿✨
Si es que estas fallas son muy comunes jeje por eso quise compartirlo a ver si le es de utilidad a alguien. Espero que no tengas que usar este tutorial, es decir, espero que no se te dañe tu arito de luz jeje.
Saludos cordiales!
vaya que se nota quieres mucho a cada cosa de tu hogar, yo lo viera botado y comprado otro , mas que nada xq no se reparar =^^= , muy bien tus reparaciones
Bueno es que cuando uno sabe el valor de las cosas tiende a apegarse a ciertos objetos, o tener sentido de pertenencia. Yo siempre prefiero reparar las cosas en lugar de desecharlas, es algo a lo que la necesidad me obligado y creo que es hasta bueno ser así, porque la necesidad produce ingenio.
Amigo excelente trabajo me alegra que lo pudistes reparar, gracias por mostrarnos tu trabajo ya que si nos pasa sabemos que si tiene solución y no debemos tíralo a la basura, te felicito❤️❤️🌹🤗
Siempre he considerado que las cosas no se deben desechar hasta intentar repararlas. Yo mismo he reparado muchos objetos que otras personas han desechado y los he dejado para mi, con más razón hay que tratar de reparar los propios jejeje
Asi es mi amigo yo no es que tenga muchos conocimiento pero tambien me las ingenio para reparar las cosas jajaja🌷🌷🌷
Sigue, contacta y se parte del testigo en: // Follow, contact and be part of the witness in:
Keychan - Hive.blog - Ecency - Peakd
Muchas gracias por el apoyo!
@tipu curate 2
Saludos... gracias por el apoyo, pero creo que no funcionó esta vez 😞
NAguara hiciste tremendo trabajo! Muy completo
Muy creativa y curiosa tu solución, felicitaciones. Lo mejor de aventurarse a reparar nuestros equipos,no es solo el hecho de poder evitarnos un gasto económico, si no la satisfacción de poder resolver esos problemas con nuestras propias manos usando nuestro ingenio. Saludos
Es una buena reparación, quedo tal como si no se hubiese sido reparado. suelo usar mucho el pegamento acero plástico, si le agrega unas gotas de alcohol a la mezcla se hace como un barniz. Ese barniz entonces se puede usar como una especie de pintura muy dura para tapar rajaduras.