Kdenlive: Improving Videos With Color Correction & Effects
Recently I've been working with color in Kdenlive to modify the look/feel of my videos.
Here's a walkthrough of the process and results.
I never used to do any sort of color correction in my videos.
This was mostly because I would record them entirely in OBS Studio using a Logitech C922-Pro Webcam. So the camera footage only took up maybe 20% of the video's entire frame. Like this:

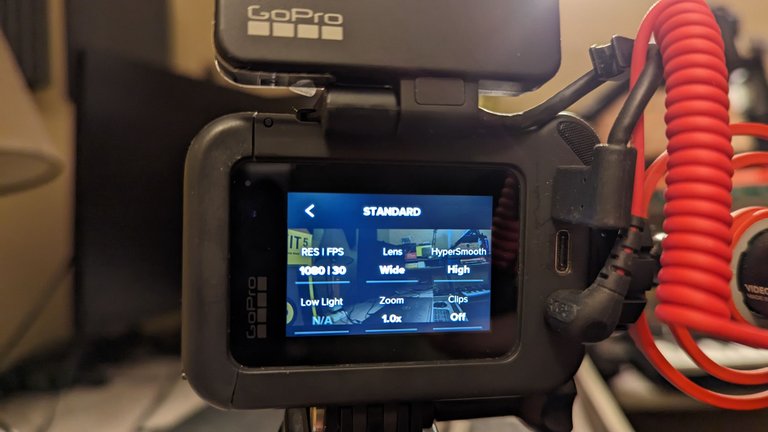
However, I've changed my approach since building a studio, and getting a GoPro Hero-8 camera. The Hero-8 is by no means a professional camera like many Youtube content creators use like those from Canon, Nikon, or Sony.
But the quality of the footage is decent considering it costs a fraction of what some of those high-end cameras cost.
It's capable of recording in 4K, but I usually stick with 1080p because that's the same resolution I capture my screen with.
Even using 1080p one major drawback is the size of the video files.
I have 25 minutes of footage recorded for my current project, and that's almost 10 gigabytes of video.
Here is the video with no effects or color processing:
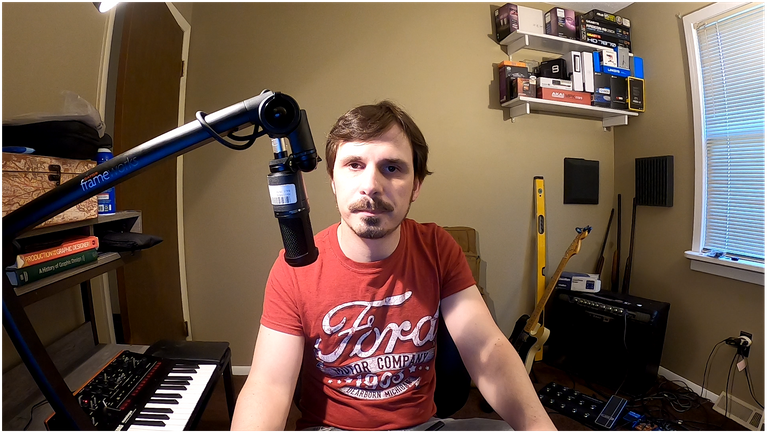
It's not terrible, but it's a little dull with a lot of yellow, neutral, light colors.
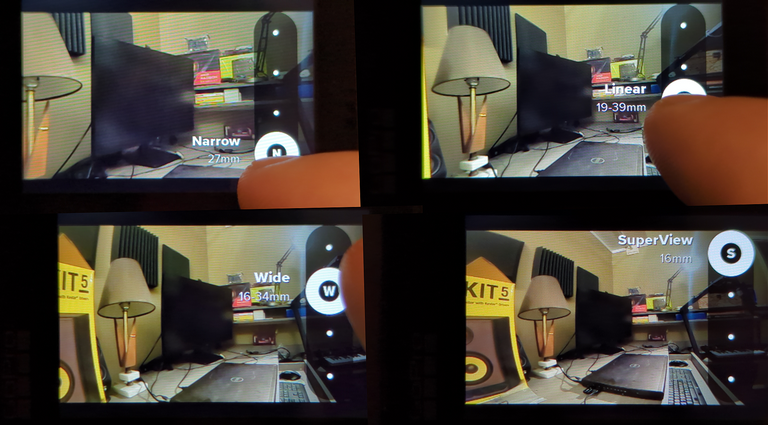
The footage has a slight "fish-eye" look towards the edges from the GoPro's digital lens.
Along with various resolutions, GoPro's Hero-8 comes with 4 different digital lenses: Narrow(27mm), Linear(19-39m), Wide(16-34mm), and SuperView(16mm).
SuperView is the most dramatic and widest, but I usually use Wide.
Resolution: 1920x1080p
Frames Per Second: 30fps
Lens: Wide
Here is each lens.
Notice how the aperture gets smaller, but also the perspective greatly changes:
Kdenlive
Kdenlive is a 100% free & open-source non-linear video editing suite available for Windows, MacOS, Linux.
It can be used for color, video, and audio editing, and features many powerful effects and features including motion-tacking, speech recognition, and even time remapping.
I produce everything on Linux, and use Kdenlive for 80%-90% of my editing.
Effects:
Kdenlive allows you to apply effects in several ways.
- Project Bin: Applies effects to the entire file before it's even in the project. The Project Bin is where you place all the files you're going to use in a project.
- Track Effects: Applies effects to a section of or the entire track/layer.
- Master: Applies effects to a section of ALL tracks/layers.
- Timeline Clips: Applies effects to individual sections/clips.
The first 3 effects I apply to the entire video files inside of the Project Bin:
Transform (Basically Just A Fancy Position & Zoom)
Starting off, just bringing in the frame a little tighter. This is 115%, pretty mild.
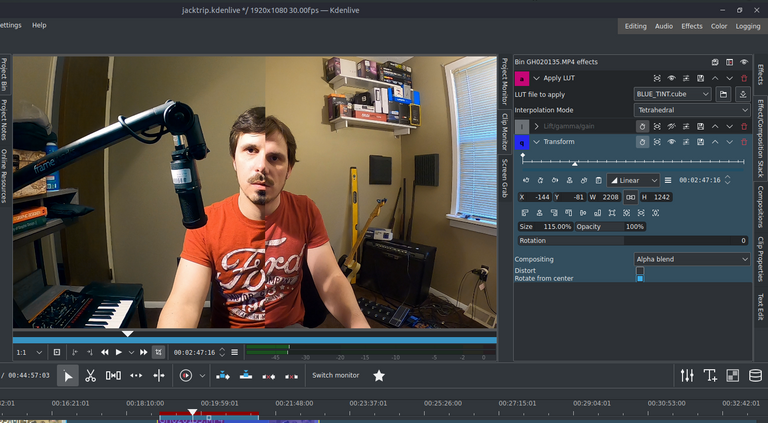
Apply LUT
LUT stands for Look Up Tables. These are the simplest way to add color-correction. LUTs come as files that you can apply to footage. There are 2D & 3D LUTs you can buy online or even download for free. 3D LUTs come in '.cube' file format.
The LUT I'm using here is Blue_Tint.cube and it comes with Kdenlive.
This particular LUT is very mild on this video, but on other videos it could look more drastic.
Blue Tint LUT & 115% zoom with a split view for comparison.(Both on the left side):
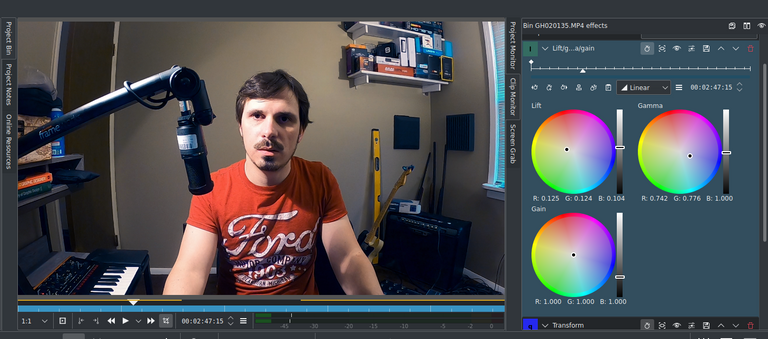
Next up is Lift/Gamma/Gain:
It's hard to precisely demonstrate, but essentially...
The effect allows for adding or subtracting each attribute from a specific color in the color wheels. I lifted green/yellow slightly, moved the gamma towards blues/teals, and slightly lowered gain. I felt this color worked well.
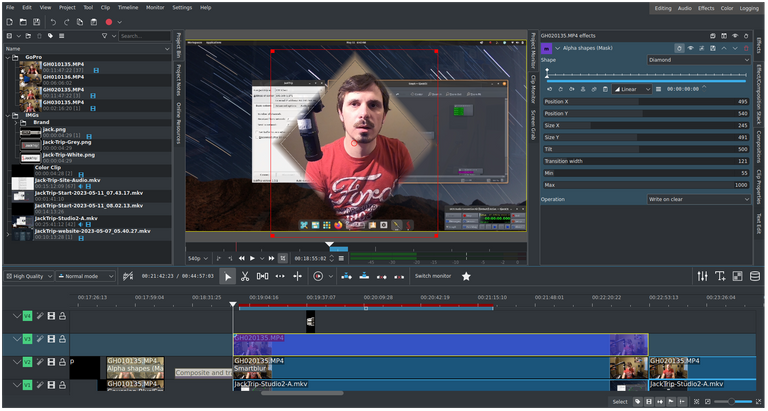
Effects Applied To Clips In The Timeline:
The final two effects require duplicating and placing the color-adjusted clips on top of each other.
On the bottom copy I add a Smart Blur effect.
The top clip gets a diamond shaped Alpha Mask with a Write On Clear operation.
This gives us the crisp focus with everything else becoming blurred for what is know as a Depth Of Field blur.
Here is the diamond mask just for demonstration:
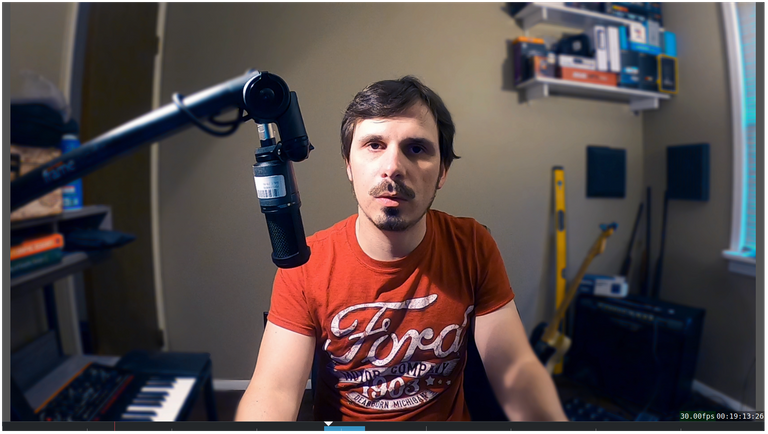
And Here Is The Final Result:
I personally think it looks much more professional.
Kdenlive is powerful, free, and open-source, but it's not known for it's color-correction capabilities.
It doesn't have every effect you'll find in say DaVinci Resolve or Adobe Pemier, but it usually has the core components necessary for you to replicate fancier effects once you have a comprehension of the fundamentals and principles used to create them.
In using open-source software I've sometimes had to learn how certain things work instead of simply learning their names in other editors.
Thank you, you reminded me to work and figure out the light in the video, my hands never got around to it :)
!CTP