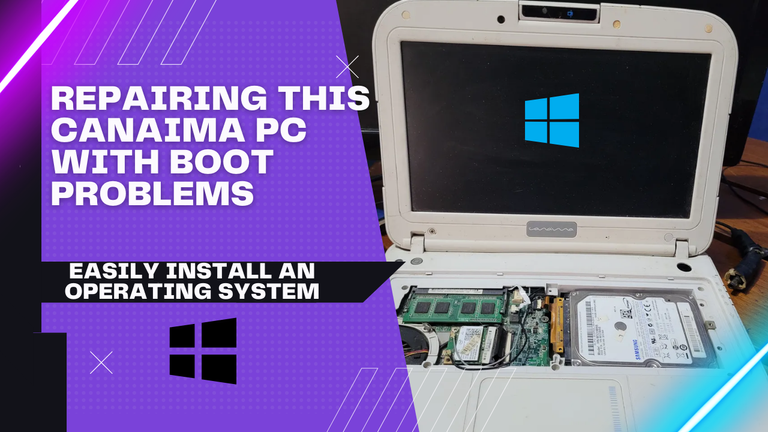
Reparando esta PC Canaima con problemas de arranque | Repairing this Canaima PC with boot problems
Mientras buscaba en varias cajas viejas de la casa, me encontré con varios aparatos muy antiguos que creía perdidos, ya que tenía años que no los veía, incluso pensé que los había vendido, según mi madre, los guardo allí y olvido que estaban en esa caja que estuvimos a punto de regalar por cierto.
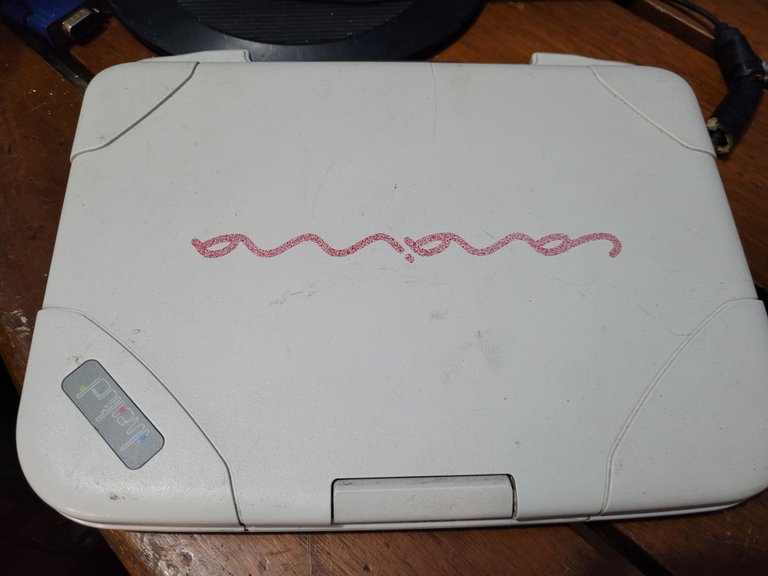
El primer aparato que me encuentre fue mi canaima o mejor conocida como PC del gobierno, estas las solían dar en los liceos o escuelas de secundaria de forma completamente gratuita, el cual el objetivo era estudiar con estas y aprender a usar una pc, pero a la final muchos las usamos para otras cosas la verdad.
While searching through several old boxes in the house, I found several very old devices that I thought were lost, since I had not seen them for years, I even thought I had sold them, according to my mother, I kept them there and forgot that they were in that box that we were about to give away by the way.
The first device that I found was my canaima or better known as government PC, these used to give them in high schools or high schools completely free, which the goal was to study with these and learn to use a pc, but in the end many use them for other things the truth.
Recuerdo ya hace unos 9 años atrás, a principios del 2014, a nuestro Liceo de secundaria llegaron estas computadoras, las cuales muchas venían hasta defectuosas jajaja, por suerte mi PC sí funcionaba y duro bastante tiempo, ya que la solía usar durante un momento en donde mi PC de mesa se quemó, así que era mi caballito de batalla durante esos años, hasta llegar a un punto donde decidí guardarla y olvidarla hasta el día de hoy.
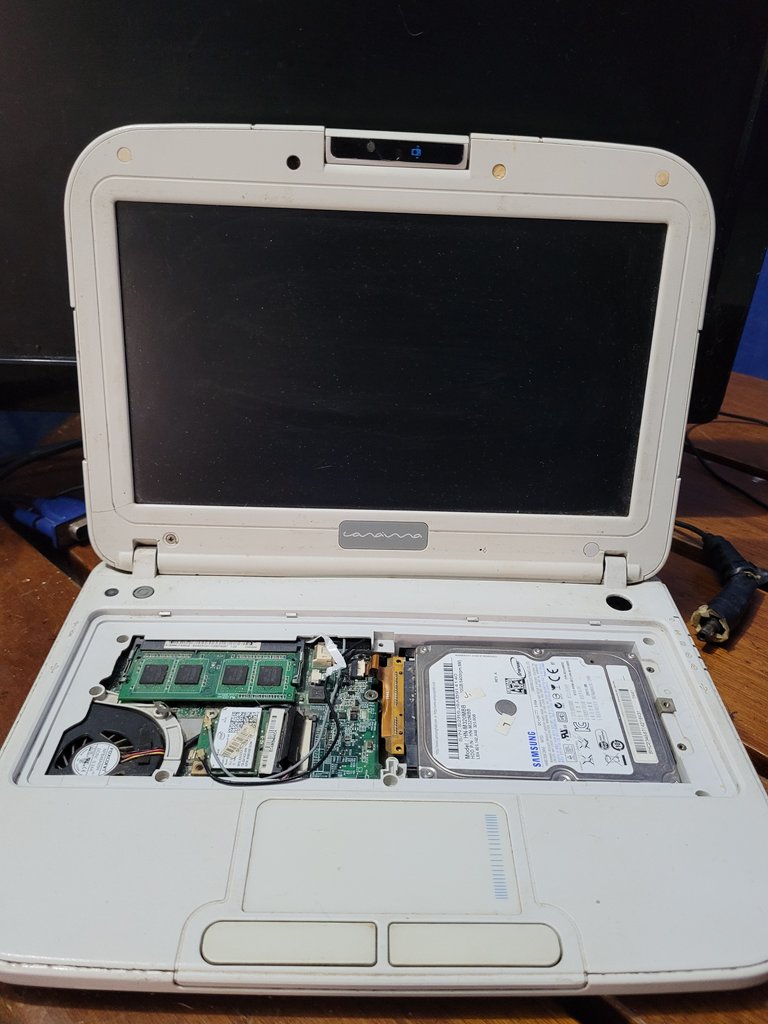
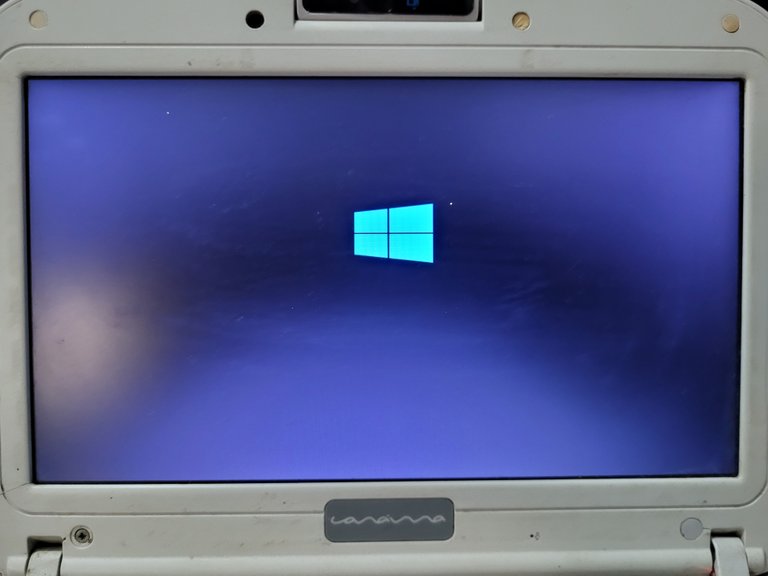
Si no mal recuerdo la última vez que la use tuvo problemas de inicio de sistema operativo, y al encenderla, pues así era, solía quedarse en la pantalla de carga, en su momento no la repare, pero hoy en día que tengo la posibilidad de repararla decidí hacerlo para aprovecharla y volver a darle vida a esta mini Laptop que muchos la consideraban como una buena PC.
I remember about 9 years ago, in early 2014, to our high school these computers arrived, which many came even defective hahaha, luckily my PC did work and lasted quite a long time, as I used to use it during a time when my desktop PC burned, so it was my hobbyhorse during those years, until a point where I decided to keep it and forget it until today.
If I remember correctly the last time I used it, it had problems starting the operating system, and when I turned it on, it used to stay in the loading screen, at the time I did not repair it, but today that I have the possibility to repair it, I decided to do it to take advantage of it and give life again to this mini Laptop that many considered it as a good PC.
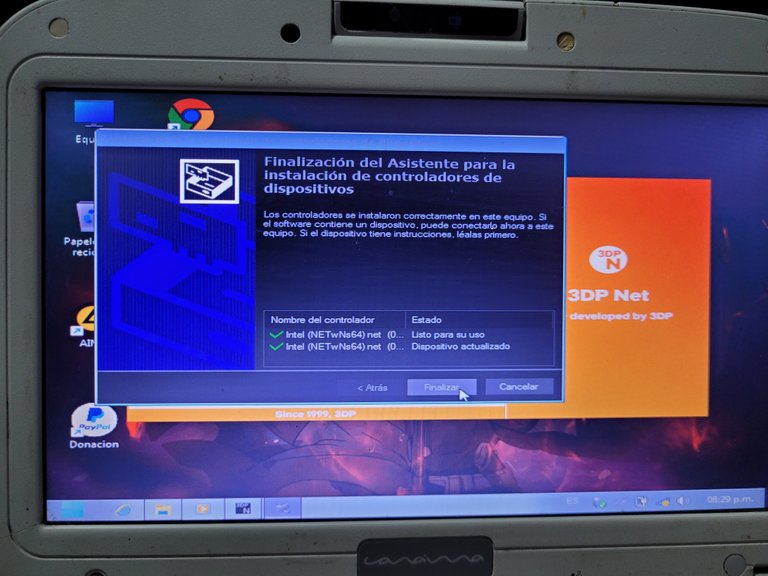
Así que busque en internet Sistemas Operativos Lite, ya que este modelo es de 2 GB de RAM, y cuenta con un procesador Intel Celeron de 1.10 GHz, lo cual me decidí por un Windows 7, pero una versión modificada especialmente para esta PC, una que tenga menos procesos a la hora de usarlo.
So I searched the internet for Lite Operating Systems, since this model has 2 GB of RAM, and has a 1.10 GHz Intel Celeron processor, so I decided to use Windows 7, but a modified version especially for this PC, one that has fewer processes when using it.

Instalación
Installation
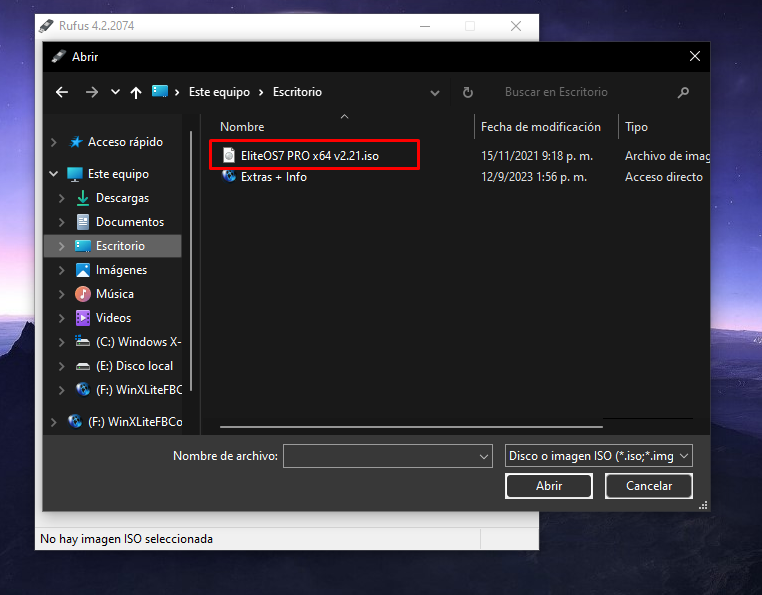
Yo creo que la mayoría ya sabe como instalar un sistema operativo, pero viene bien dejar la explicación, lo primero que hice fue descargar el sistema operativo, el cual es un Windows 7 modificado para este tipo de computadoras de bajos requisitos, por otra parte, descargue el Rufus, el cual es un programa útil para el formateo de una unidad USB y para la creación de unidades Flash de inicio de sistemas operativos.
I believe that most of you already know how to install an operating system, but it is good to leave the explanation, the first thing I did was to download the operating system, which is a Windows 7 modified for this type of computers with low requirements, on the other hand, I downloaded the Rufus, which is a useful program for formatting a USB drive and for the creation of Flash drives for booting operating systems.

Seguidamente, insertamos nuestro pendrive o unidad USB a nuestra PC y abrimos el Rufus, este inmediatamente debe detectar la unidad USB.
Next, we insert our pendrive or USB drive to our PC and open Rufus, it should immediately detect the USB drive.
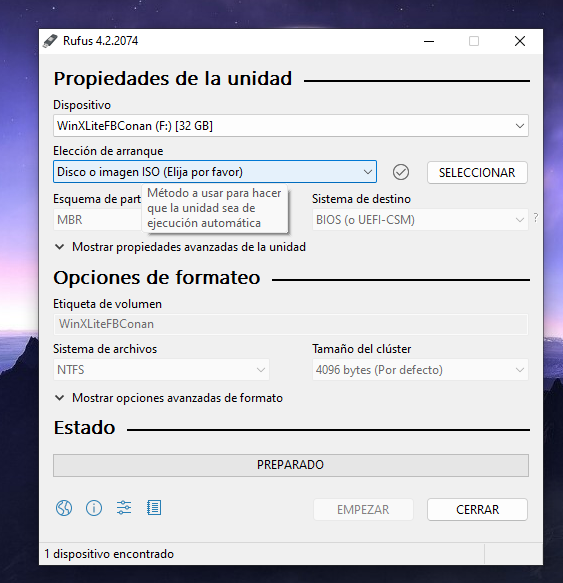
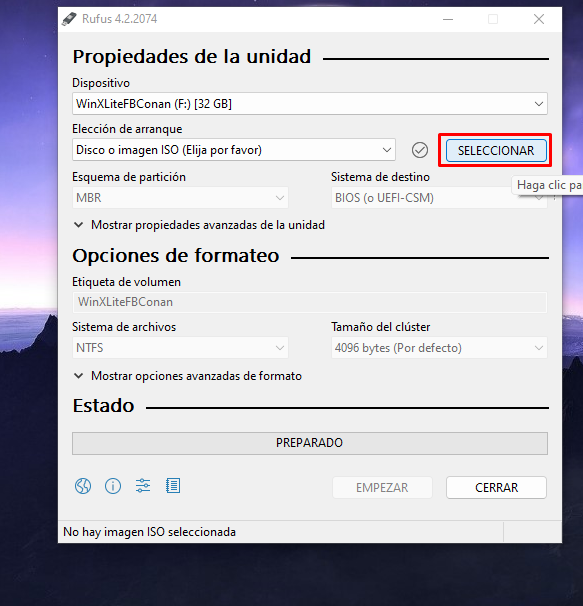
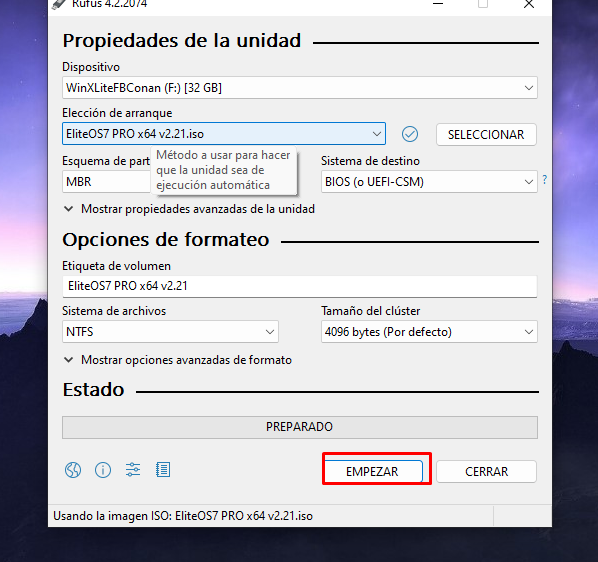
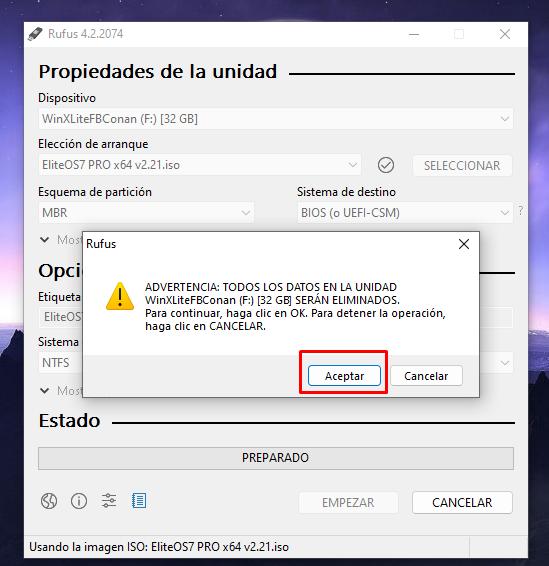
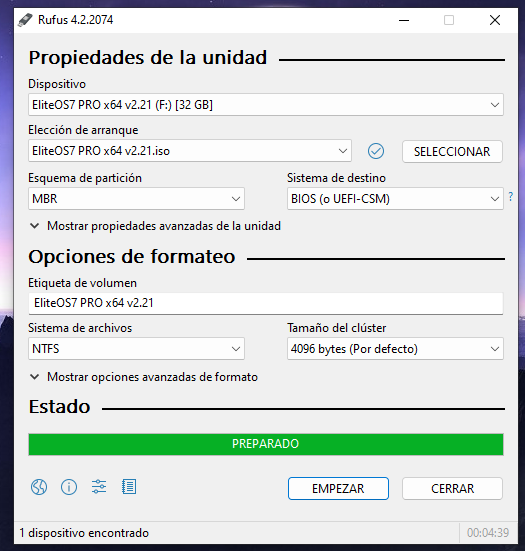
Donde dice seleccionar, le damos clic y buscamos el sistema operativo que instalaremos, luego de esto lo dejamos todo tal como está en la imagen y le damos empezar, nos saldrá un anuncio que dirá que se formateará la unidad USB, marcamos en aceptar y esperaremos varios minutos hasta que esté listo.
Where it says select, we click and we look for the operating system that we will install, after this we leave everything as it is in the image and we give to begin, an announcement will leave us that will say that the USB unit will be formatted, we mark in accept and we will wait several minutes until it is ready.
 |  |
|---|
 |  |
|---|
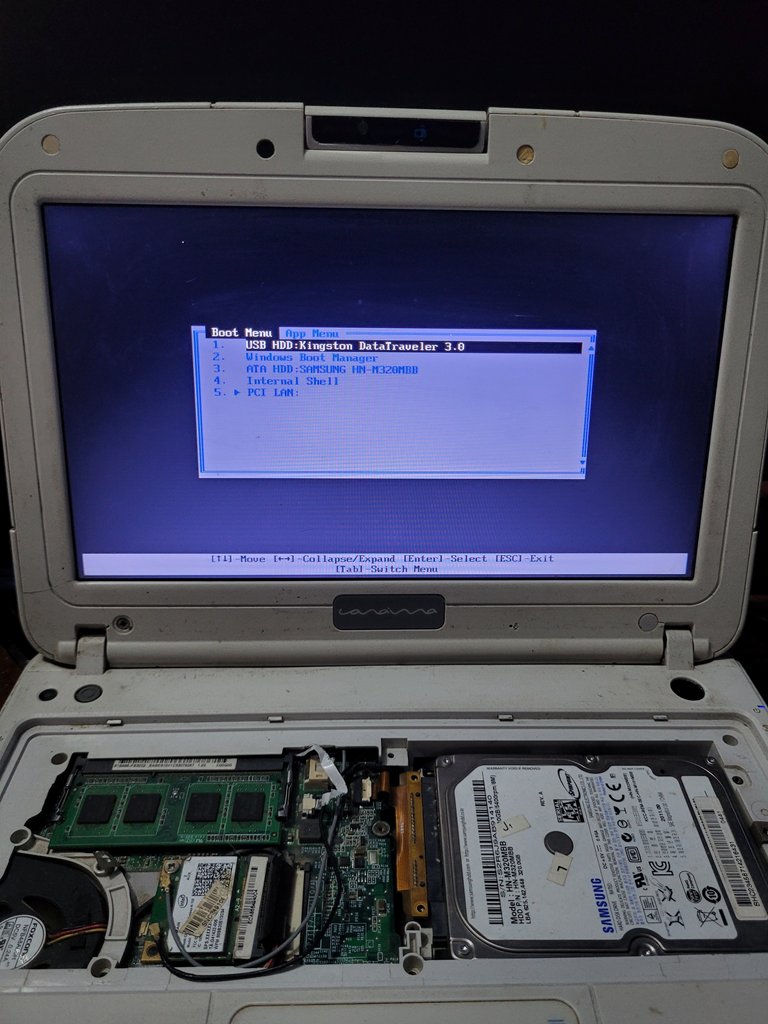
Ya de aquí nuestra unidad USB o pendrive está lista para usar, de aquí inserto la unidad USB en la canaima o PC y encendemos el equipo, aquí debemos saber qué botón del teclado presionar, para cada computadora es distrito, puede que sea F8, o incluso del botón de ESC o escape, el motivo de presionar este botón apenas encendiendo la PC, es para poder entrar en el menú de Boot o arranque, con la finalidad de iniciar nuestro sistema desde el Disco duro o en esta ocasión desde nuestra unidad USB, en mi caso en estas computadoras usamos el botón F11.
Bien, una vez presionado el botón, buscamos la unidad USB en el menú que nos muestra y de aquí nos dirá que presionemos una tecla de nuestro teclado para iniciar con el proceso de instalación.
Already from here our USB unit or pendrive is ready to use, from here I insert the USB unit in the canaima or PC and we turn on the equipment, here we must know which button of the keyboard to press, for each computer it is district, it can be F8, or even the ESC button or escape, the reason to press this button just turning on the PC, is to be able to enter in the Boot menu, with the purpose of initiating our system from the Hard disk or in this occasion from our USB unit, in my case in these computers we use the F11 button.
Well, once pressed the button, we look for the USB unit in the menu that shows us and from here it will tell us to press a key of our keyboard to initiate with the installation process.
 |  |
|---|
 |  |
|---|
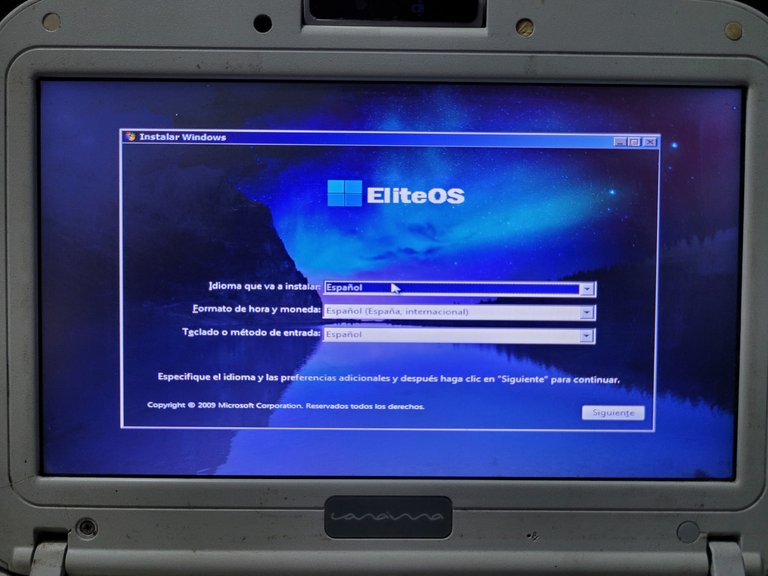
Desde aquí elegimos la región, idioma y el tipo de teclado, marcamos instalar y avanzamos el proceso de instalación.
From here we choose the region, language and keyboard type, check install and proceed with the installation process.

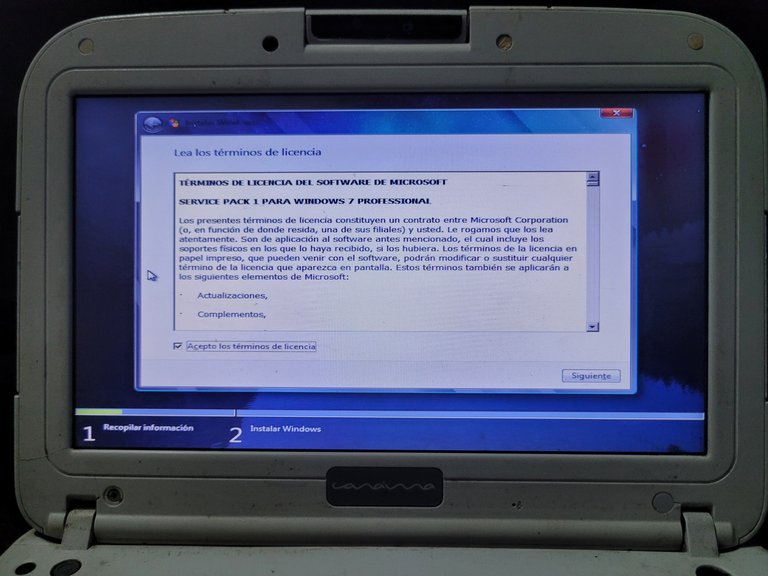
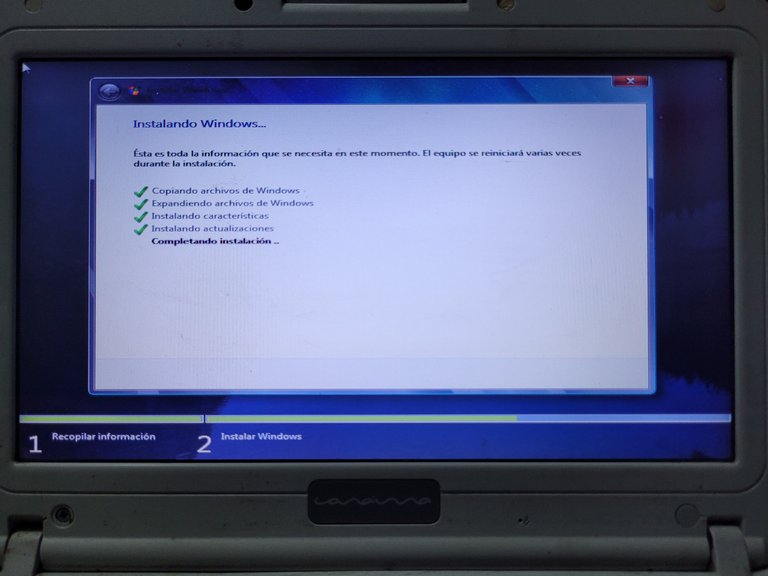
Llegaremos a un punto en donde nos dirá actualización o personalizado, marcaremos en personalizado y seguimos hasta llegar a las diferentes particiones que tiene el disco duro, por lo que pude observar, este disco duro tiene un problema en una de sus particiones, el cual no me deja ni formatear ni modificar, aun así se puede usar sin problemas es partición, muy bien elegimos donde instalaremos el sistema operativo y le damos en siguiente, luego esperaremos a que se instale todo.
We will arrive at a point where it will say update or customized, we will mark in customized and we continue until arriving at the different partitions that the hard disk has, for what I could observe, this hard disk has a problem in one of its partitions, which does not allow me neither to format nor to modify, even so it can be used without problems is partition, very well we choose where we will install the operating system and we give him in following, then we will wait until everything is installed.
 |  |
|---|
 |  |
|---|
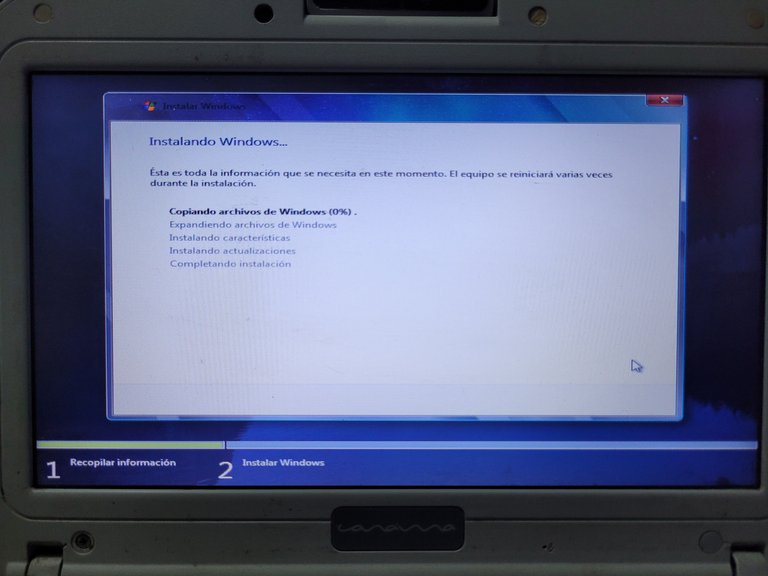
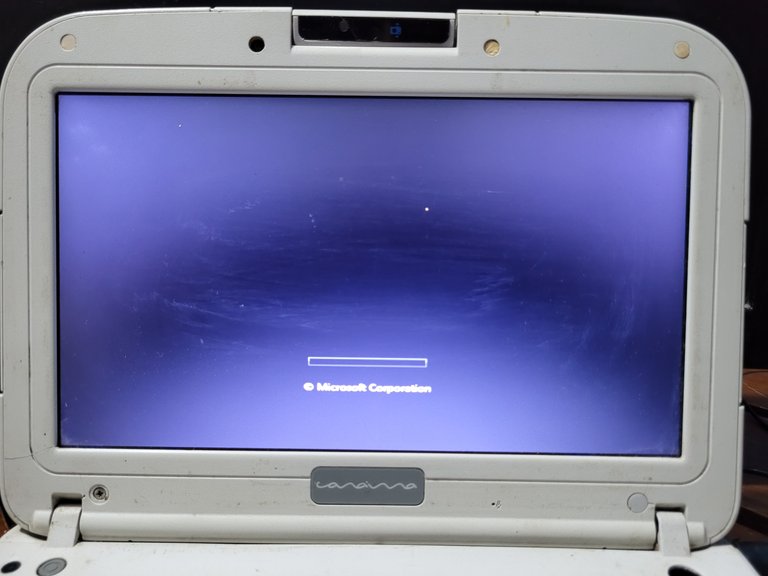
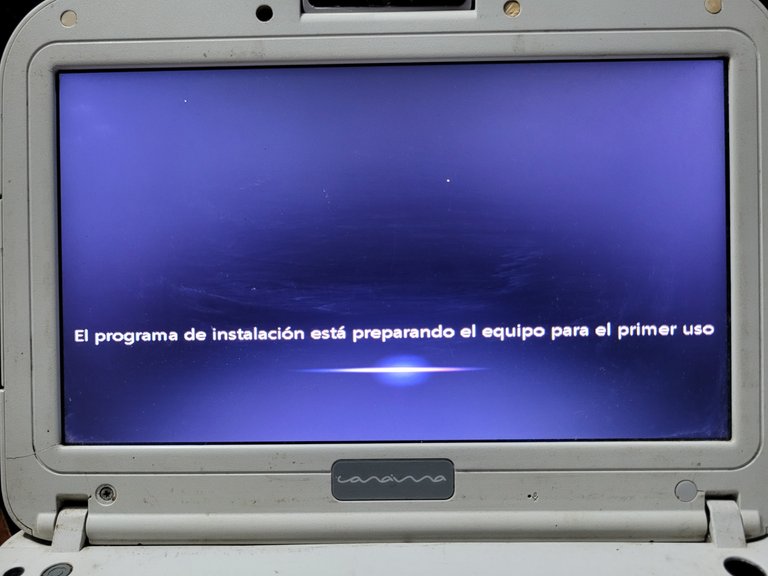
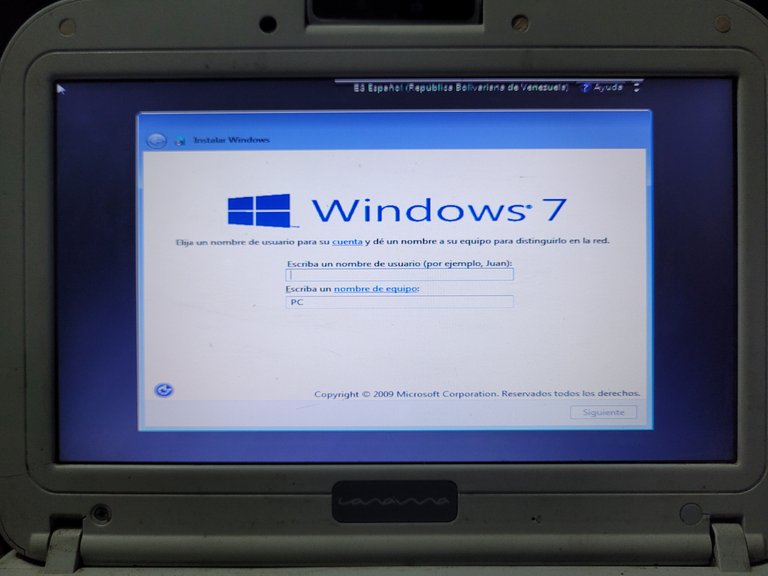
Muchas veces el equipo se reiniciará, pero lo dejaremos a que culmine con la instalación sin tocar nada, ya de varios minutos nos mostrara una parte donde nos pedirá el nombre de usuario a usar, si deseamos colocar contraseña, entre otras cosas que podremos modificar.
Many times the computer will restart, but we will leave it to finish the installation without touching anything, after several minutes it will show us a part where it will ask us the user name to use, if we want to put password, among other things that we will be able to modify.
 |  |
|---|
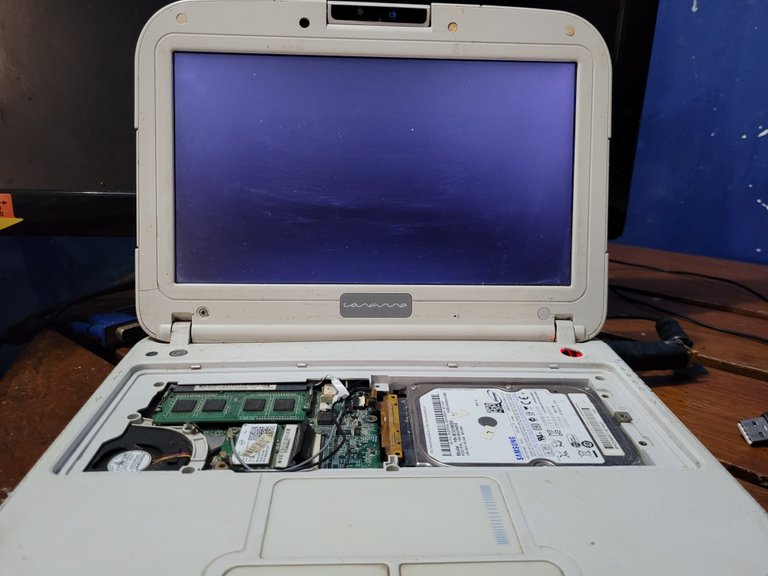
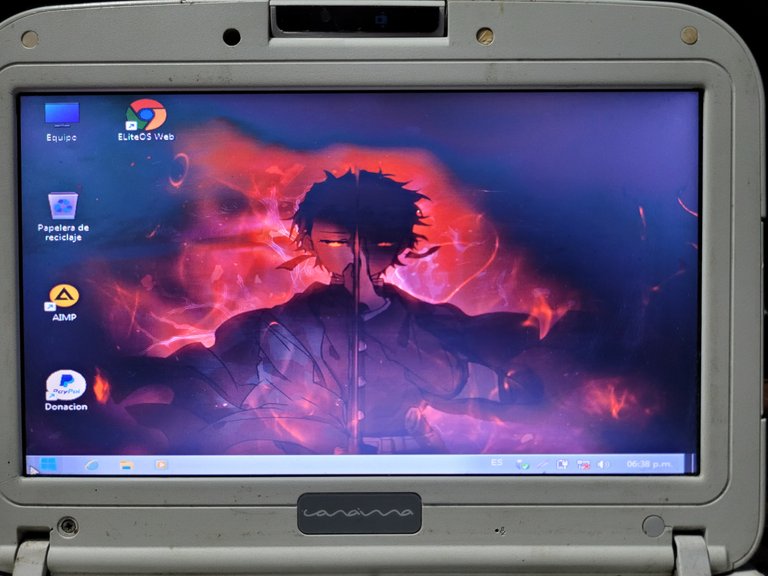
Y listo, tenemos nuestro Windows en una PC canaima, decidi instalar este sistema operativo en esta pc, ya que usaré este equipo como mucho para escuchar música o ver videos mientras juego a mis juegos en mi PC principal, ya más adelante le haré modificaciones para ponerla mucho más bonita y con más potencia jajaja.
And ready, we have our Windows on a PC canaima, I decided to install this operating system on this pc, as I will use this computer as much to listen to music or watch videos while I play my games on my main PC, and later I will make modifications to put it much more beautiful and more powerful hahaha.
Muchas gracias por llegar hasta aquí, cualquier duda, pregunta o recomendación es bienvenida :D, que tengas un excelente día.
Thank you very much for coming here, any doubt, question or recommendation is welcome :D, have a great day.
Que bueno que la hayas arreglado mi bro esa canaima son bien luchonas jajaja lo que puedes hacer es usarla como monitor extra y la complementas con tu pc de mesa saludos
Muchas gracias bro! Así es actualmente la tengo con un monitor y la uso para ver videos jajaja, saludos :D
Hola amigo, buena explicación del proceso de instalación del sistema operativo, siempre es bueno refrescar los pasos. Por otra parte es bueno que recuperaras la Canaima, lo que imagino que la batería ya no esté muy buena, por el tiempo que lleva guardada. Saludos desde Cuba amigo.
Hola amigo, de vez en cuando viene bien recordar esos proceso o explicarlos, por otra parte no tenía batería y la que conseguí en otras cajas estaba literalmente muerta, pero funciona eso es algo jajaja, saludos bro :D
Muy buena, yo con las Canaima trato de dejarle siempre lo más optimizado posible por una mayor fluidez. Limitando sus animaciones actualizaciones automáticas, etc. Saludos 💪🏽😎💯🆒
Buen dato! Lo voy a aplicar en esta canaima que ya parece un tanque jajaja, saludos :D
Encontraste una reliquia en el baúl de lo recuerdos 😅.
Me alegro que hayas podido reinstalar la laptop Canaima, por cierto muy bueno el tutorial es algo que muchos saben hacer pero estoy seguro que la mayoría no saben, espero que la disfrutes oyendo música y la mejores como bien dices.
Saludos 👋
Siiii naguara, es una joya esta pc sinceramente, me servirá bien hasta que la potencie más jajaja, saludos bro
Congratulations @asderhz! You have completed the following achievement on the Hive blockchain And have been rewarded with New badge(s)
Your next target is to reach 600 replies.
You can view your badges on your board and compare yourself to others in the Ranking
If you no longer want to receive notifications, reply to this comment with the word
STOPCheck out our last posts:
Muchas gracias!!!! Que gran apoyo :D
¡Eso es genial @asderhz! ¡Estamos emocionados de ver tus logros en Hive! ¡Seguiremos apoyándote para lograr tus próximas metas!
Esto sí que es súper útil sobretodo porque las Canaima dan bastante problemas.
Si bro, pero ya con Windows va power! Saludos :D