JS Event Handlers & Tricks By albro
There are various events in JS, and when these events are defined, something must be defined to do a specific thing by executing them. For example, in the following code, the <h1> element changes after the user clicks:
<!DOCTYPE html>
<html>
<body>
<h1 onclick="this.innerHTML='Ooops!'">Click on this text!</h1>
</body>
</html>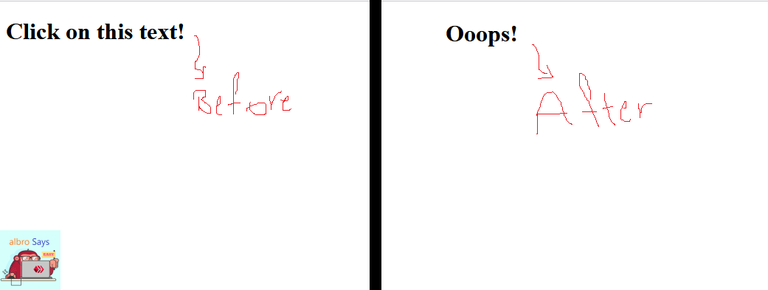
In this code and all other codes, there is a common component; Obviously, after the execution of the event, we want to do something special, but we have done it in the same HTML and as an attribute. What if we want to implement it in JavaScript itself?
In programming languages, the code responsible for managing one or more events is called an event handler.
For example, in the following code, we want to display the date when the user clicks on a button:
<!DOCTYPE html>
<html>
<body>
<h2>JavaScript addEventListener()</h2>
<p>This example uses the addEventListener() method to attach a click event to a button.</p>
<button id="myBtn">Try it</button>
<p id="demo"></p>
<script>
document.getElementById("myBtn").addEventListener("click", displayDate);
function displayDate() {
  document.getElementById("demo").innerHTML = Date();
}
</script>
</body>
</html>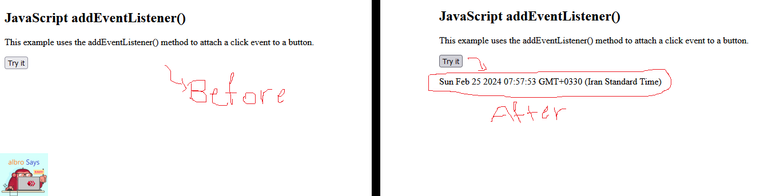
As you can see in the example above, I have used the addEventListener() function to create an event handler. The function of this function is to add an event handler to an element. Of course, the good thing about it is that it does this without deleting or overwriting other events and event handlers, so you can add several event handlers to an element at the same time to perform several different actions when an event occurs. .
Note: You can add multiple event handlers to an element without deleting the other event handlers, even if they are of the same type (for example, they are all of the onclick type).
Of course, adding an event handler is not limited to different elements, and you can also add it to a DOM object (for example, a browser window). The use of event handlers makes the HTML codes separate from the JavaScript, and as a result, the HTML code becomes more readable. It also allows you to add event handlers to its various elements without accessing the HTML source code.
Note: To remove an event handler, you can use the removeEventListener() function.
addEventListener() Structure
The general structure of the addEventListener() function is as follows:
element.addEventListener(event, function, useCapture);The function takes three parameters:
-
The first parameter is the event type. Is our event
clickormousedownor...? - The second parameter is the function that is called when the event is fired.
- The last parameter is a boolean value that says to use event bubbling or event capturing. This parameter is optional.
Note: When we want to enter an event handler as an attribute in the HTML source code, we use the On prefix for events (such as onclick or onmousedown, etc.), but in JavaScript, this is considered an error (the correct form click, mousedown, etc.).
Now it's time to look at some examples. In the example below, I want to make a window open and say hello if the user clicks on our button:
<!DOCTYPE html>
<html>
<body>
<h2>JavaScript addEventListener()</h2>
<p>This example uses the addEventListener() method to attach a click event to a button.</p>
<button id="myBtn">Click on this button</button>
<script>
document.getElementById("myBtn").addEventListener("click", function() {
  alert("Hello, My dear user");
});
</script>
</body>
</html>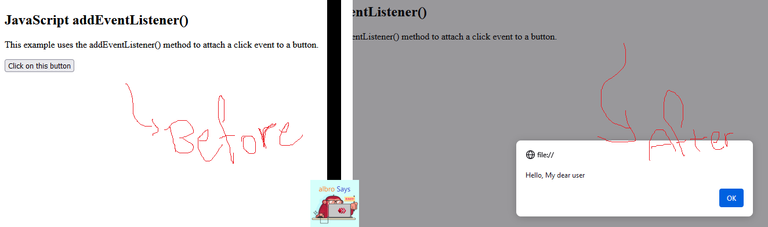
We can write the above example in another way; For example, let's use named functions:
<!DOCTYPE html>
<html>
<body>
<h2>JavaScript addEventListener()</h2>
<p>This example uses the addEventListener() method to execute a function when a user clicks on a button.</p>
<button id="myBtn">Click on this button</button>
<script>
document.getElementById("myBtn").addEventListener("click", myFunction);
function myFunction() {
  alert ("Hello, My dear user");
}
</script>
</body>
</html>
You can see that this is very simple and convenient.
Add multiple Event Handlers
As I said before, addEventListener() can connect multiple event handlers to an element at the same time, even if those handlers are of the same type. Consider the following example:
<!DOCTYPE html>
<html>
<body>
<h2>JavaScript addEventListener()</h2>
<p>This example uses the addEventListener() method to add two click events to the same button.</p>
<button id="myBtn">Click on this button</button>
<script>
var x = document.getElementById("myBtn");
x.addEventListener("click", myFunction);
x.addEventListener("click", someOtherFunction);
function myFunction() {
  alert ("Hello, My dear user");
}
function someOtherFunction() {
  alert ("This is the second function to be executed");
}
</script>
</body>
</html>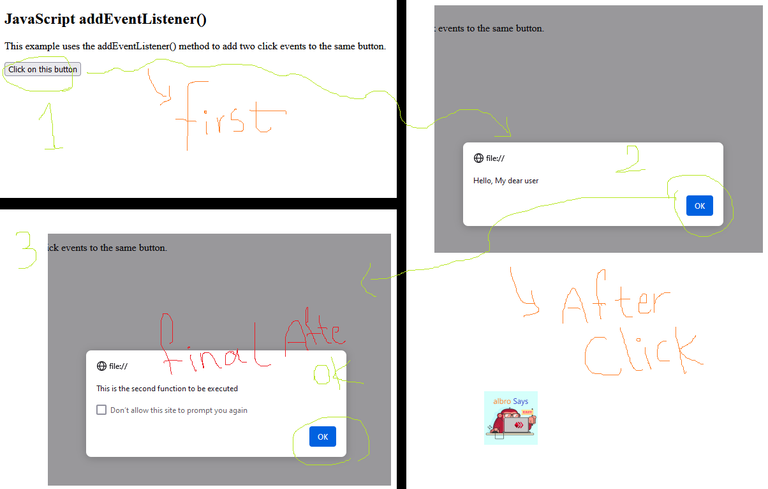
In this example, I used only one type of event (click). In the following example I want to use 3 different events:
<!DOCTYPE html>
<html>
<body>
<h2>JavaScript addEventListener()</h2>
<p>This example uses the addEventListener() method to add many events on the same button.</p>
<button id="myBtn">Click on this button</button>
<p id="demo"></p>
<script>
var x = document.getElementById("myBtn");
x.addEventListener("mouseover", myFunction);
x.addEventListener("click", mySecondFunction);
x.addEventListener("mouseout", myThirdFunction);
function myFunction() {
  document.getElementById("demo").innerHTML += "Moused over!<br>";
}
function mySecondFunction() {
  document.getElementById("demo").innerHTML += "Clicked!<br>";
}
function myThirdFunction() {
  document.getElementById("demo").innerHTML += "Moused out!<br>";
}
</script>
</body>
</html>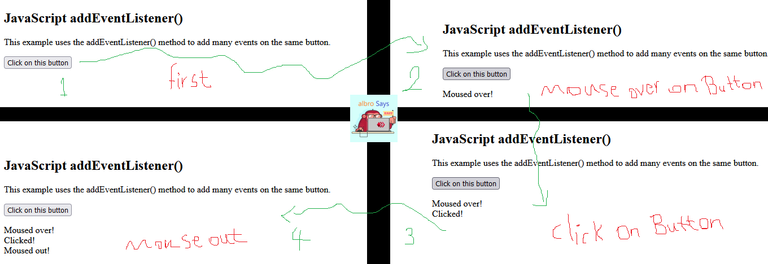
-
First, I have taken the desired element using the
getElementByIdstatement, so that I can put an event handler on it later. -
Then, using the
addEventListenerstatement and three different events, I have given it three functions to execute the events. -
The
myFunctionfunction printsMoused overon the screen every time the mouse moves over the button. -
The
mySecondFunctionfunction printsClickedon the page every time the button is clicked. -
The
myThirdFunctionfunction printsMoused outon the page every time the mouse moves from the button.
Attach the Event Handler to the window object
We can connect one or more Event Handlers to the window object using addEventListener. For example, in the code below, if our user changes the size of the browser window, show a random number:
<!DOCTYPE html>
<html>
<body>
<h2>JavaScript addEventListener()</h2>
<p>This example uses the addEventListener() method on the window object.</p>
<p>Try resizing this browser window to trigger the "resize" event handler.</p>
<p id="demo"></p>
<script>
window.addEventListener("resize", function(){
  document.getElementById("demo").innerHTML = Math.random();
});
</script>
</body>
</html>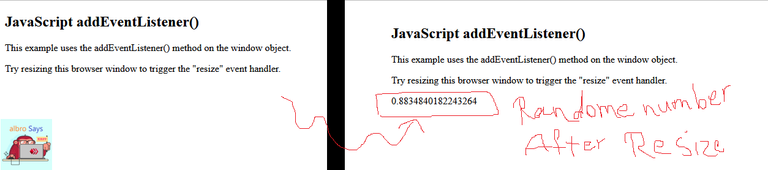
What should we do if we want to use a function that takes a parameter when using addEventListener? In this case, you should use anonymous function. Consider the following example:
<!DOCTYPE html>
<html>
<body>
<h2>JavaScript addEventListener()</h2>
<p>This example demonstrates how to pass parameter values when using the addEventListener() method.</p>
<p>Click the button to perform a calculation.</p>
<button id="myBtn">Click on this button</button>
<p id="demo"></p>
<script>
var p1 = 5;
var p2 = 7;
document.getElementById("myBtn").addEventListener("click", function() {
  myFunction(p1, p2);
});
function myFunction(a, b) {
  var result = a * b;
  document.getElementById("demo").innerHTML = result;
}
</script>
</body>
</html>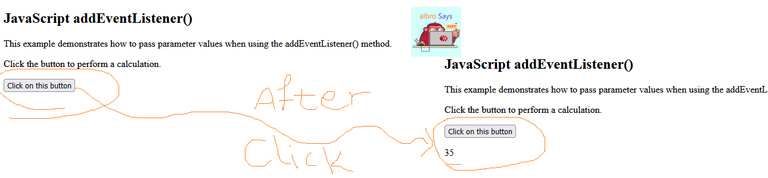
What is Event Propagation?
Event propagation is a method to define the sequence of events during execution. For example, if we have a <p> element that is inside a <div> element, and then the user clicks on <p>, for which event will the click event be executed first? <p> or <div> element?
If the value is set to bubbling, the event of the innermost element is fired first; Therefore, in the hypothetical example above, the event related to <p> element and then the event related to <div> will be executed first. But if the value is on the capturing mode, the event of the outermost element is performed first; Therefore, in the hypothetical example above, the event related to the <div> element and then the event related to <p> will be executed first.
Do you remember? I said above that the third parameter of the addEventListener function is a boolean value, and we can use it to choose the type of event propagation:
addEventListener(event, function, useCapture);
In the above format, you should use true or false instead of useCapture. The default value is false, so the bubbling propagation mode will be used by default. If you set the value to true, the capturing propagation is used.
<!DOCTYPE html>
<html>
<head>
<style>
#myDiv1, #myDiv2 {
  background-color: coral;
  padding: 50px;
}
#myP1, #myP2 {
  background-color: white;
  font-size: 20px;
  border: 1px solid;
  padding: 20px;
}
</style>
<meta content="text/html; charset=utf-8" http-equiv="Content-Type">
</head>
<body>
<h2>JavaScript addEventListener()</h2>
<div id="myDiv1">
  <h2>Bubbling:</h2>
  <p id="myP1">click on me</p>
</div><br>
<div id="myDiv2">
  <h2>Capturing:</h2>
  <p id="myP2">click on me</p>
</div>
<script>
document.getElementById("myP1").addEventListener("click", function() {
  alert("You have clicked on the white rectangle");
}, false);
document.getElementById("myDiv1").addEventListener("click", function() {
  alert("You have clicked on the orange rectangle");
}, false);
document.getElementById("myP2").addEventListener("click", function() {
  alert("You have clicked on the white rectangle");
}, true);
document.getElementById("myDiv2").addEventListener("click", function() {
  alert("You have clicked on the orange rectangle");
}, true);
</script>
</body>
</html>
When you go to the output page of the above code, you will see two pairs of white and orange rectangles. One of them uses bubbling propagation and the other uses capturing propagation . If you click on each (noting the order in which the messages appear) you will see how the two propagation differ.
I hope you enjoyed this post.
Thanks for your contribution to the STEMsocial community. Feel free to join us on discord to get to know the rest of us!
Please consider delegating to the @stemsocial account (85% of the curation rewards are returned).
You may also include @stemsocial as a beneficiary of the rewards of this post to get a stronger support.
Love these JavaScript event handler tips! Super helpful for improving my coding skills. Thanks for sharing your expertise
oh. I dont use listener in JS but it is pretty!